Introduction
The Shopping Cart or Ecommerce tool included in CharityEngine’s CMS application is
Prerequisites
- If you are interested in learning more about the Shopping Cart feature, please reach out to your account information.
- Before creating your shopping cart, make sure that you have already configured a fulfillment center in CharityEngine and create the products. If you need assistance configuring a fulfillment center click Here and click
Here for creating products.
Table of Contents
Instructions
You can add an E-commerce section to any website you already have created through, or create a new website dedicated to your shopping cart.
Once you have opened your Website or created a new website, you will need to create a shopping cart page. Navigate to the pages tab and click the Add New button.
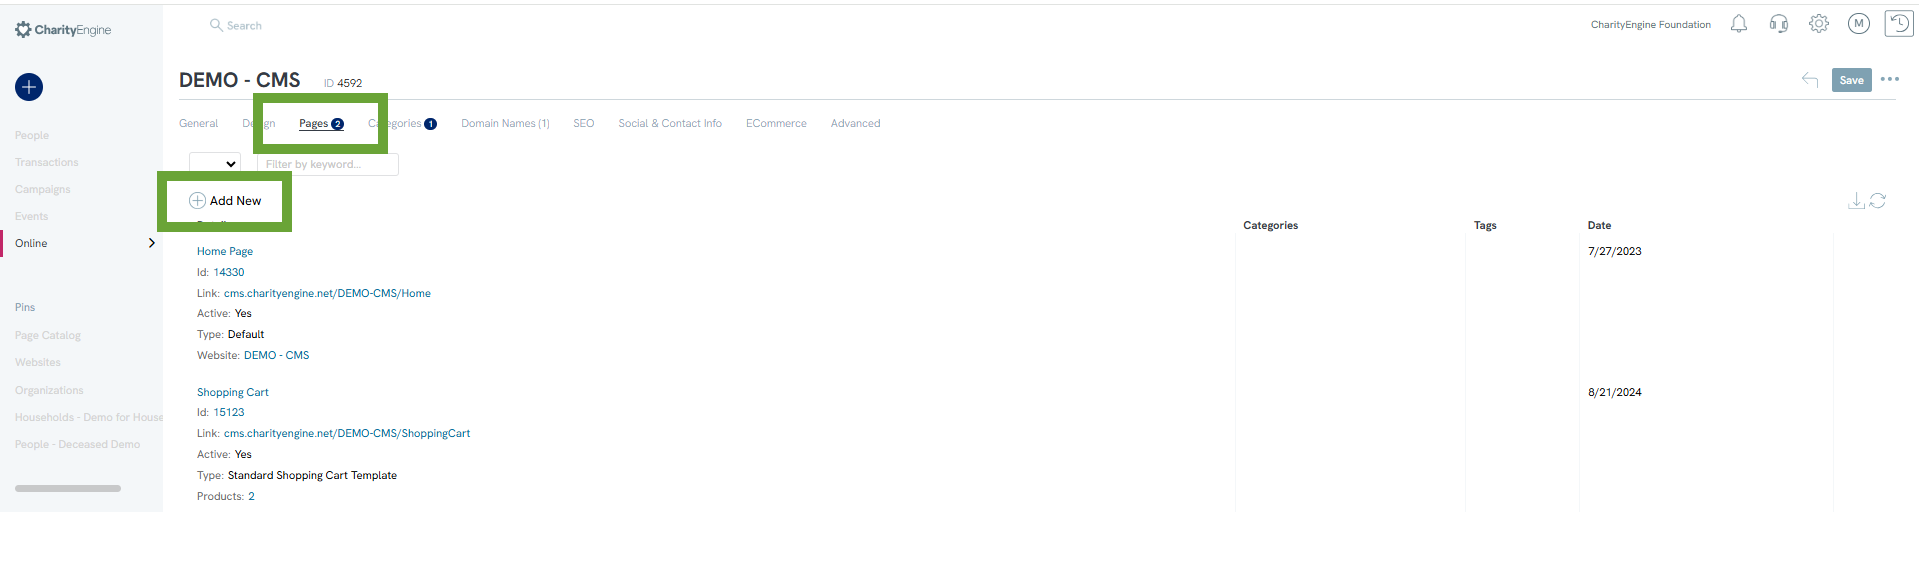
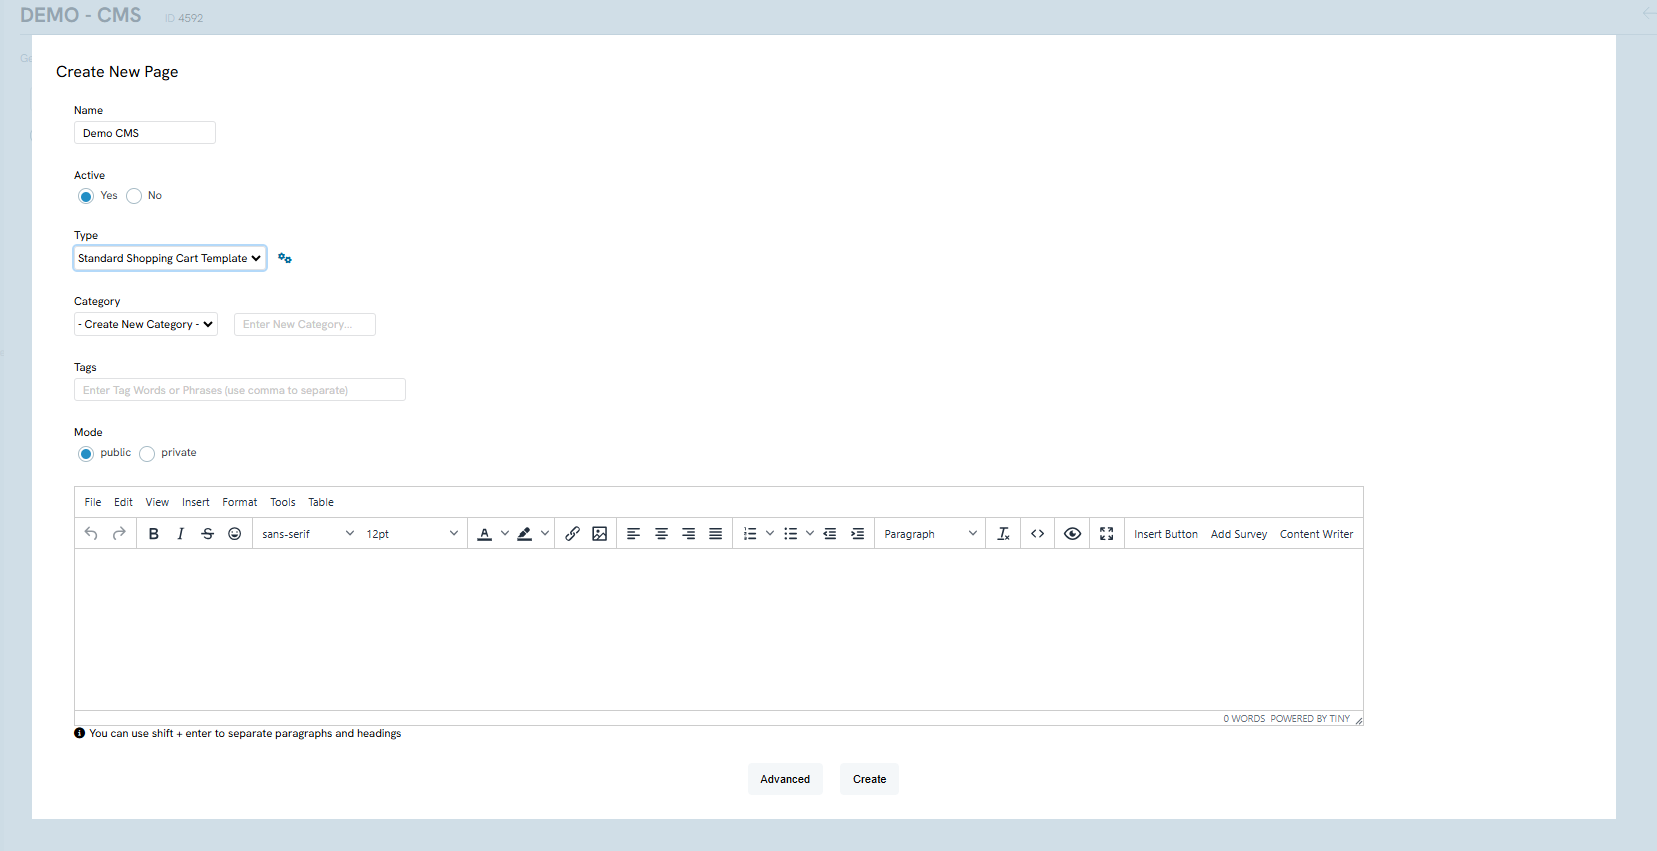
A popup will appear that will allow you to customize your new page by adding a name, setting the type, setting the category, creating tags, and entering any text to help your consumers or introduce your page.
Category: Use the drop-down to select a category, or create a category by entering in the text field next to the drop down.
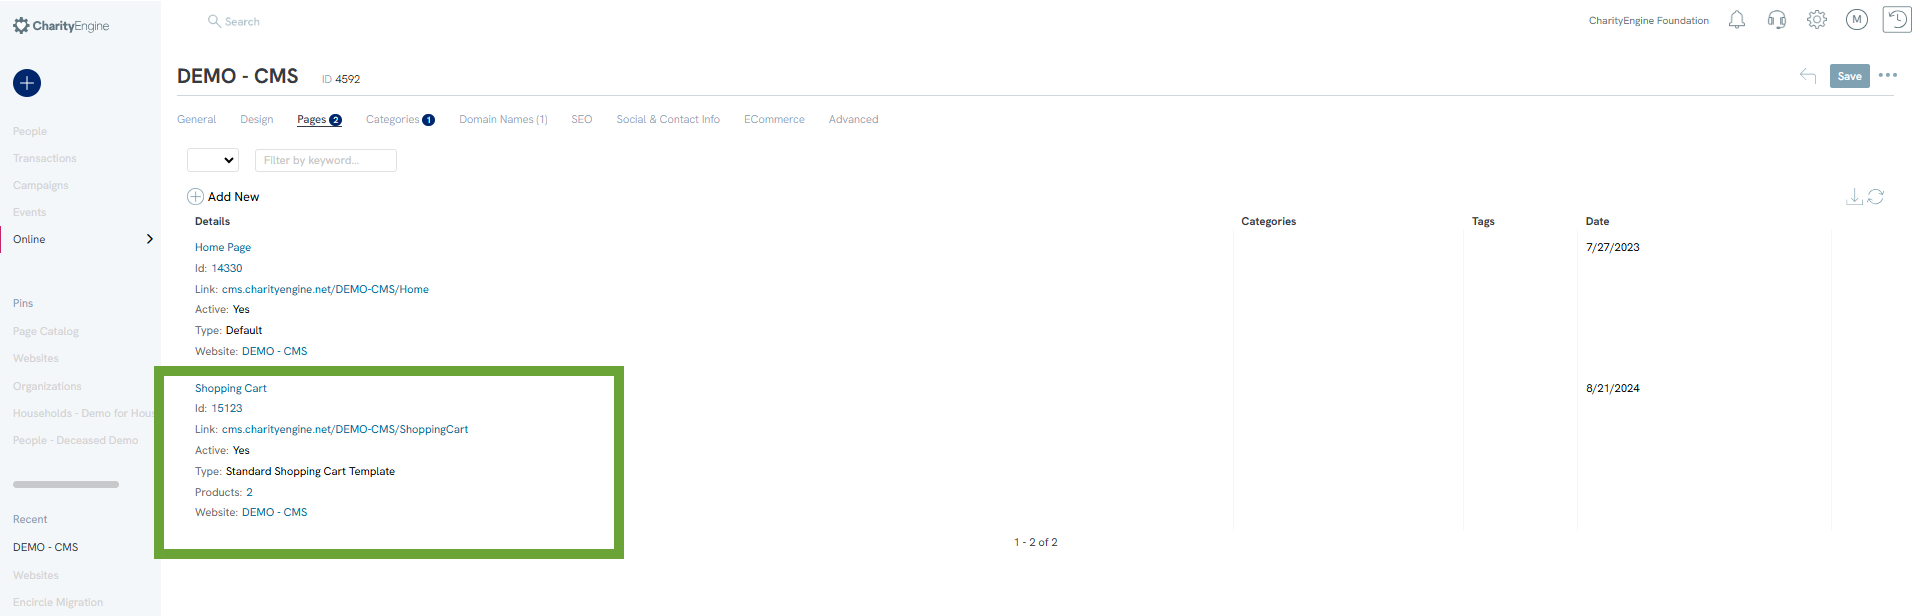
Your new page will show below in the details sections
The General Subtab
Navigate to the Ecommerce Tab to continue to configure your shopping cart. You will want to configure your general settings first under the General subtab.
The general subtab will allow you to customize how the items on your shopping cart are displayed. You will be able to do this by selecting how they are listed, what the rows look like, and how to product detail is displayed by choosing from the drop-down.
You will also be able to customize how the inventory is displayed by checking the “show inventory” box for in stock and out of stock inventory as well as entering a custom message for your consumers.
Additionally, you can limit how many units of an item are placed in the consumer's cart. This can be helpful if there is a very limited quantity or if you are quickly running out of inventory.
Use these settings to control how the products will be listed and appear on your shopping cart page:
- Listing Template
- Row Listing Template
- Product Detail Template
- Number of columns
- Show column headers
- Show product detail page
- Number of products per page option
- Add to cart Quantity (def)

Media Subtab
If you have any media, such as images for your products, you will be able to configure the image settings on the Media subtab. You can set the image width and height, how many images are in a column, and the dimensions of the image.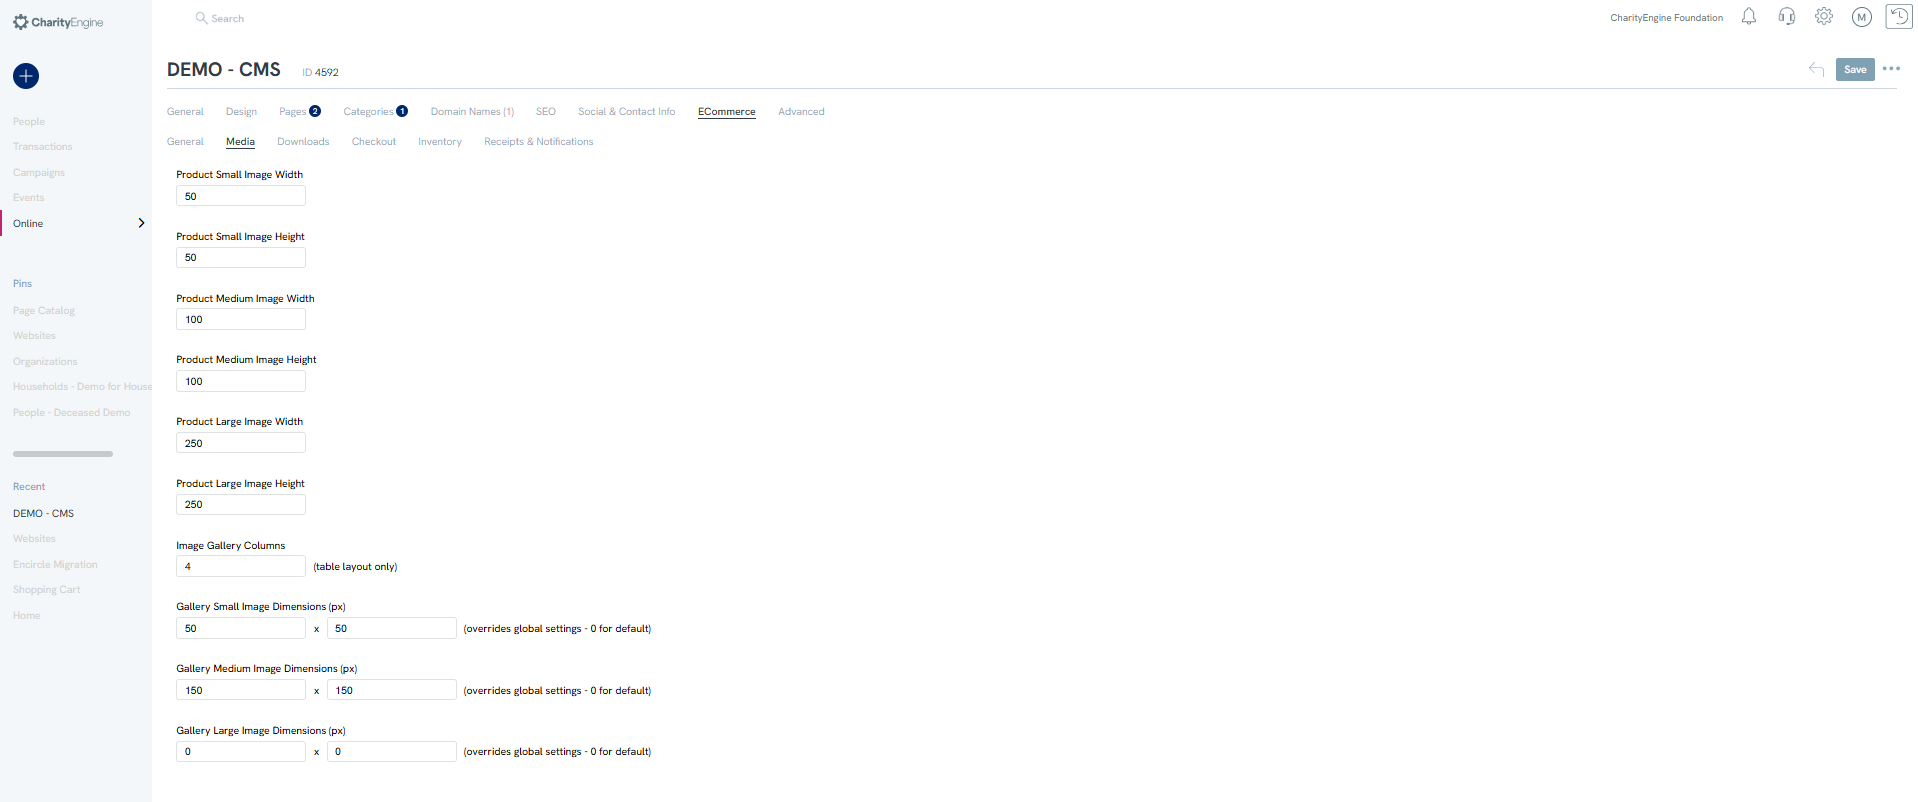
Note: By entering different dimensions, you will be overriding the global settings, if you would like to have the default settings, enter 0.
Downloads Subtab
If your product is downloadable, such as a pamphlet or a design template, you will be able to configure how many times the product can be downloaded and how long the customer will have to download before it expires.
Note: If you enter 0 or do not change the default settings, there will be no expiration date and unlimited downloads will be available.
Checkout Subtab
The Checkout subtab will ensure you have all of the information of the consumer you will need to sell and ship the product to them such as payment information and shipping address.
You will notice that there are two subtabs under checkout, Public and Authenticated. Public options will appear to all consumers, Authenticated options will only appear to those who have logged in to your website.
Click the arrow next to the names to expand all of the sections.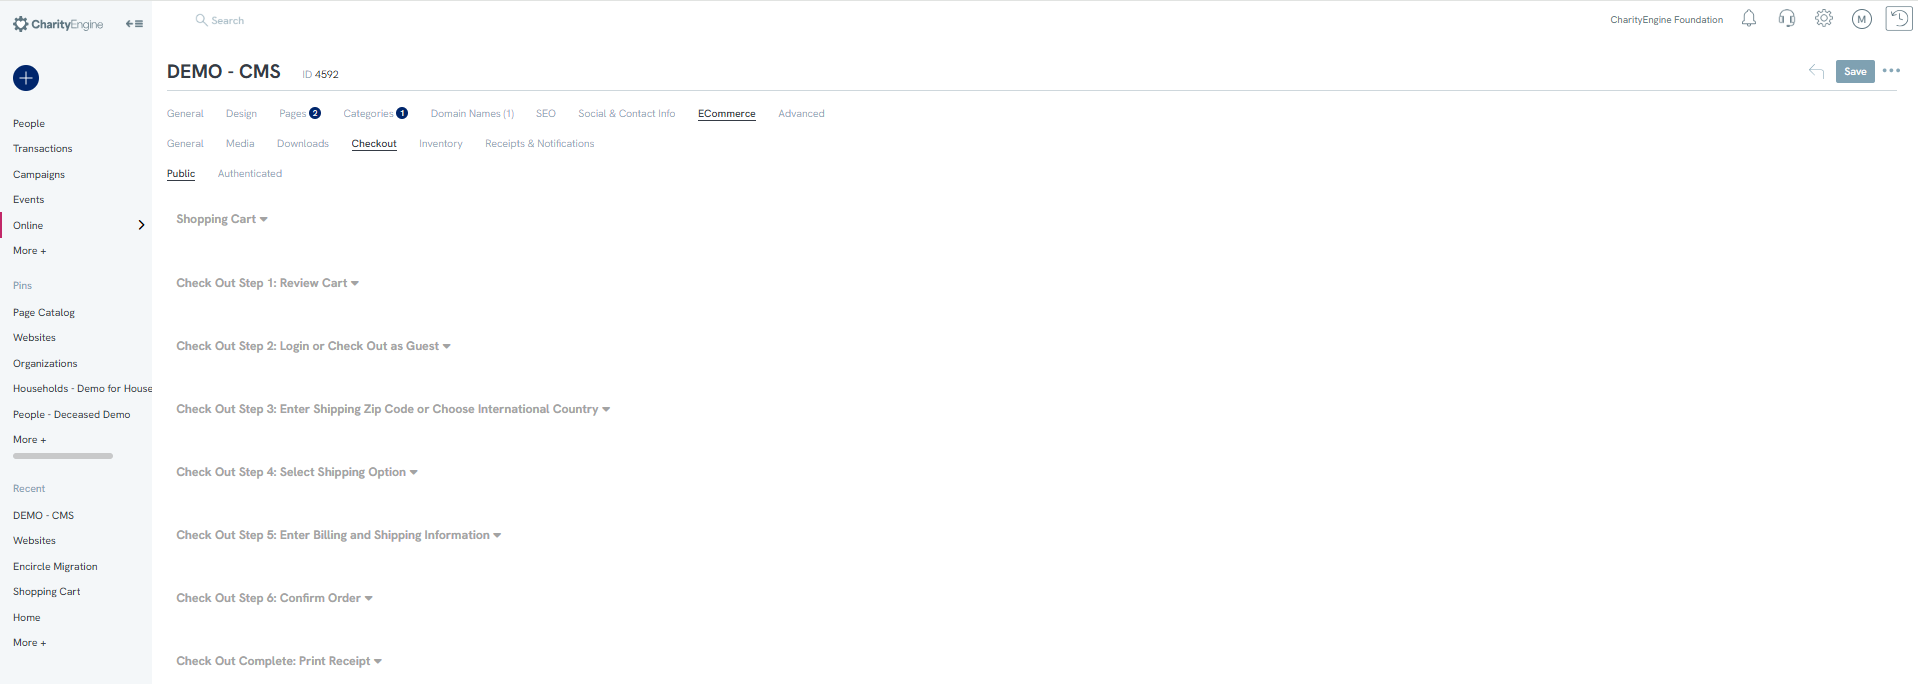
In each section, you will be able to enter a Title and a subtitle or description. You can change the title of the section and provide a short description for your consumers.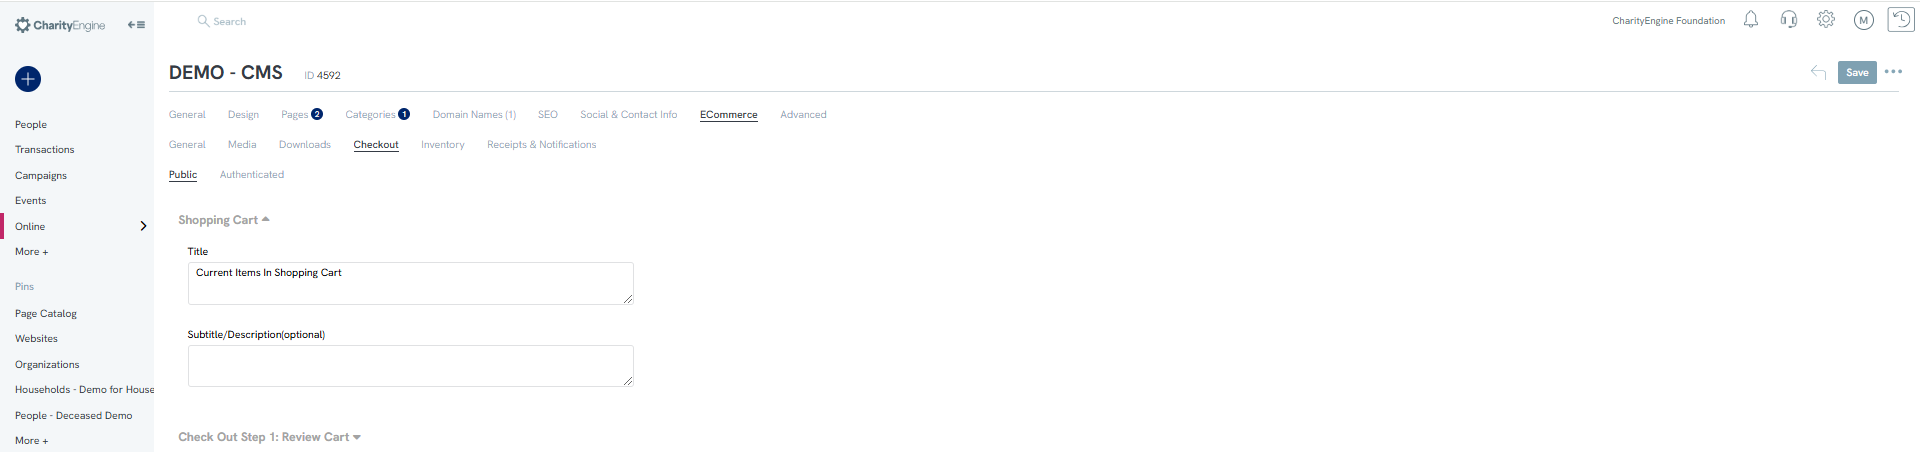
Several of the sections will have further settings to configure, for further instruction on the Checkout Subtab, click Here.
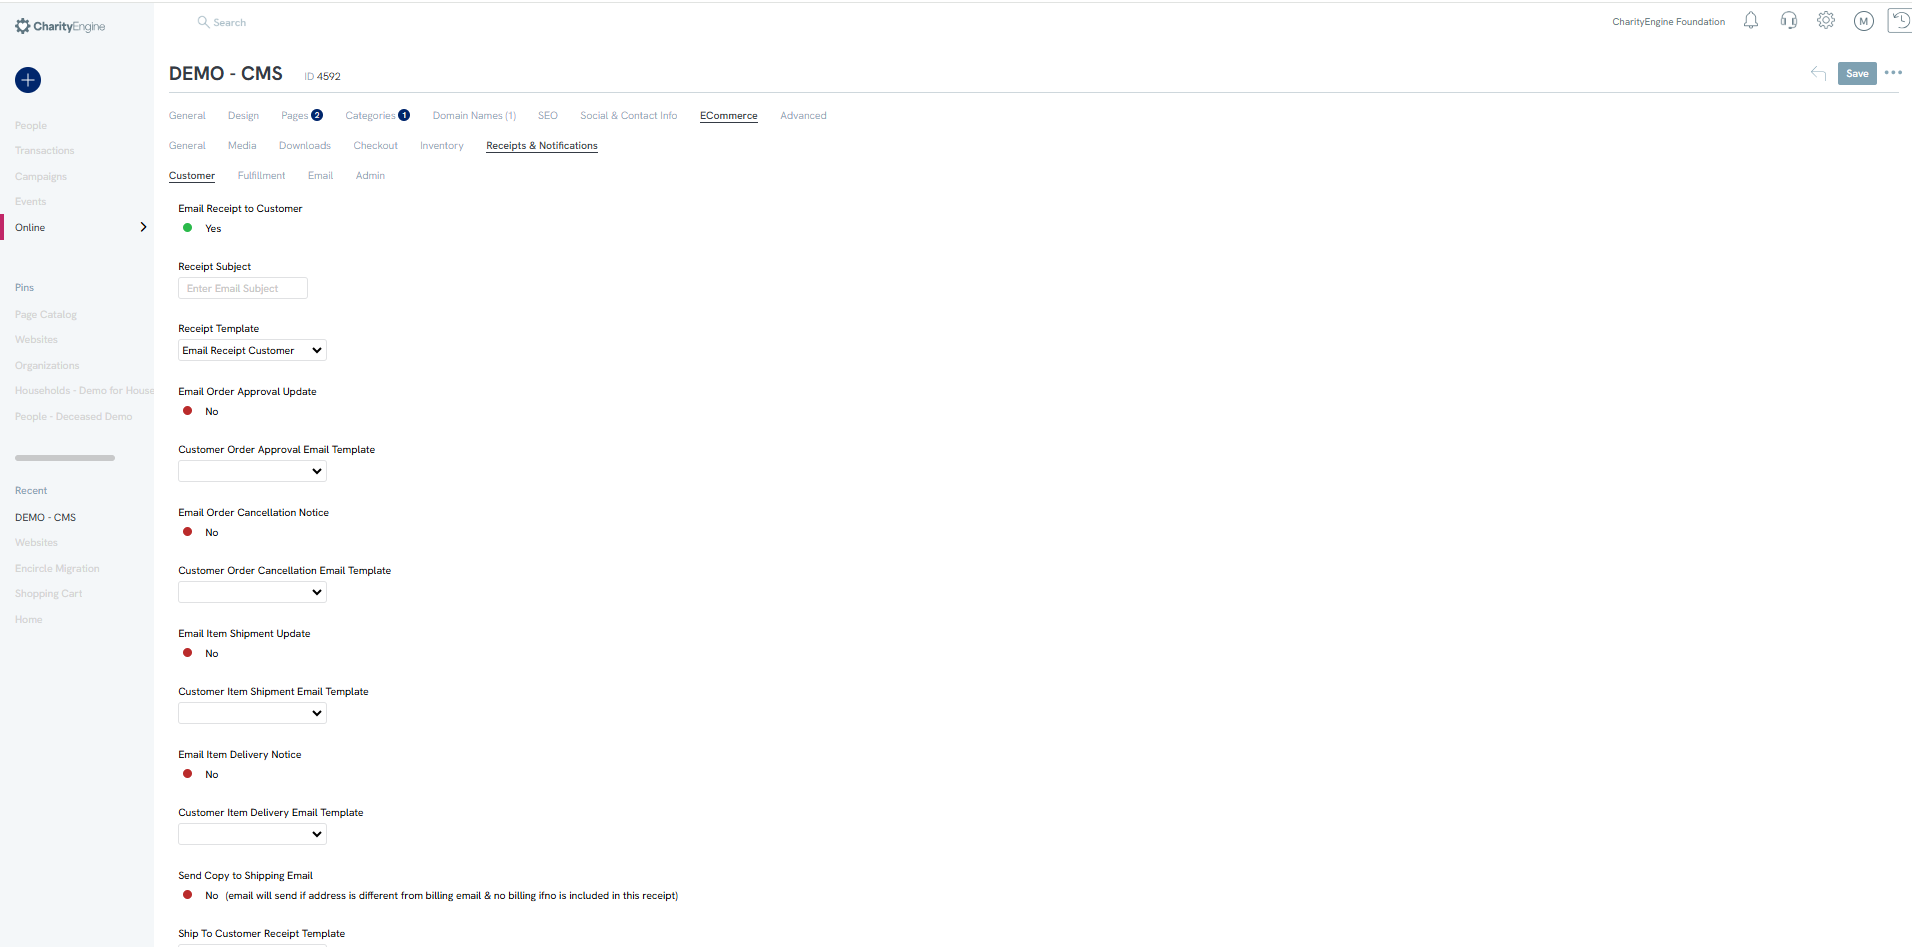
Notification Subtab
On the notification subtab, you will be able to configure who will receive a notification of the sale and what type of notification they will receive. You will be able to configure the settings for the Customer, the Fulfillment Center, and any Admin on the website.
Use the yes or no toggles to turn on notifications and use the dropdowns to select the template that will be sent. For each select, select the email template as created within Configuration App > Design & Message Templates > Templates
Continue to do this for the fulfillment, email, and the admin tabs.