
Introduction
Do you have an event coming up and need to create products for your donors to purchase on your website via shopping cart? Or would you like to help promote your mission? Creating products like T-shirts, pamphlets, bags, etc. can be done easily through CharityEngine to help promote your event or mission.
Prerequisites
Before you can create a product, make sure you have a fulfillment center and Shopping Cart configured in CharityEngine. If you need help configuring your fulfillment center click Here. If you need help configuring your Shopping Cart click Here.
Instructions
To create a T-shirt, navigate to Online application then under the Shopping Cart section, click on Products and click on Create New.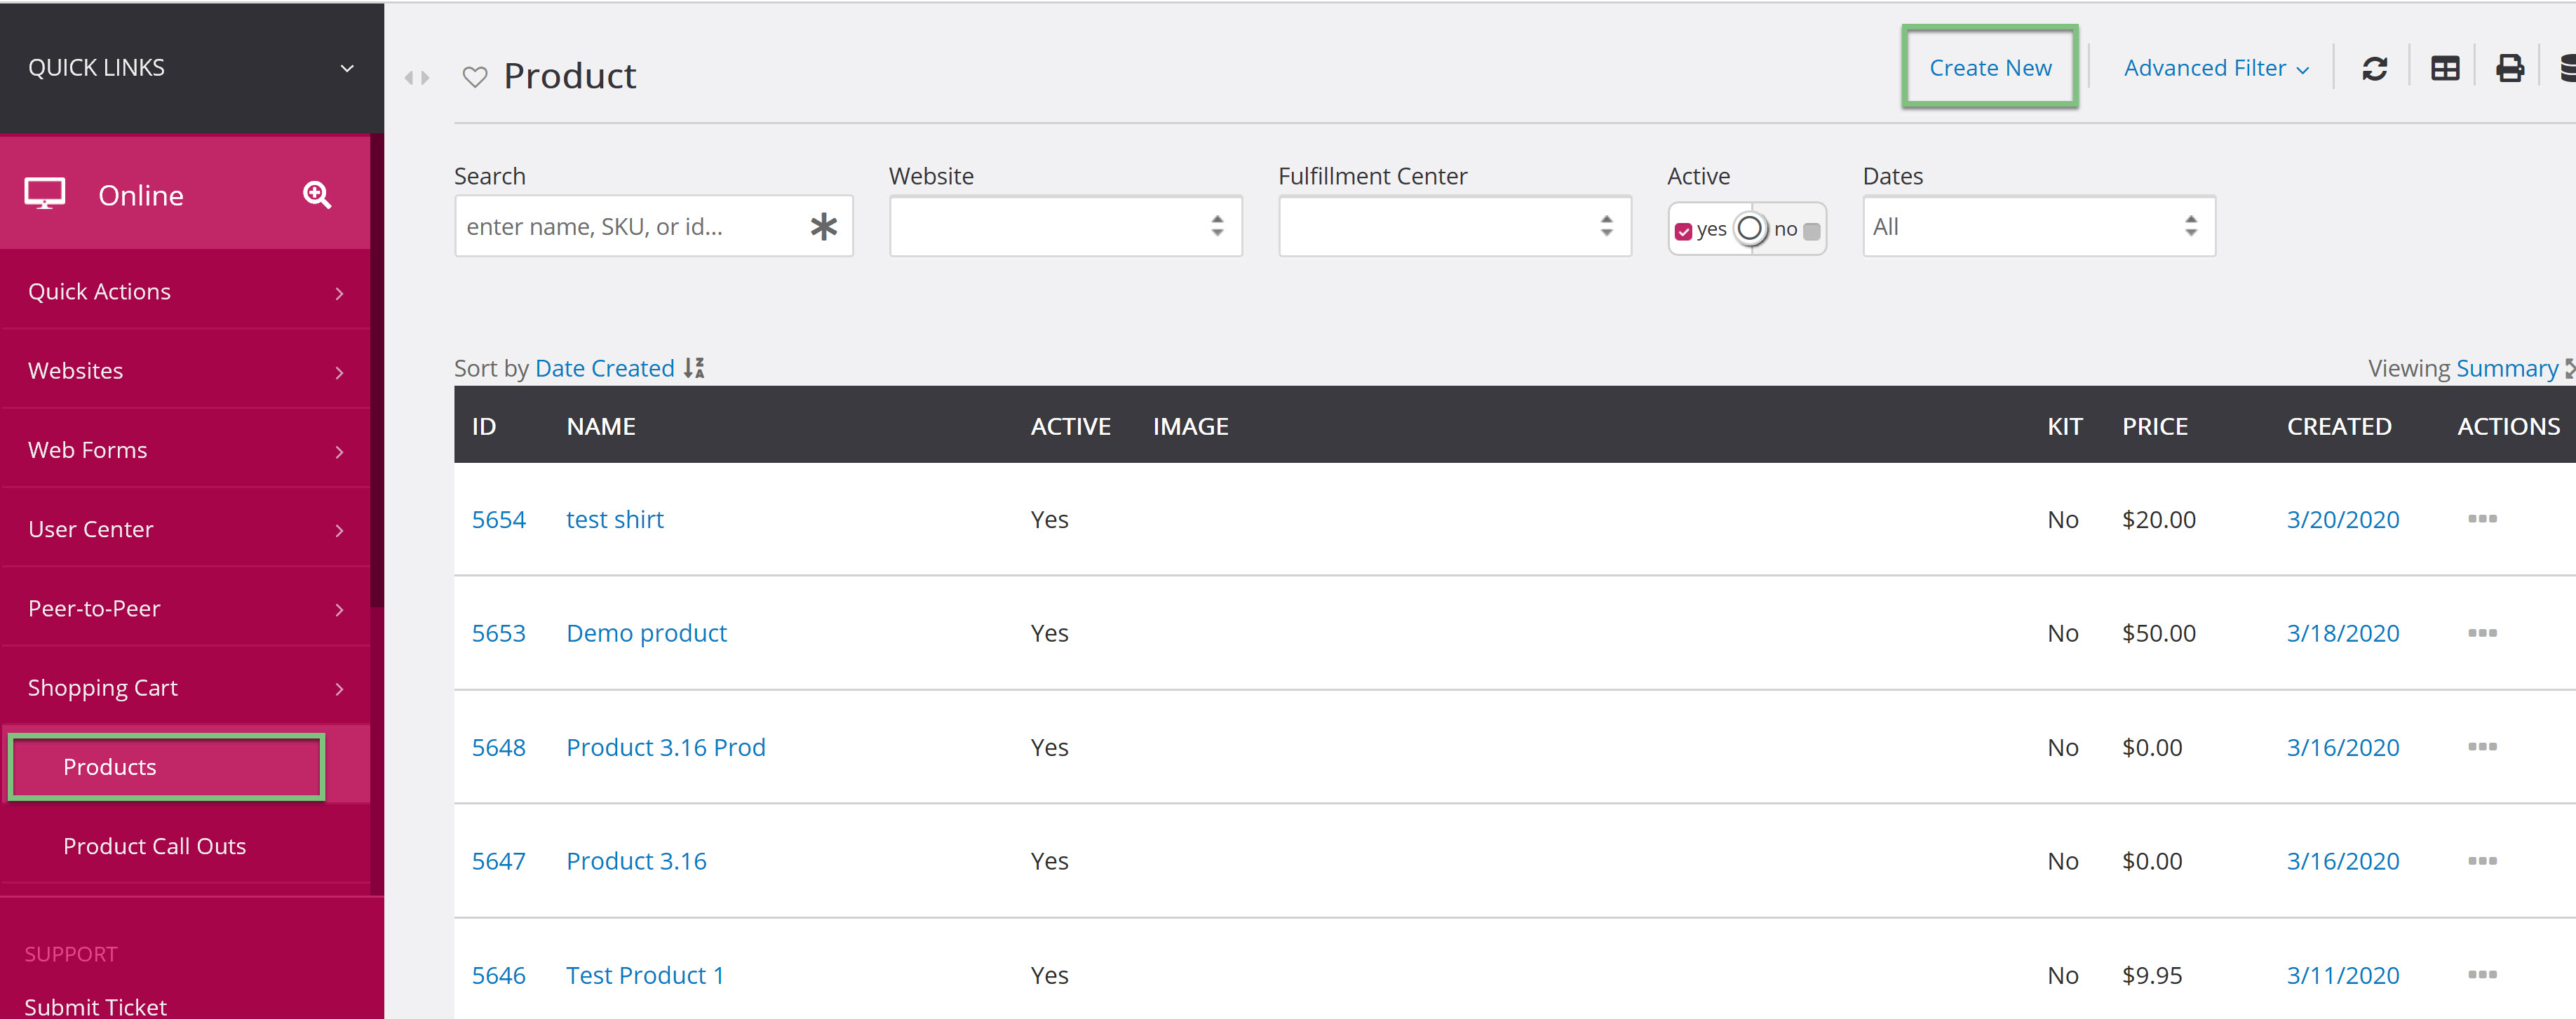
Now you will be able to begin creating your product by naming and setting the price for your T-shirt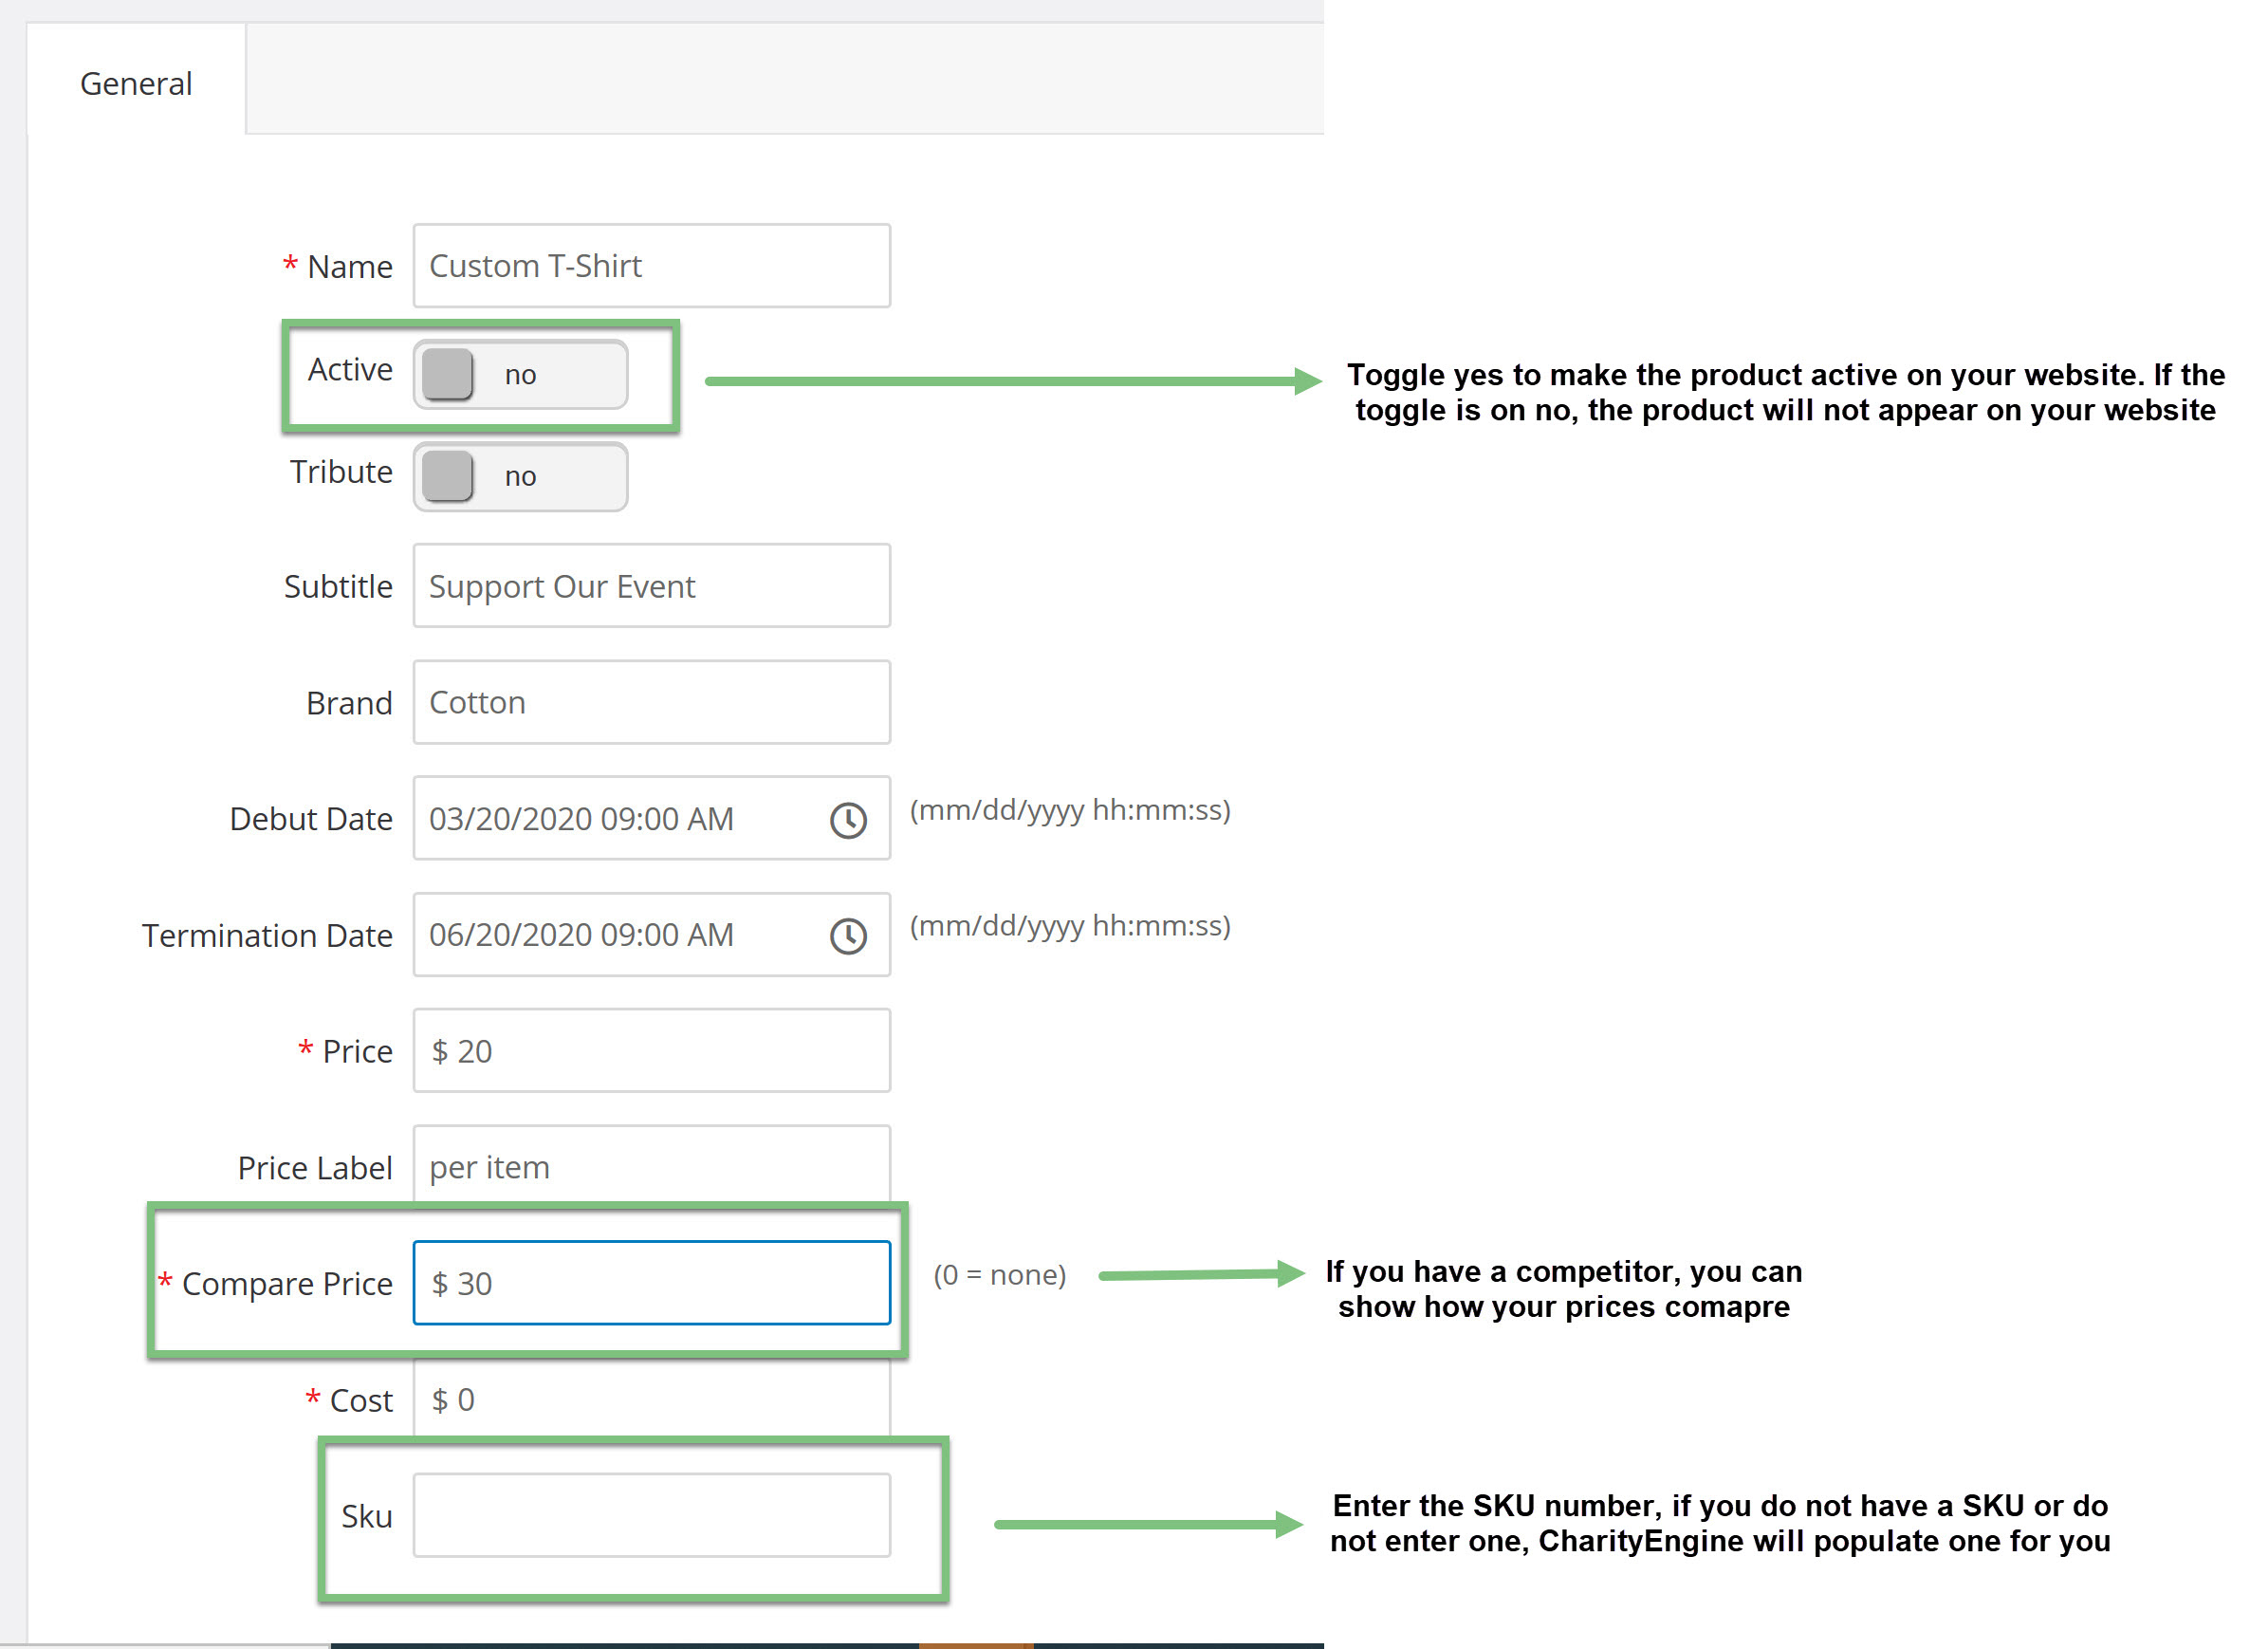
Note: If you do not wish to set a compare cost or cost, enter 0 for none.
Click the save button and more options to customize the t-shirt will appear.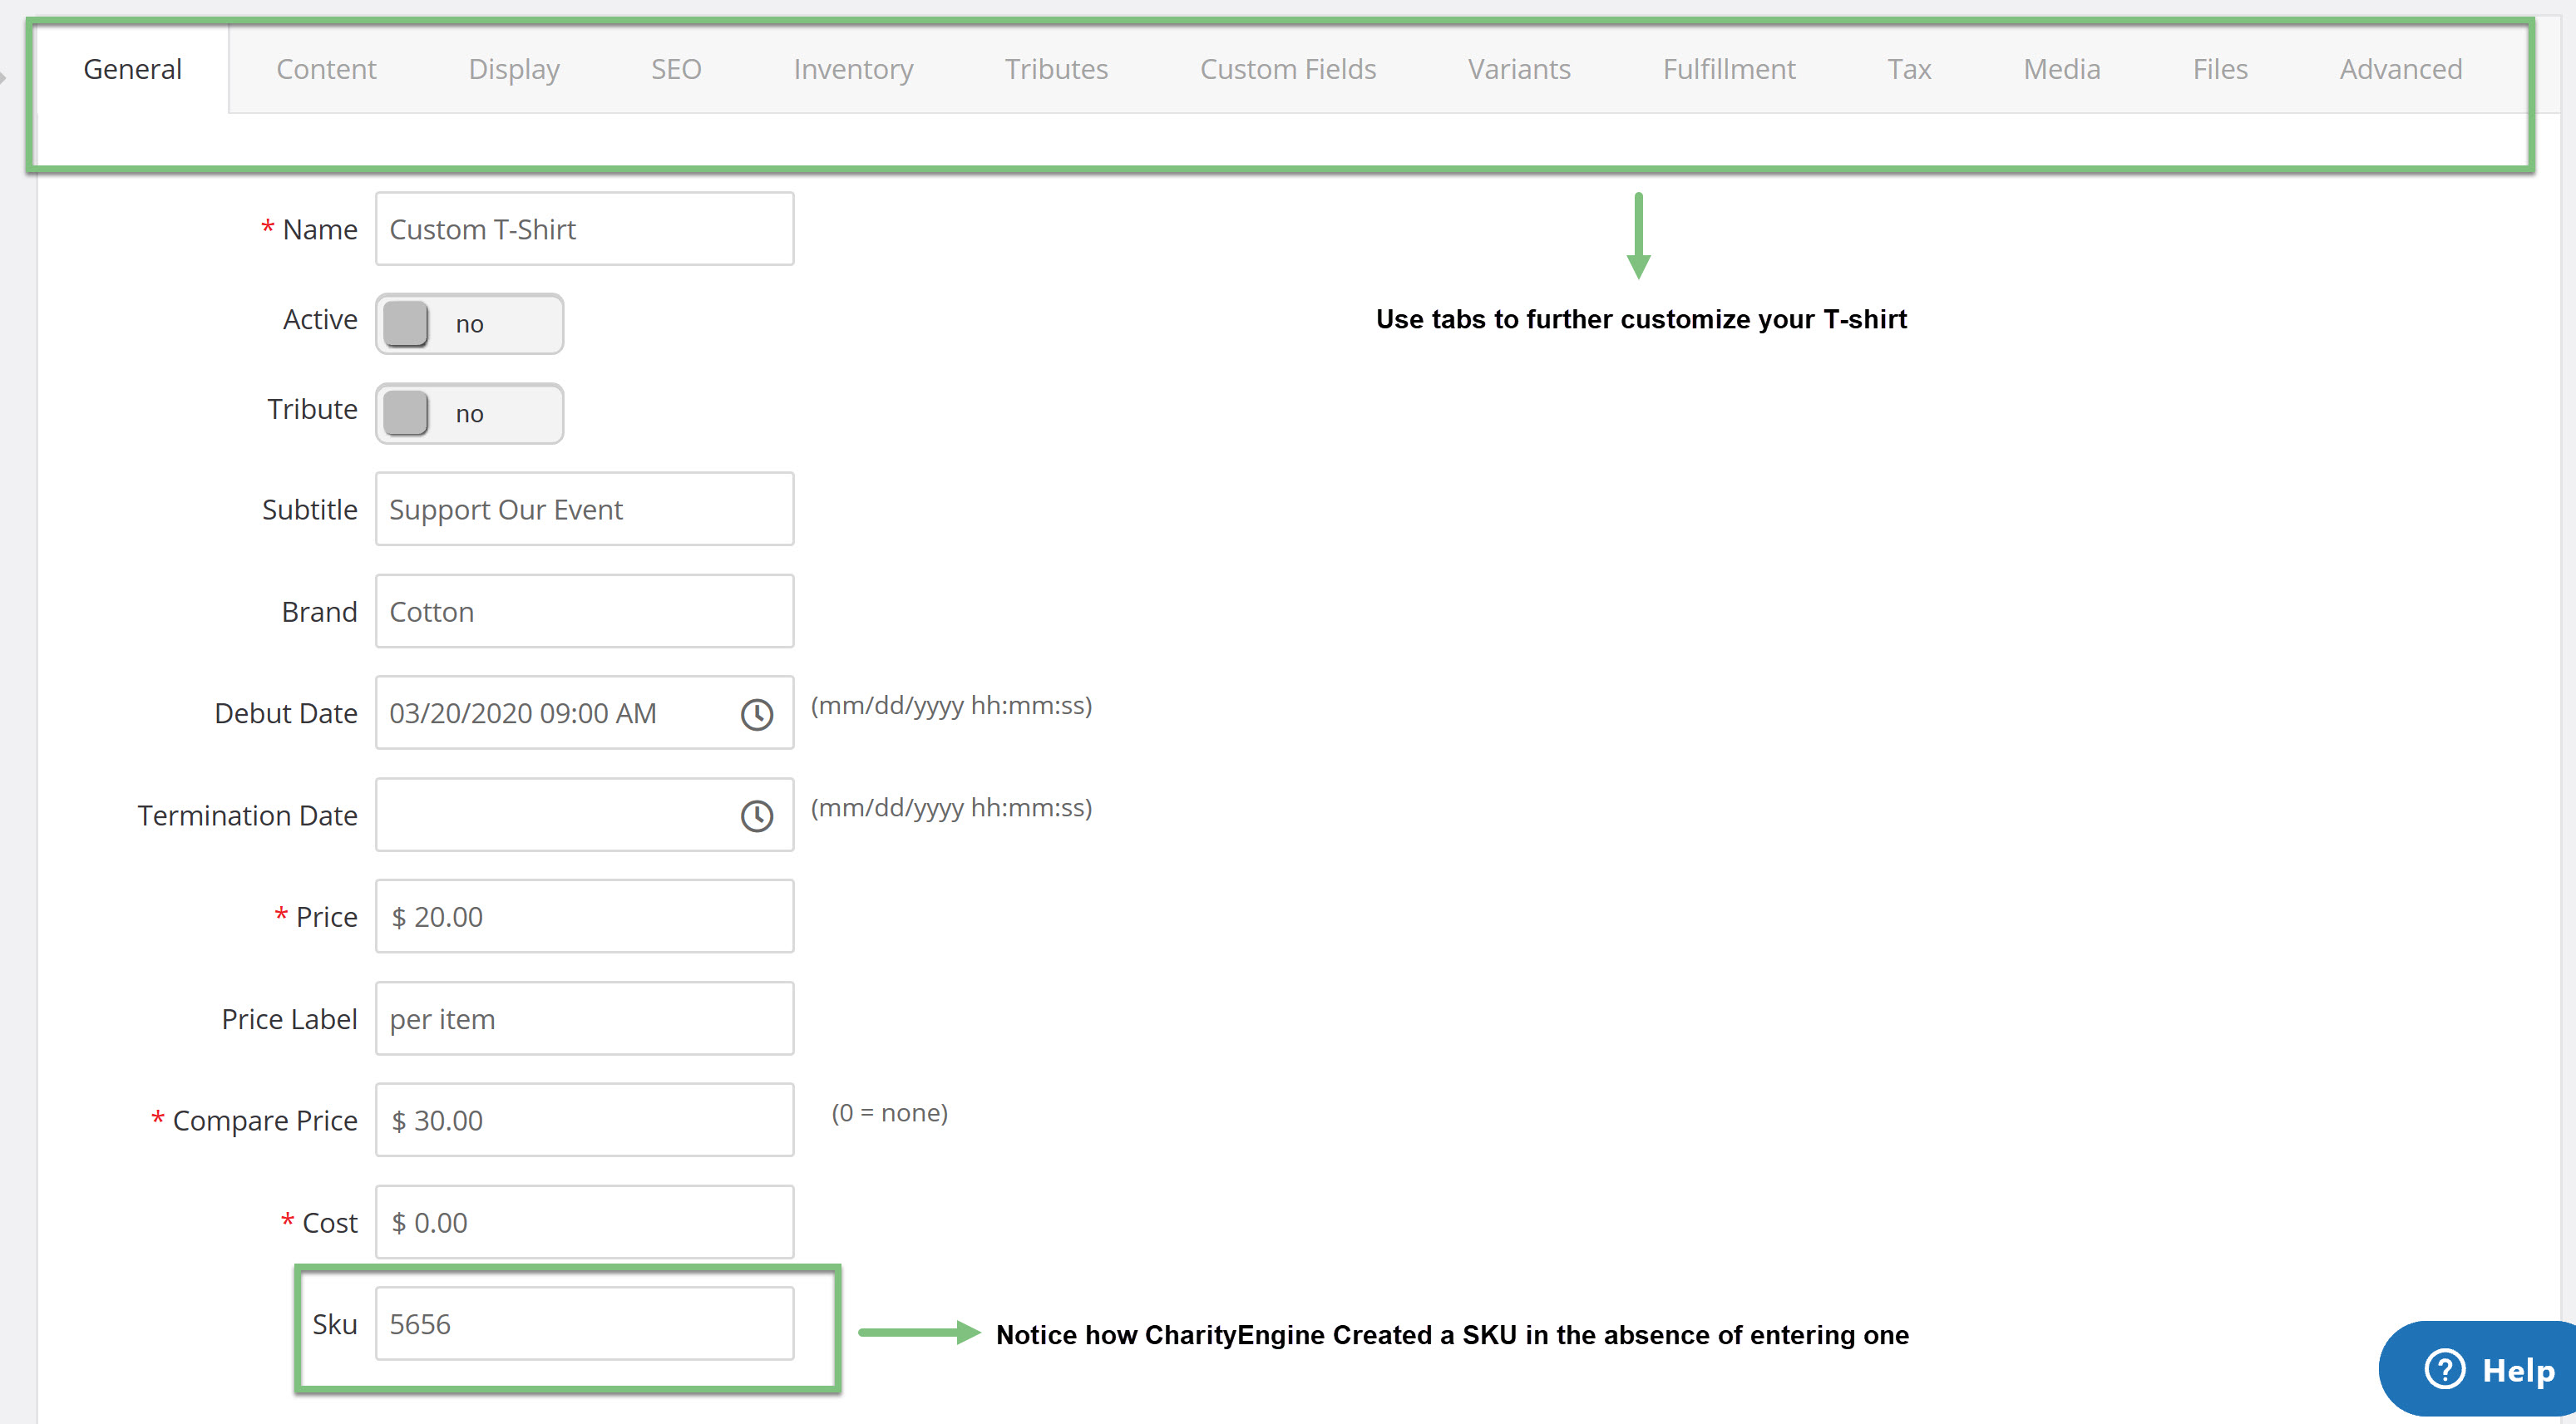
Content Tab
On the connect tab, add any text that will appear with the product, this could be a description of the product or explaining where the proceeds will be applied to if someone purchased your T-shirt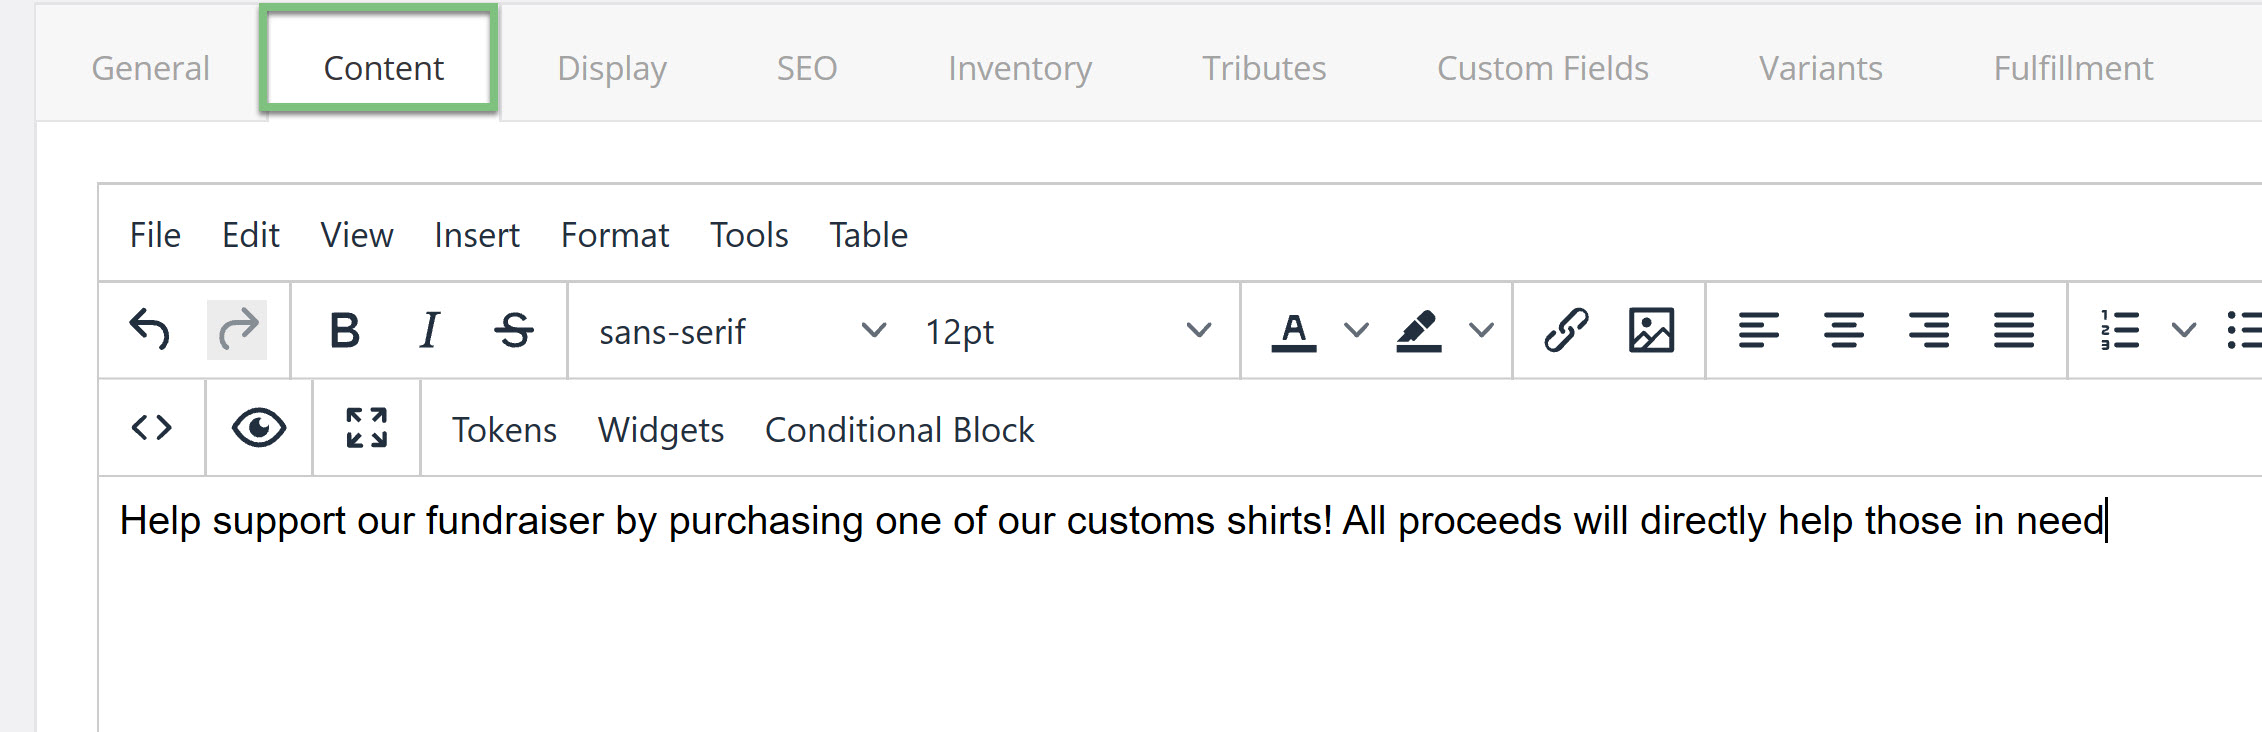
Display Tab
The display tab will help you configure where your T-shirt will be displayed on your website.
On the Pages Subtab, you will be able to select what page on your website the item will appear. Use the drop-down to select the page.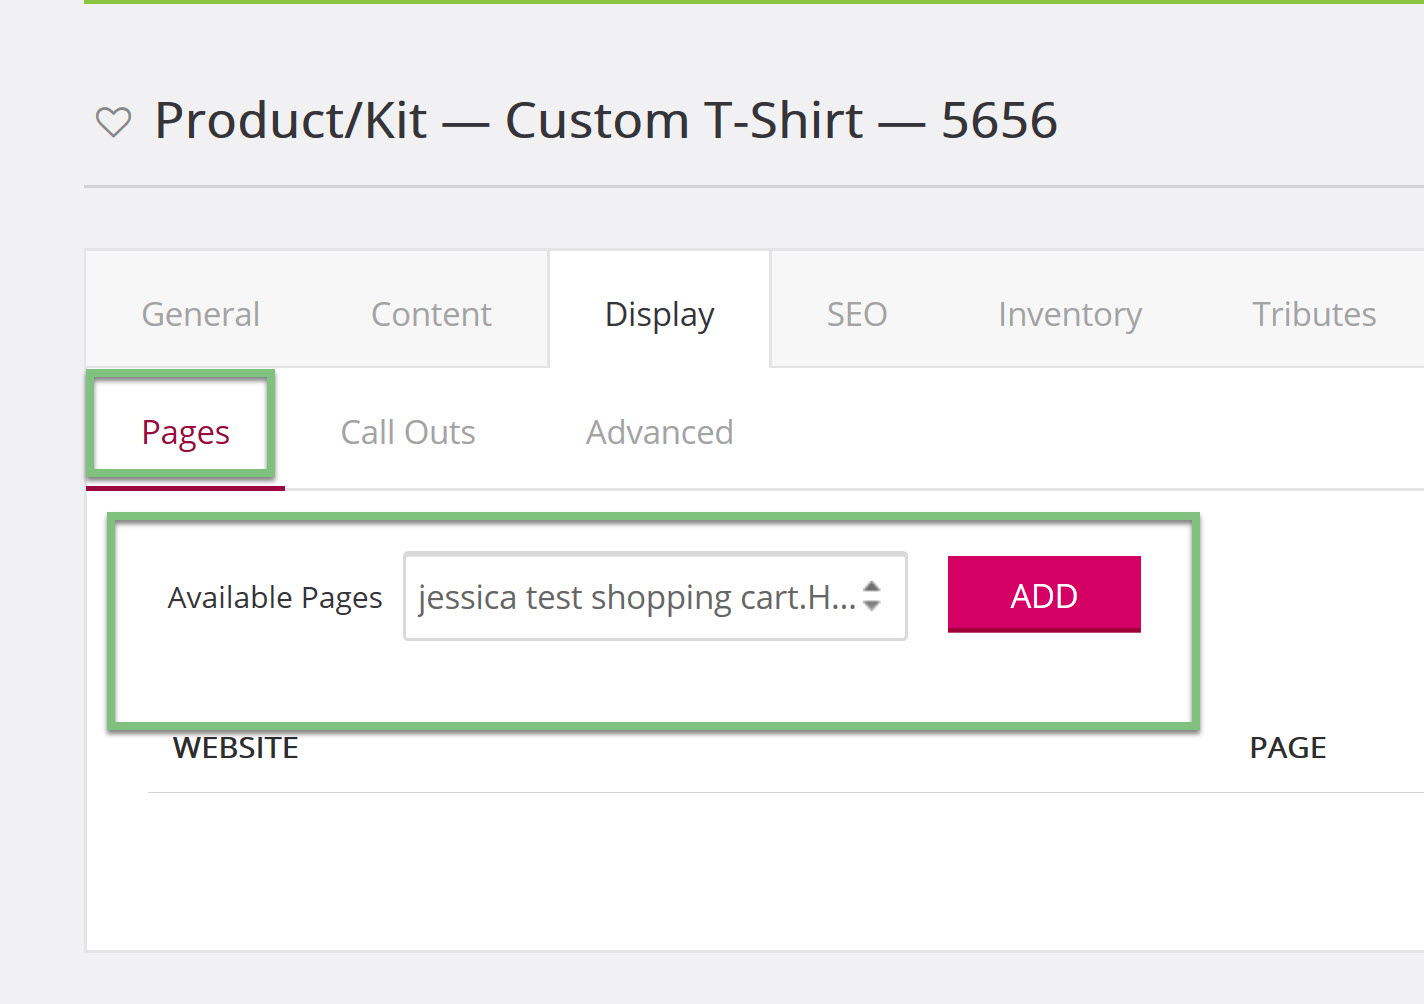
The page will now appear below and you will be able to manage and view it online.
The Advanced Subtab will override any settings you have configured on your website when you set up your shopping cart. The overrides will only apply to the item you are configuring and will not affect any other settings on your website.
Inventory Tab
You will be able to Customize how your inventory is shown and configure how much inventory you have by using the inventory Tab. For further information click here 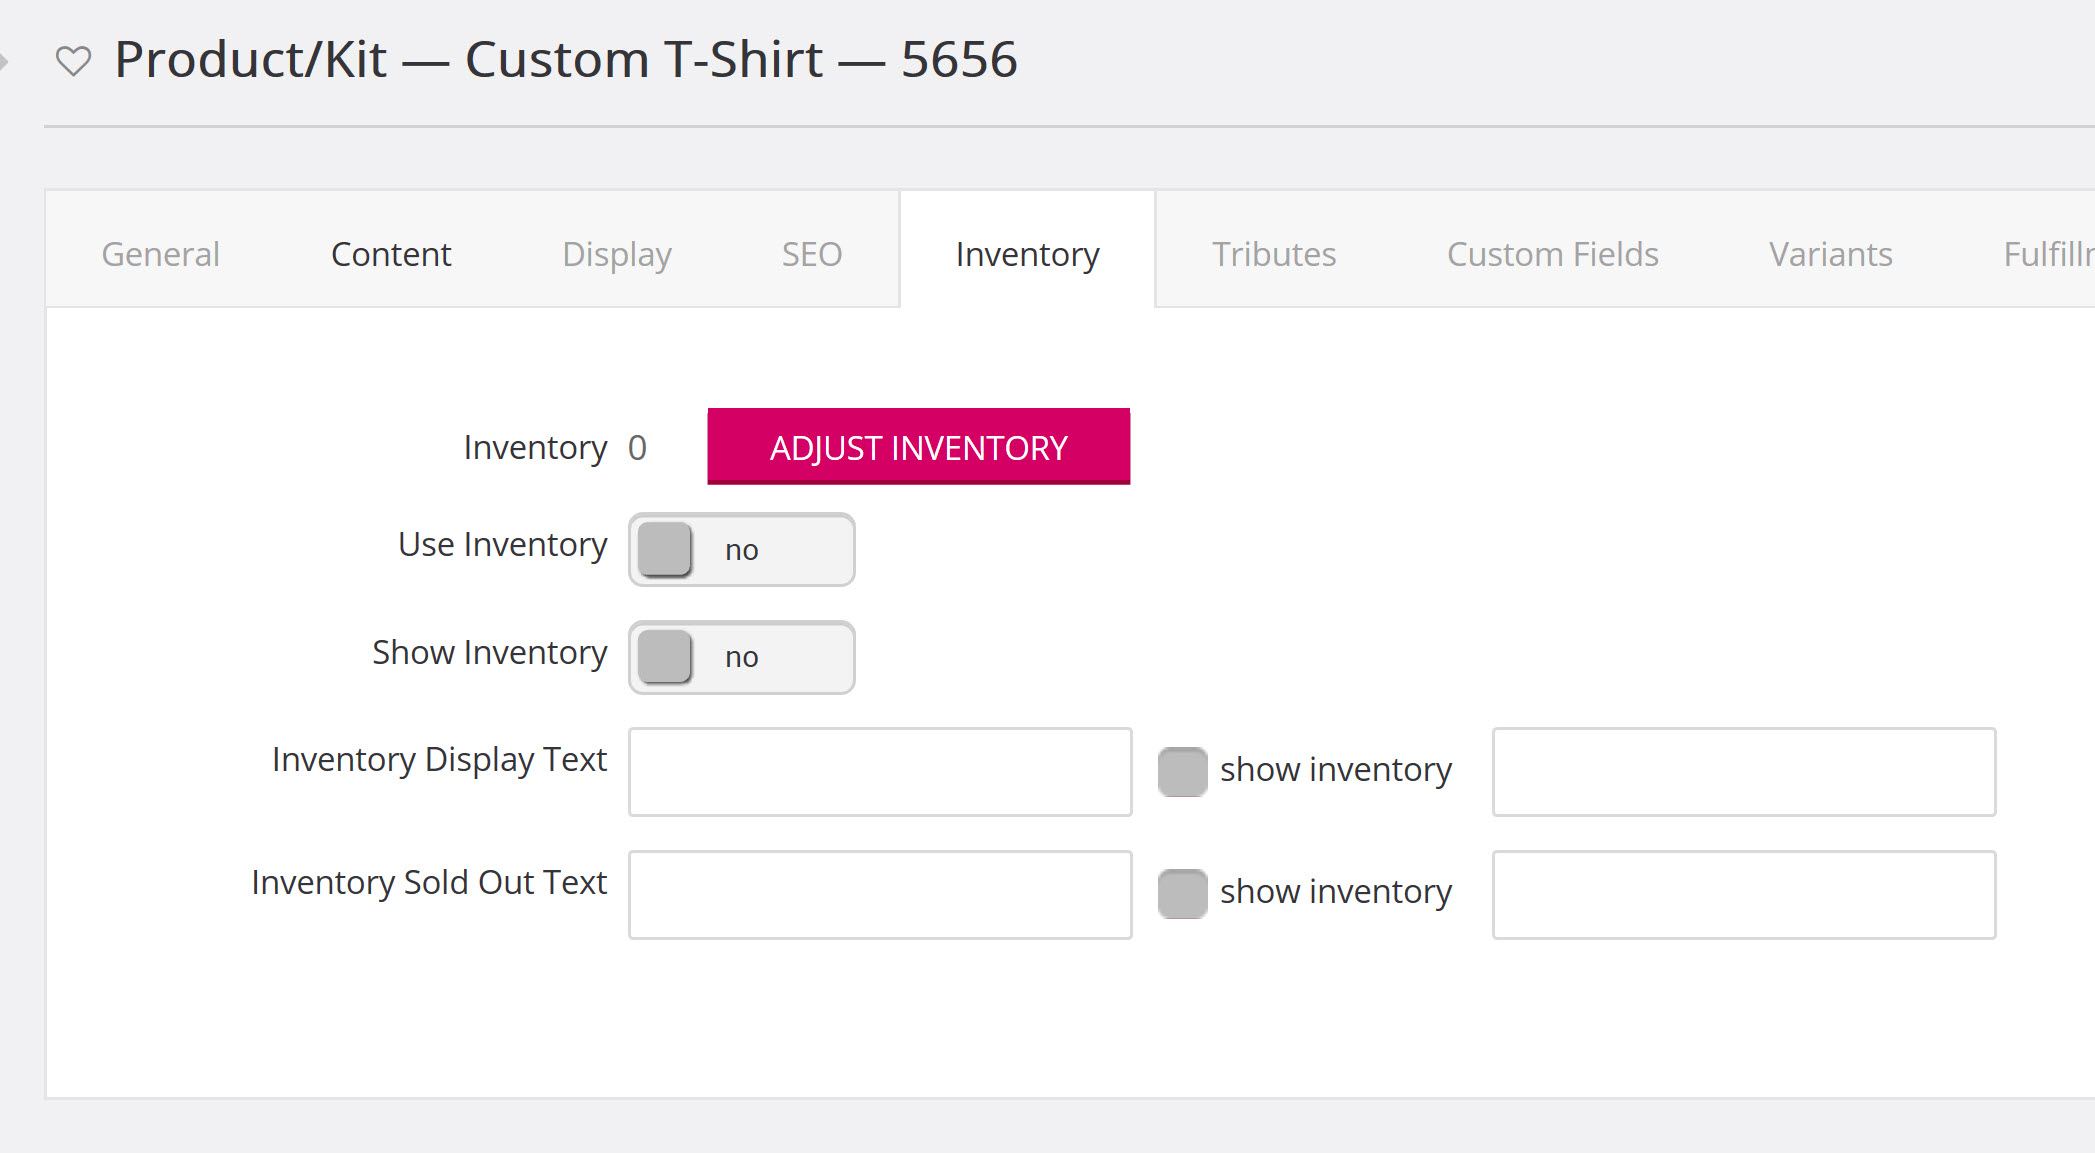
Fulfillment Tab
Prior to creating an item, you will need to create a fulfillment center if you have not already done one. By using the fulfillment tab, you will be able to configure the settings for this item at a center.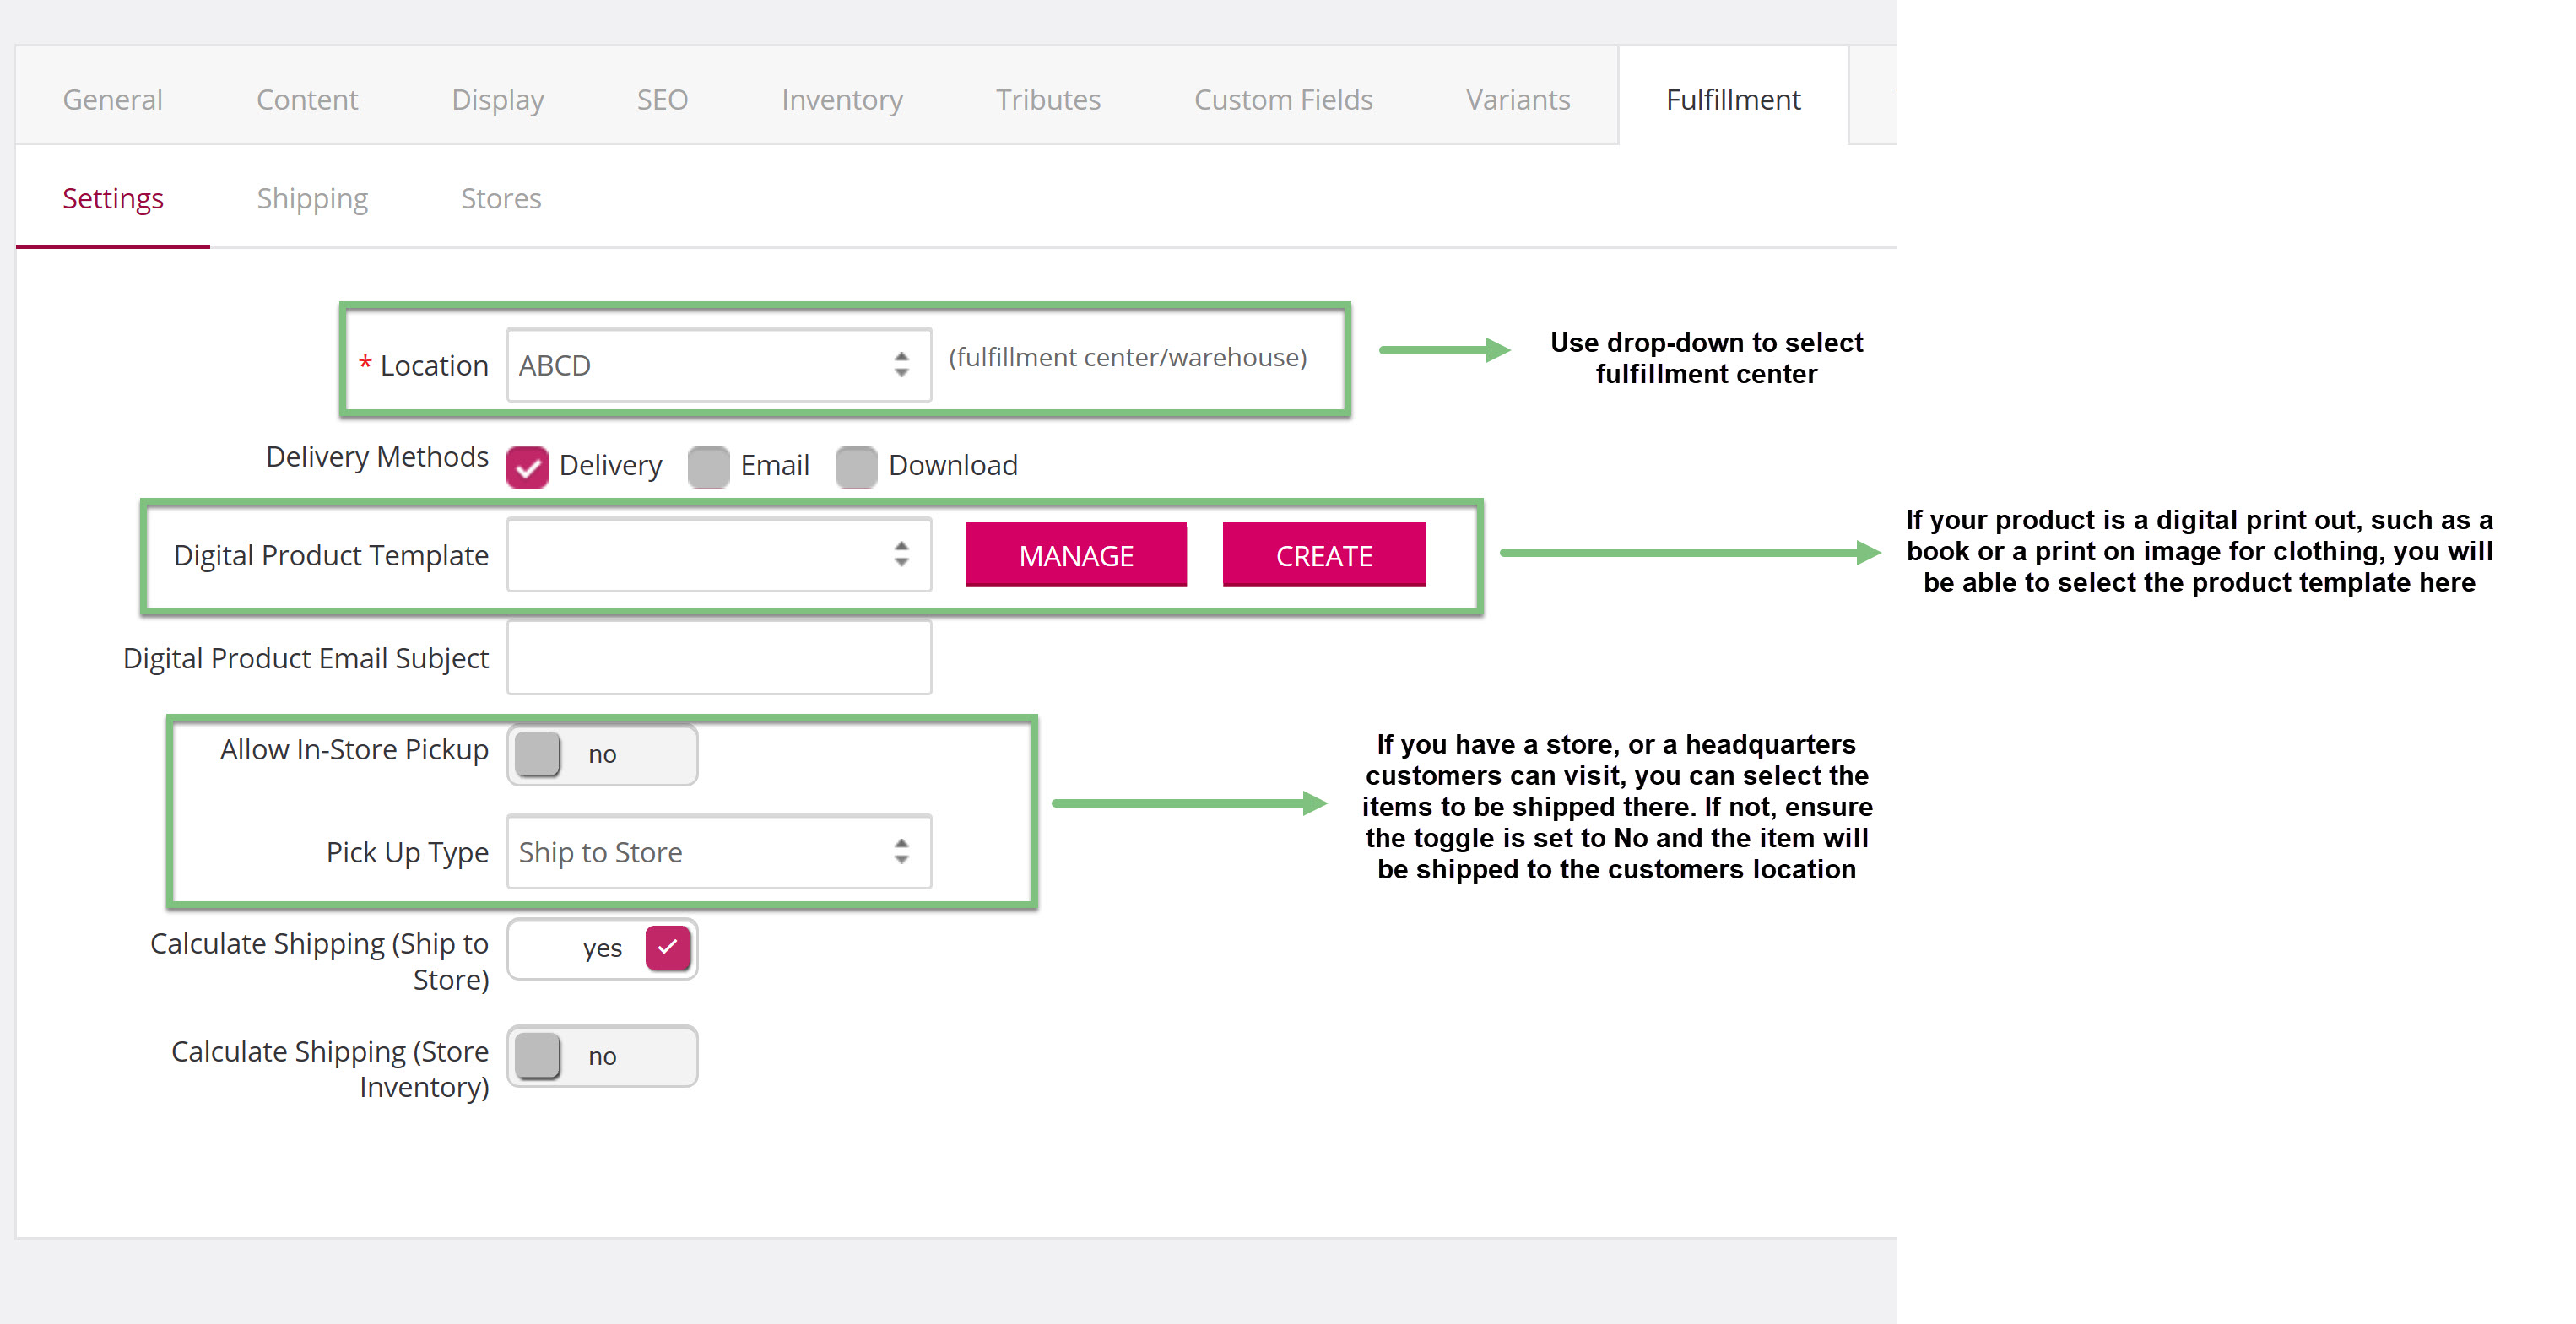
Note: You will have three different delivery methods, delivery, email, and download. The method will depend on the product being created. For example, if the product is a T-shirt, the method can only be delivery. However, if the product is a template for an iron-on for a t-shirt, it could be emailed or downloaded. You will need to select the correct method depending on the product.
You can also override any shipping configuration you made on your website shopping cart under the Shipping subtab, including free shipping. These shipping settings will only apply to this item an no other products on your website. None of these fields are required as you should have set your shipping options on your website.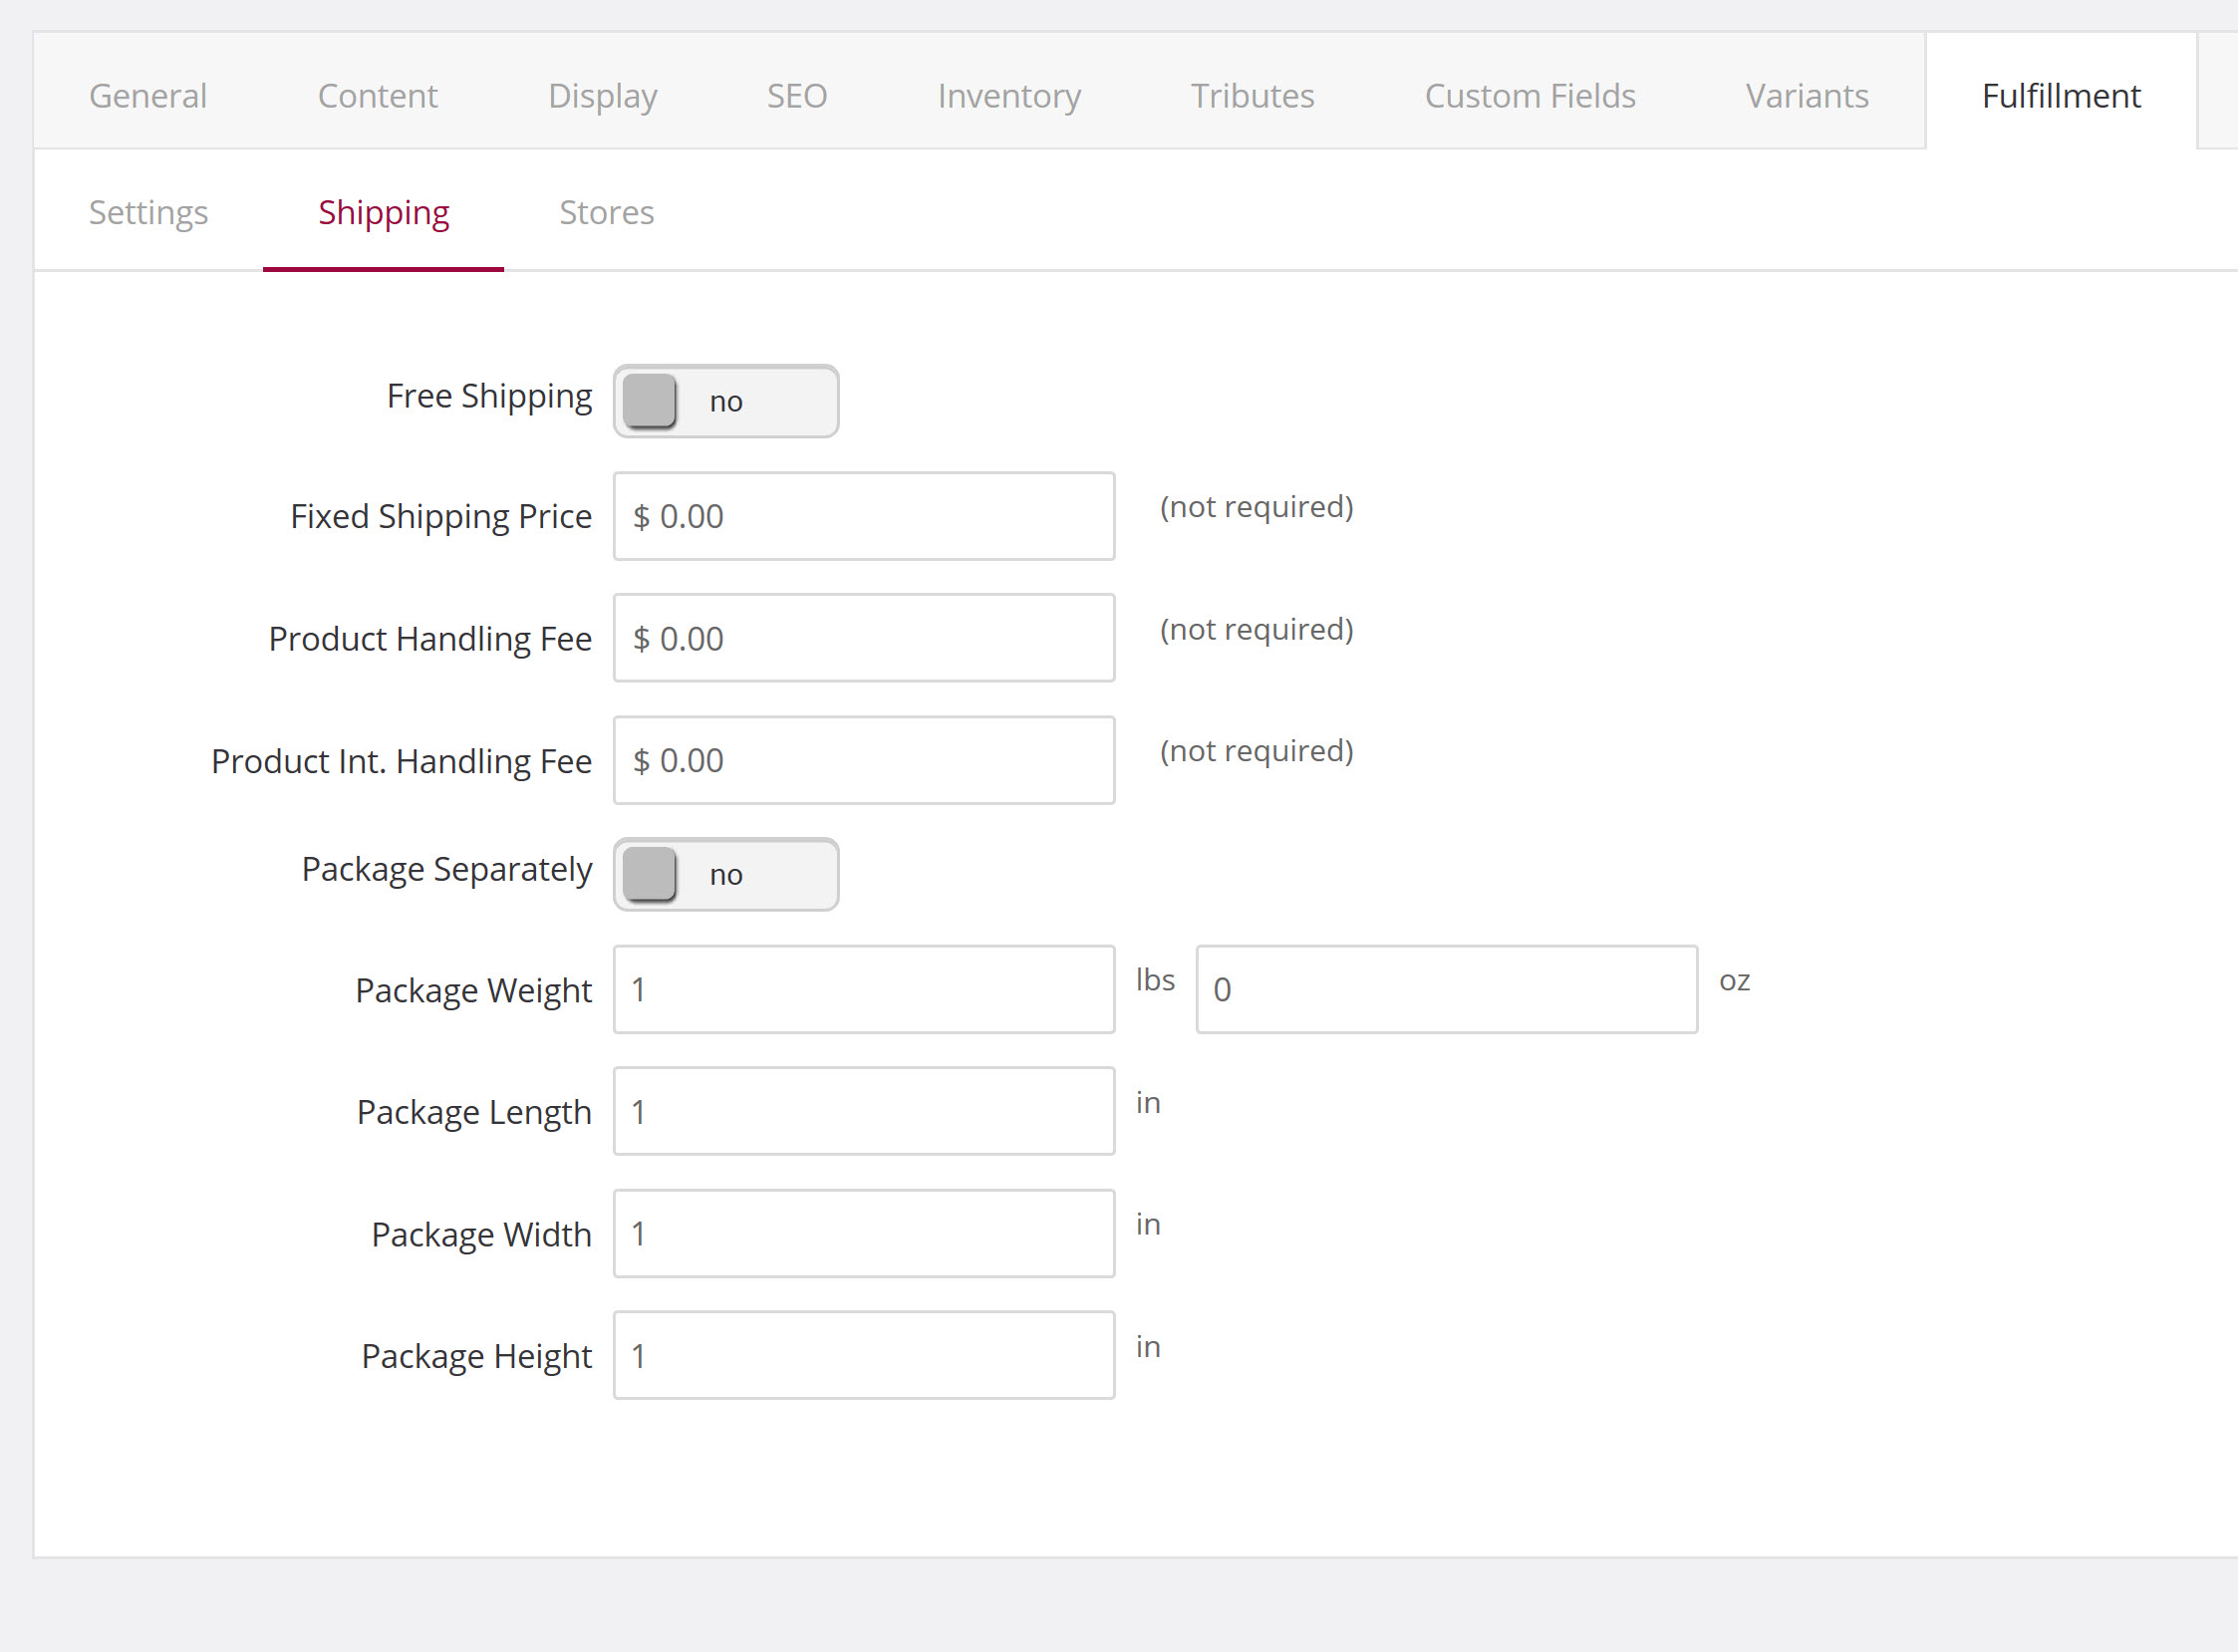
Media Tab
To show your customers what your product will look like, you will want to add images to the media tab.
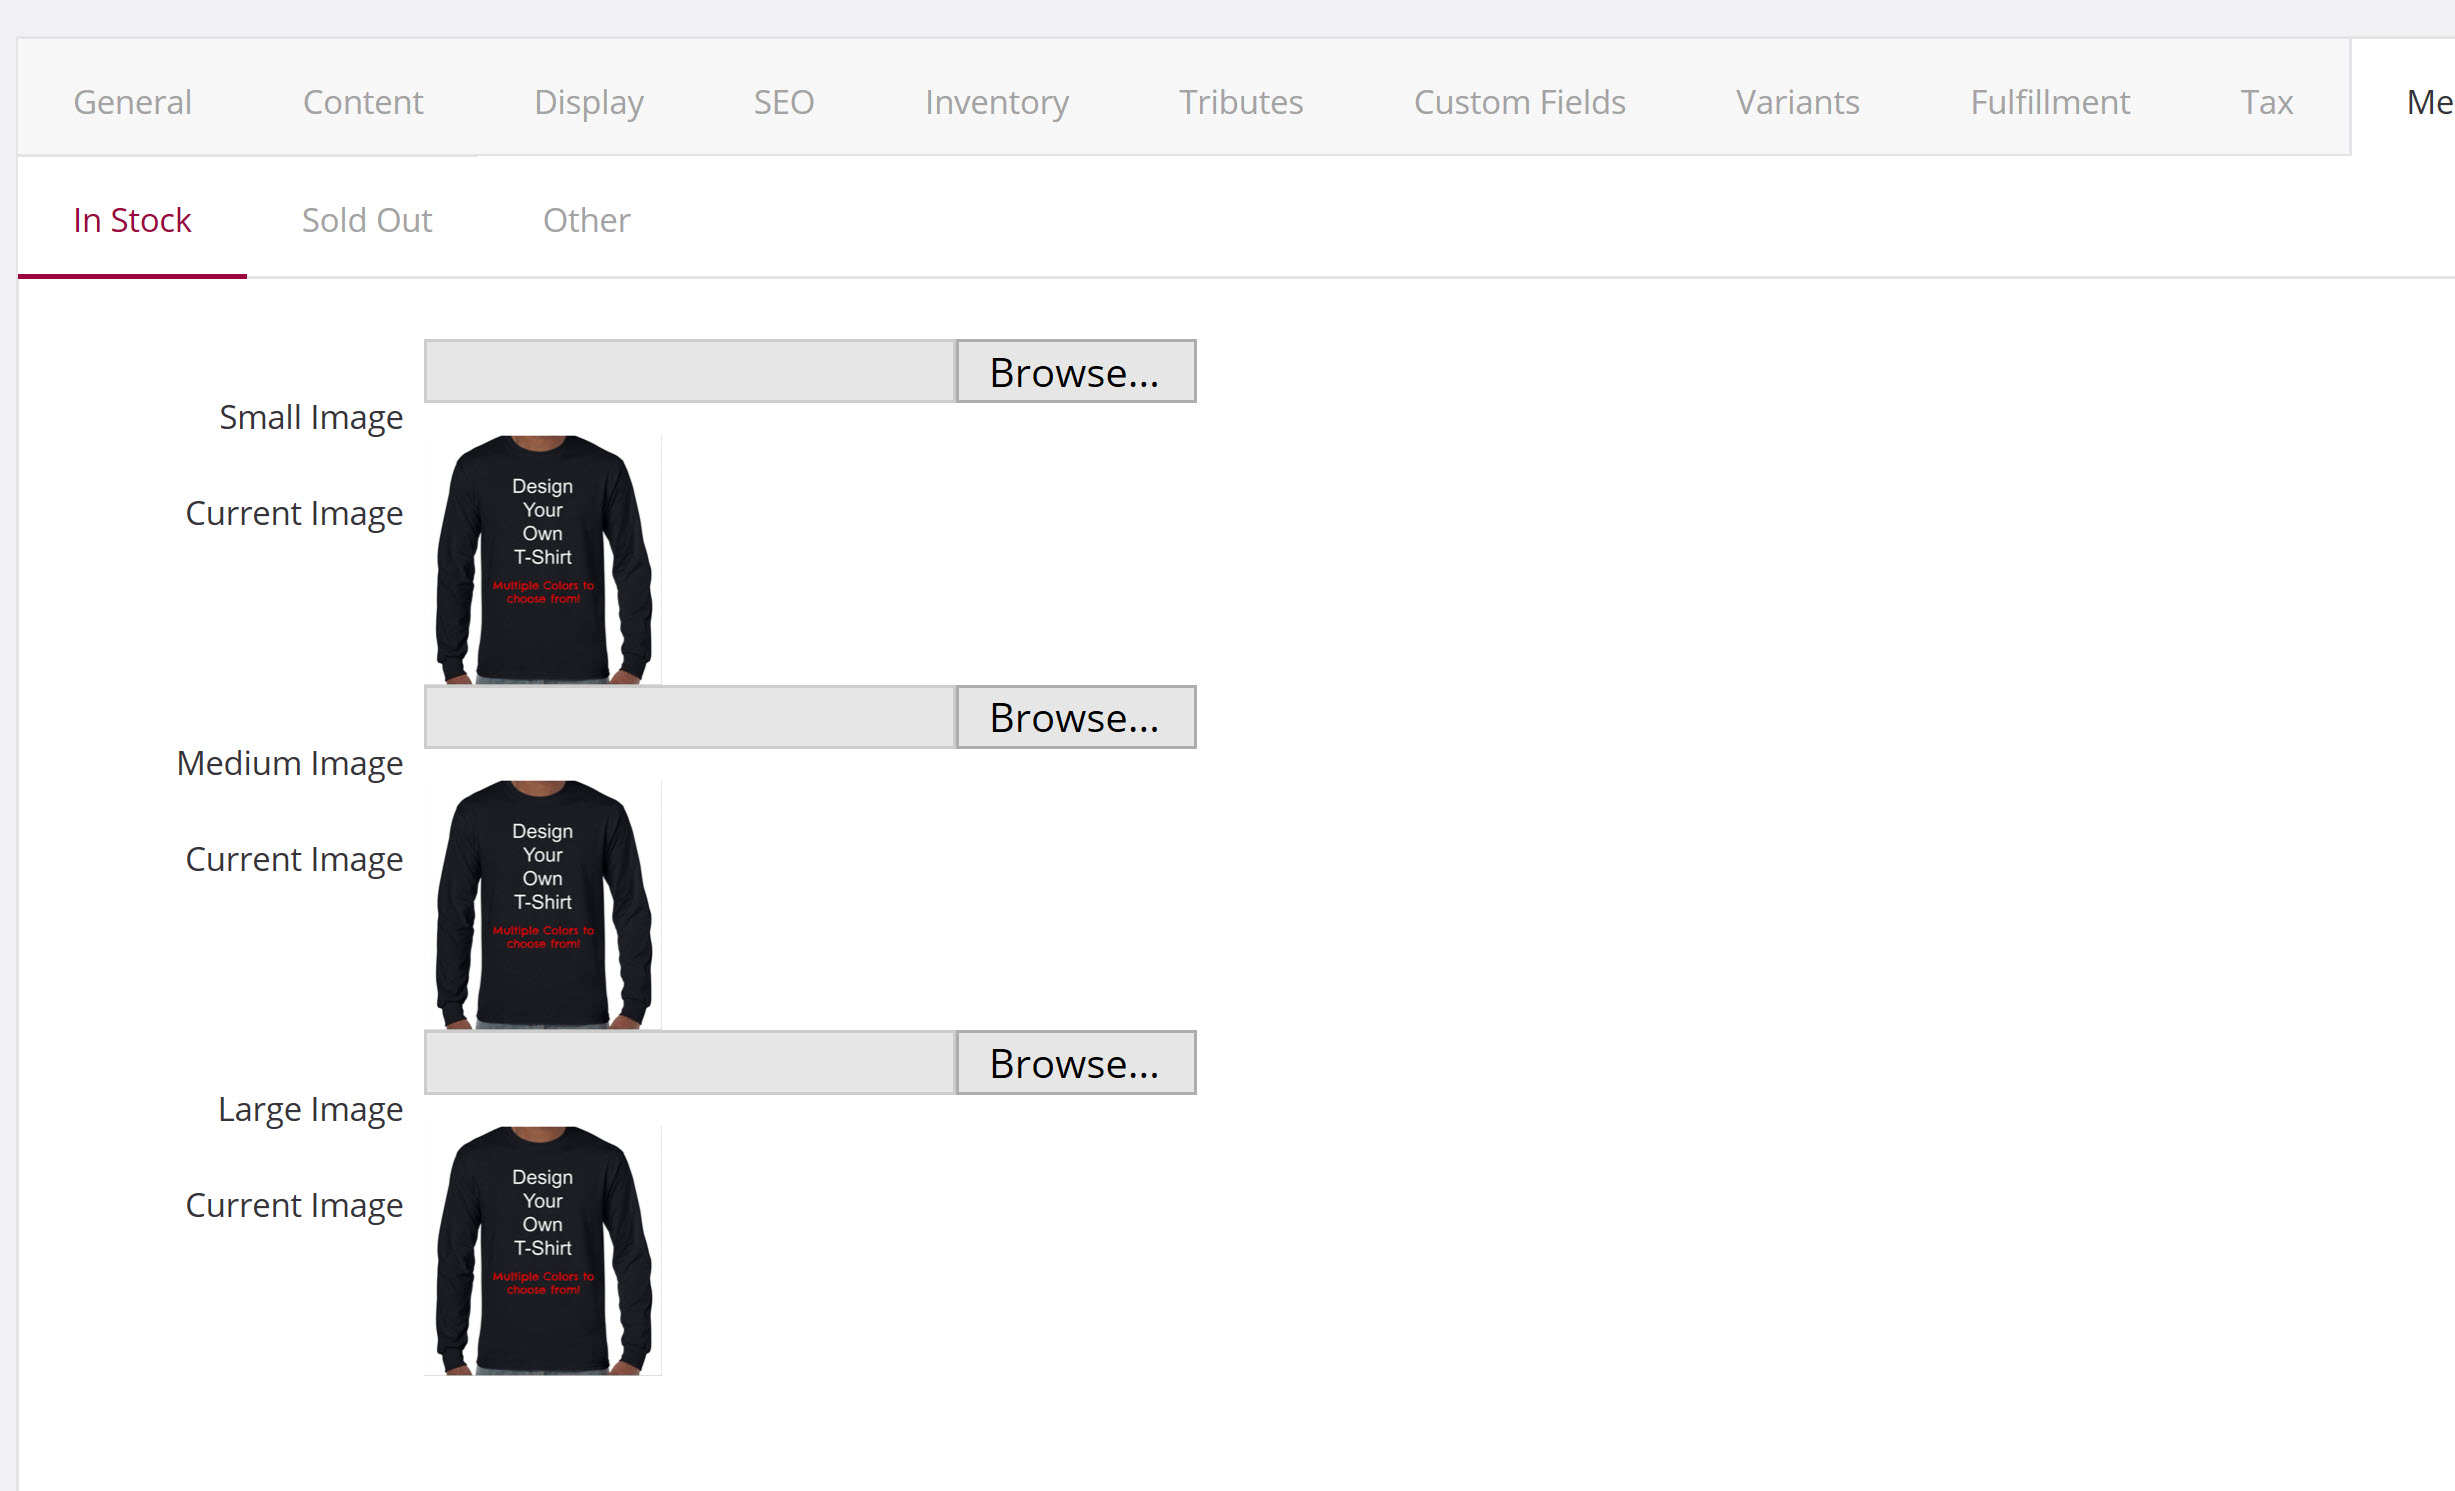
Note: If you would like to show out of stock items, use the out of stock subtab. You could use the same picture with writing over top stating “Out of Stock”. This could be used to show customers a product that will come back in stock at a later date, instead of removing the product from your website completely once there is no more inventory.
Files
If your product is a file that will be emailed or available for download, you will need to upload the file on the Files Tab.
To add files, navigate to the Add Files subtab. Browse your computer to find the file that you want to upload and select the file type from the dropdown.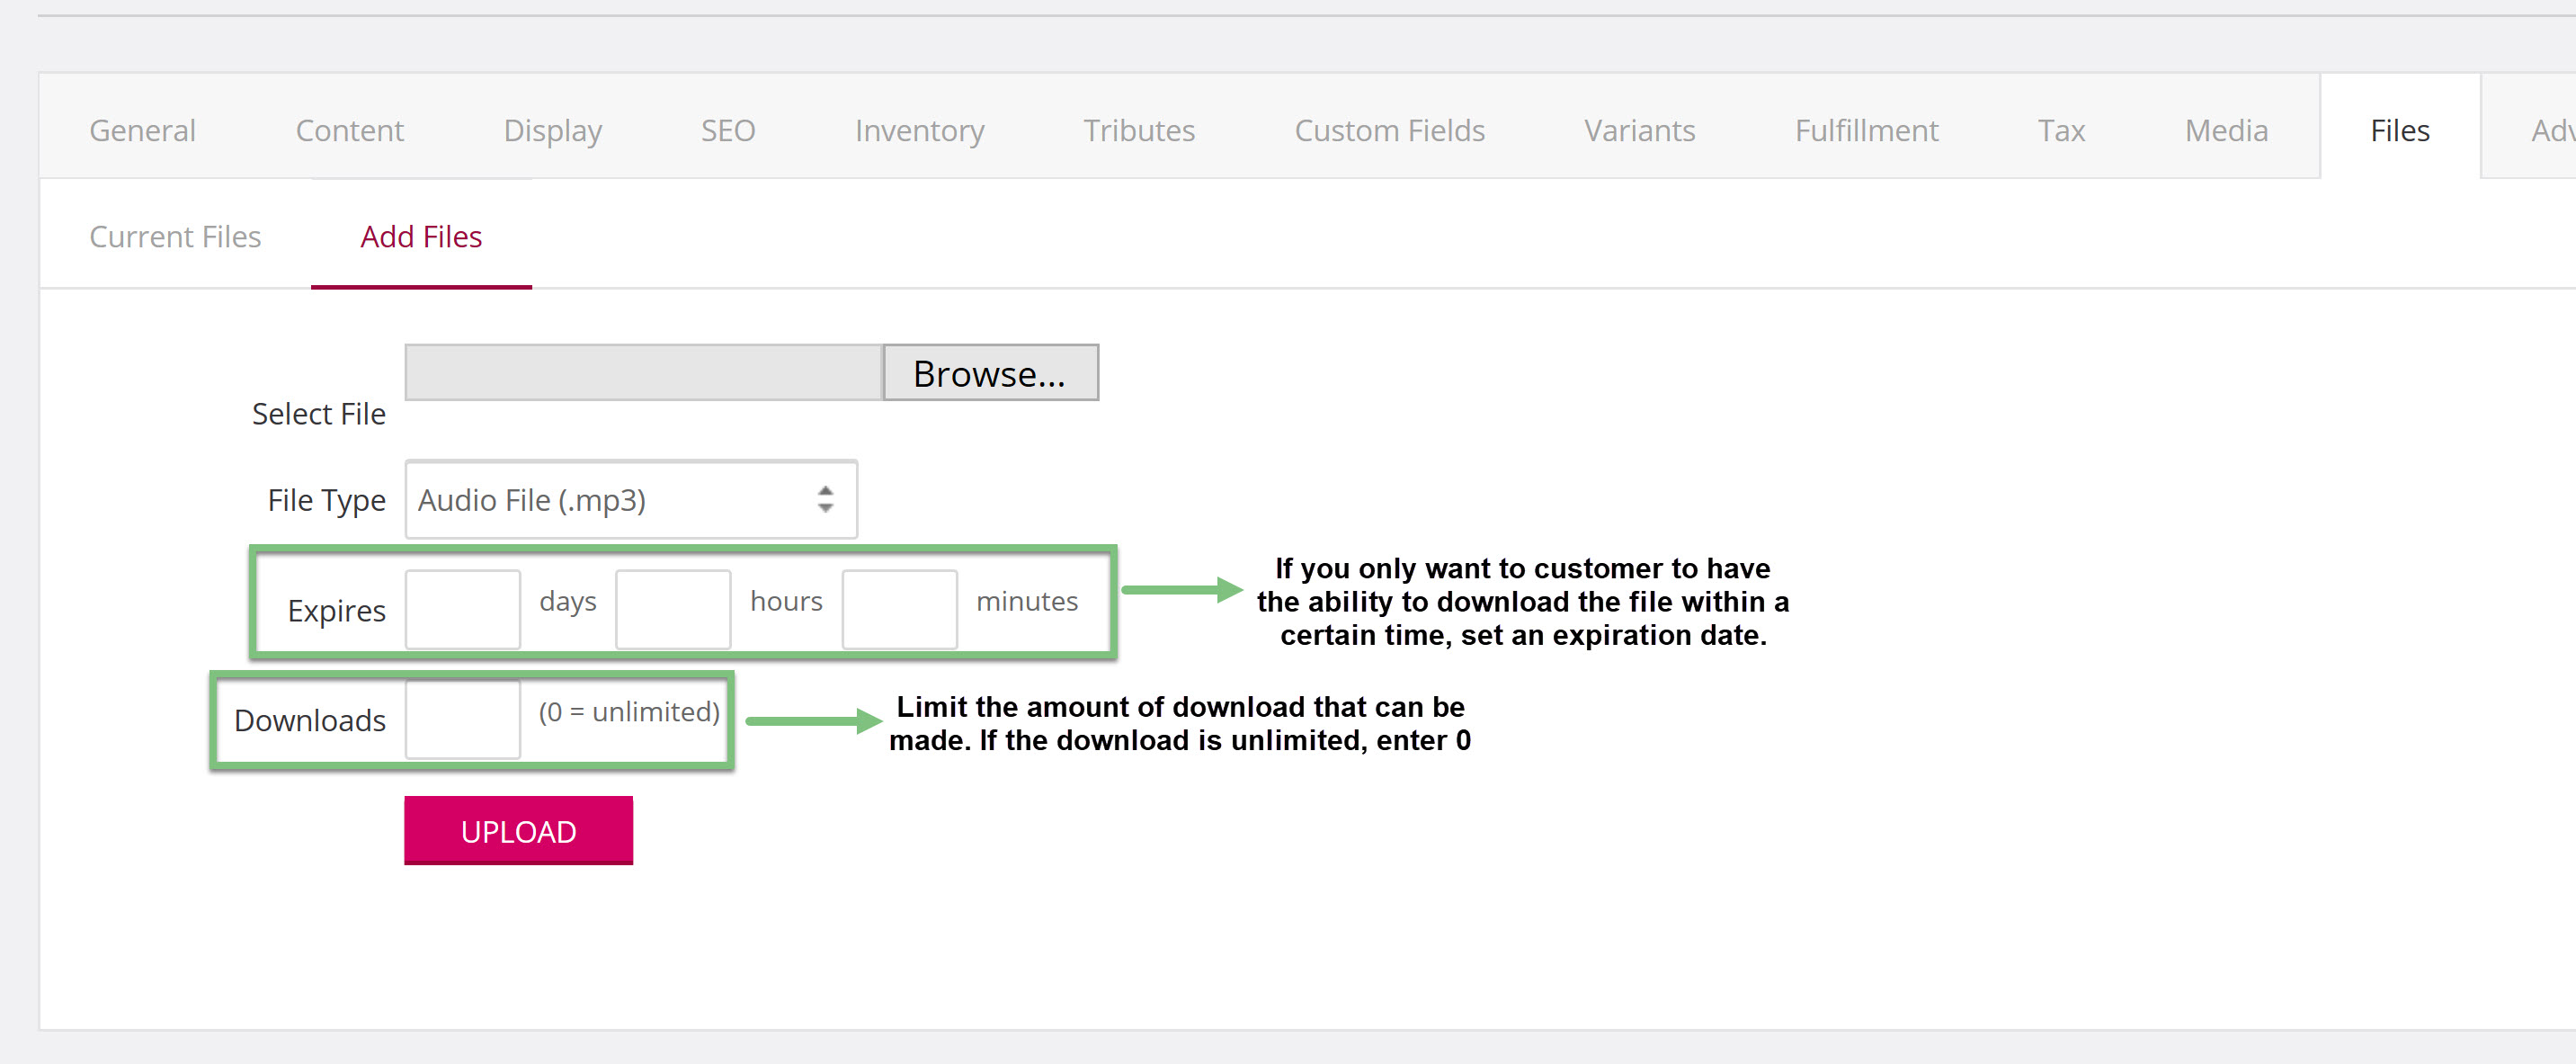
Note: Setting an expiration and a download limit is not required.
FAQ
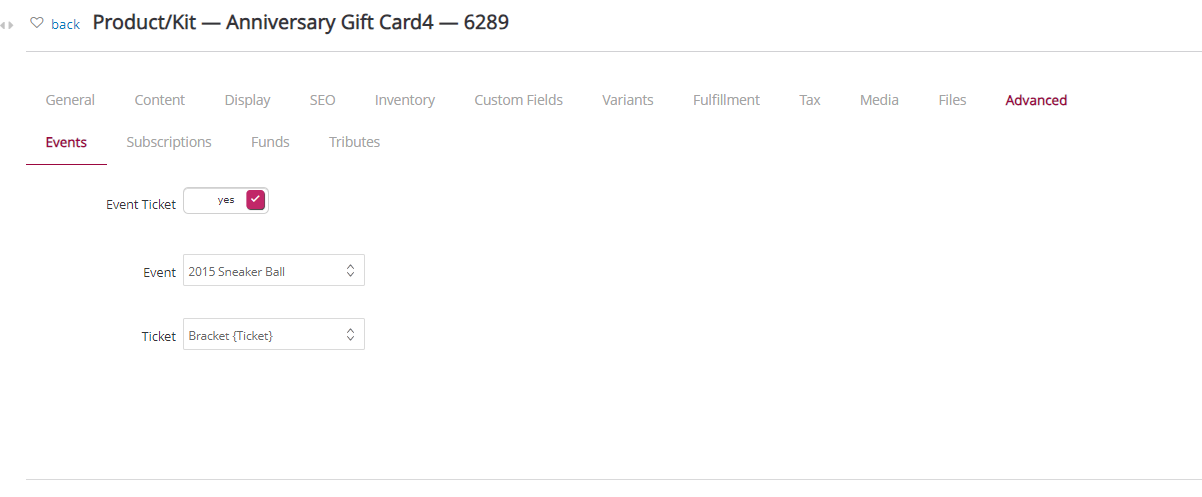
Q: Can I sell event Tickets from this online shopping cart?
A: Yes, you can sell event tickets by creating a product for that ticket. on the Advanced tab of the product, you will need to toggle Event ticket to Yes under the Event Subtab and then select the event and ticket that you are selling.
Q: Can someone sign up to be a recurring donor on a shopping cart?
A: Yes, when creating a product, under the advanced tab > Subscription, you can attribute a product to a sustainer account.
