Introduction
Badges allow quick identification of key data points on contact records. The badge is located on the top of the Contact Record page and can be used to view information quickly without having to search the contact record to find important data for your organization. Our badge functionality allows you to manually create and assign badges to contact, household, and organization records. Additionally, the system automatically applies preconfigured badges when a record meets specific criteria.
You have the flexibility to add custom badges tailored to your organization’s needs without any data mapping requirements.
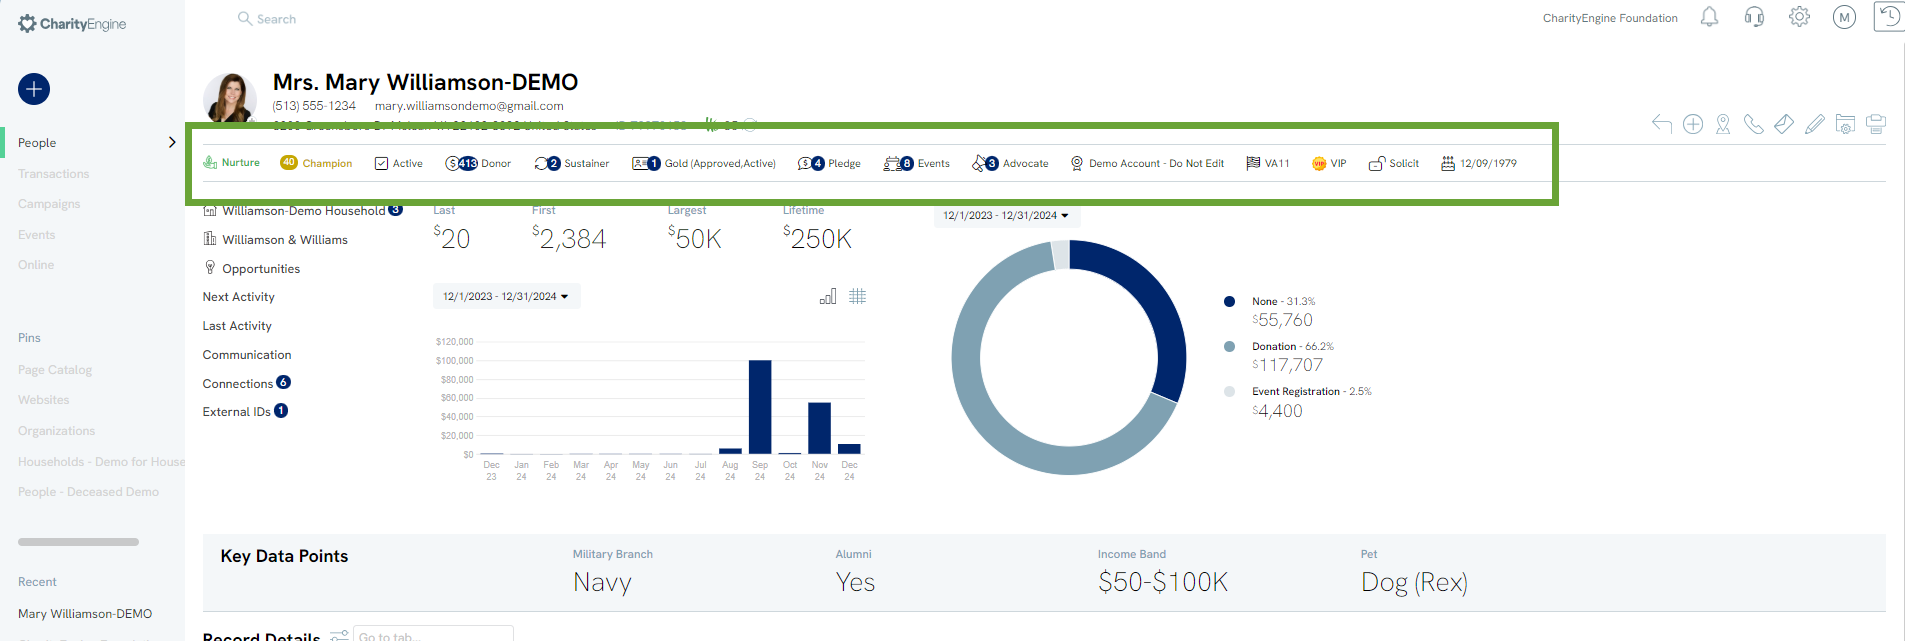
Table of Contents
Instructions - System Badges
CharityEngine has System Badges that are default to your account such as Donor, Sustainer, Member, or Pledge. These badges will be displayed at the top of the contact record.
To view system badges, navigate to the Configuration App > Contacts > Badges. You will see a list of System Badges that have already been created for you.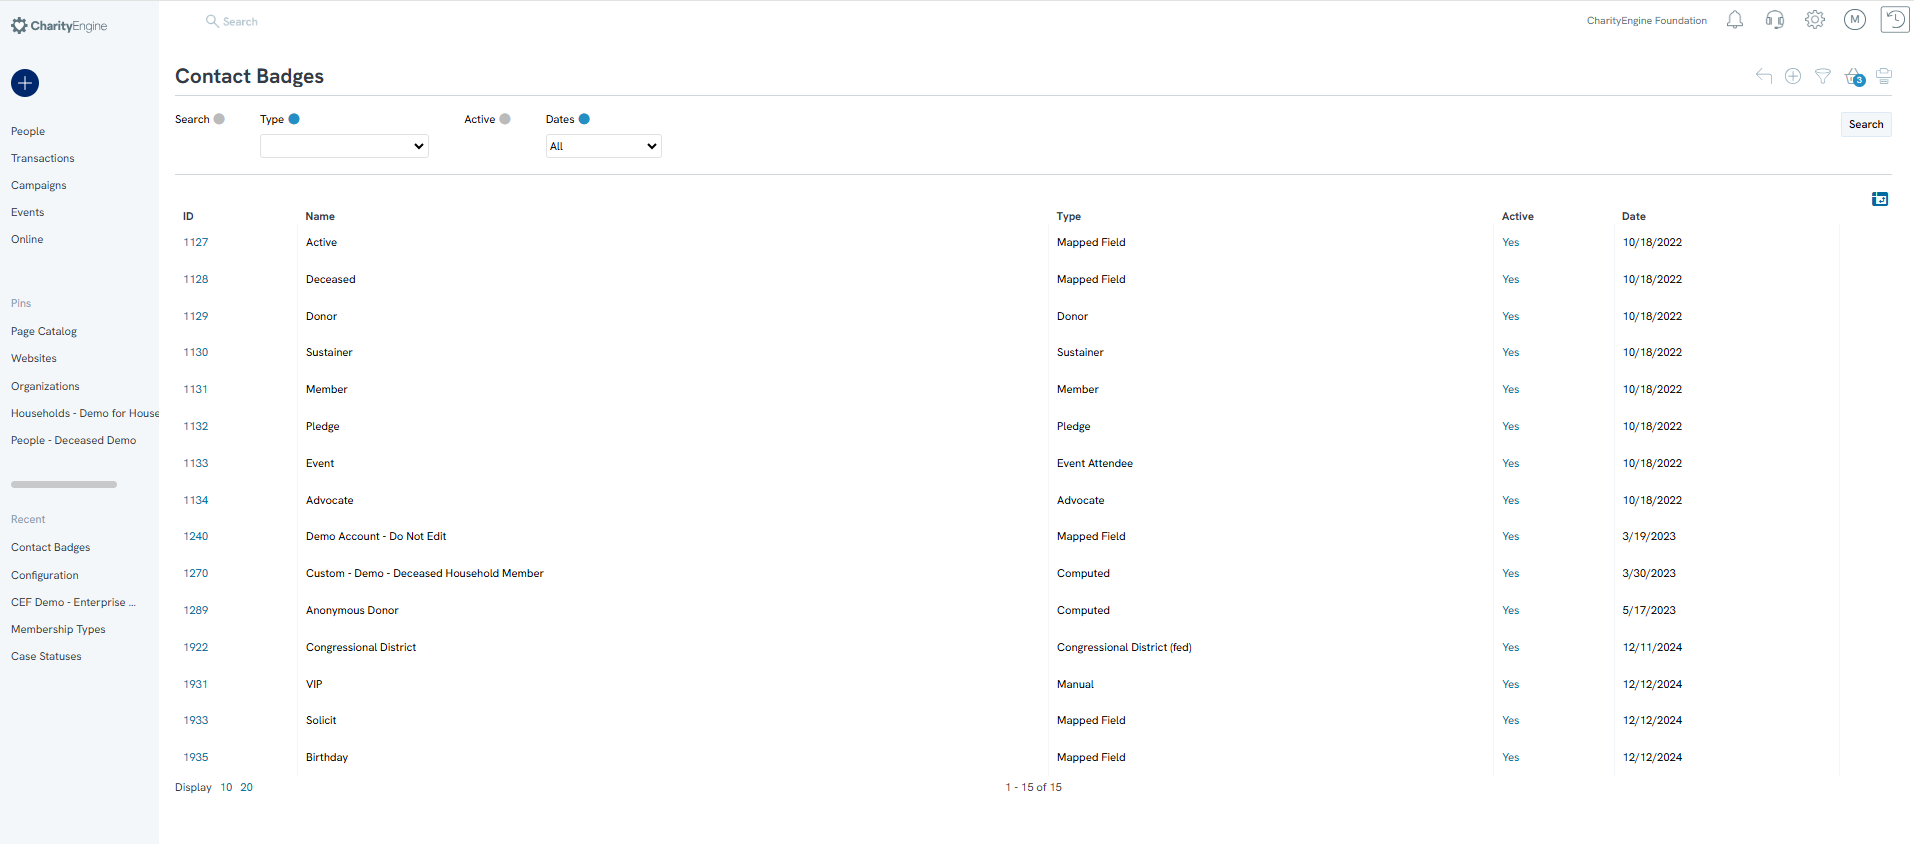
Instructions - Custom Badges: Manual Entry
To Create a badge, navigate to the Configuration App > Contacts > Badges. You will see a list of System Badges that have already been created for you.
Click Create New to create a new badge.
The user will enter:
- Name: internal naming reference
- Label: user facing label on contact record and UI
- Icon Color: optional
- Active: Yes
- Type: Select from drop down on type of badge being created
- Contact Types: Select Manual from the drop down
- Show on Contact: Yes to present at top of contact recor
- Show on Widget: Yes to present on the Search/Listing Screen when in Card View
Navigate to the Media tab to apply a custom image.
Click Save to secure.
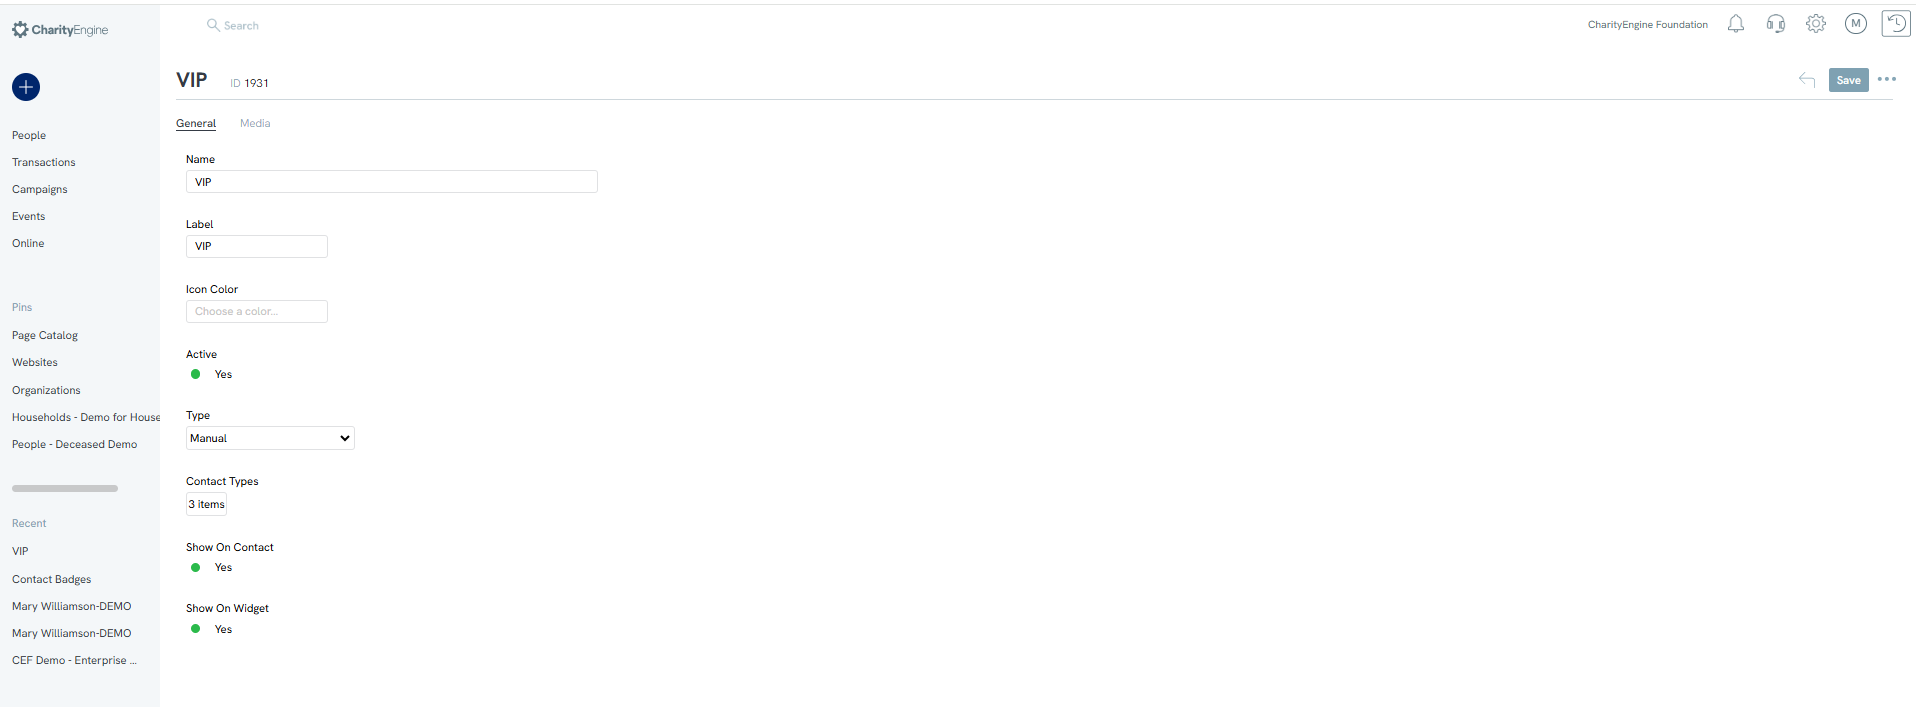
To manually apply the badge, navigate to the contact record and navigate to the Edit (Pencil icon) > Badges tab > Save to secure changes

Instructions - Custom Badges: Mapped Fields
CharityEngine allows users to create badges driven by the presence of a field, great for instances where the users wishes to expose a badge to highlight a specific field or custom created field.
Navigate to the Configuration App > Contacts > Badges.
Click Create New to create a new badge.
The user will enter:
Name: internal naming reference
Label: user facing label on contact record and UI
Icon Color: optional
Active: Yes
Type: Select Mapped Field from drop down on type of badge being created
Contact Types: Select the type of contacts for which the badge should be displayed
Show on Contact: Yes to present at top of contact record
Show on Widget: Yes to present on the Search/Listing Screen when in Card View
Map Type: Select type of either existing CE system attribute or a custom field
Attribute: Select an existing CE system attribute or a custom field
Navigate to the Media tab to apply a custom image.
Click Save to secure.
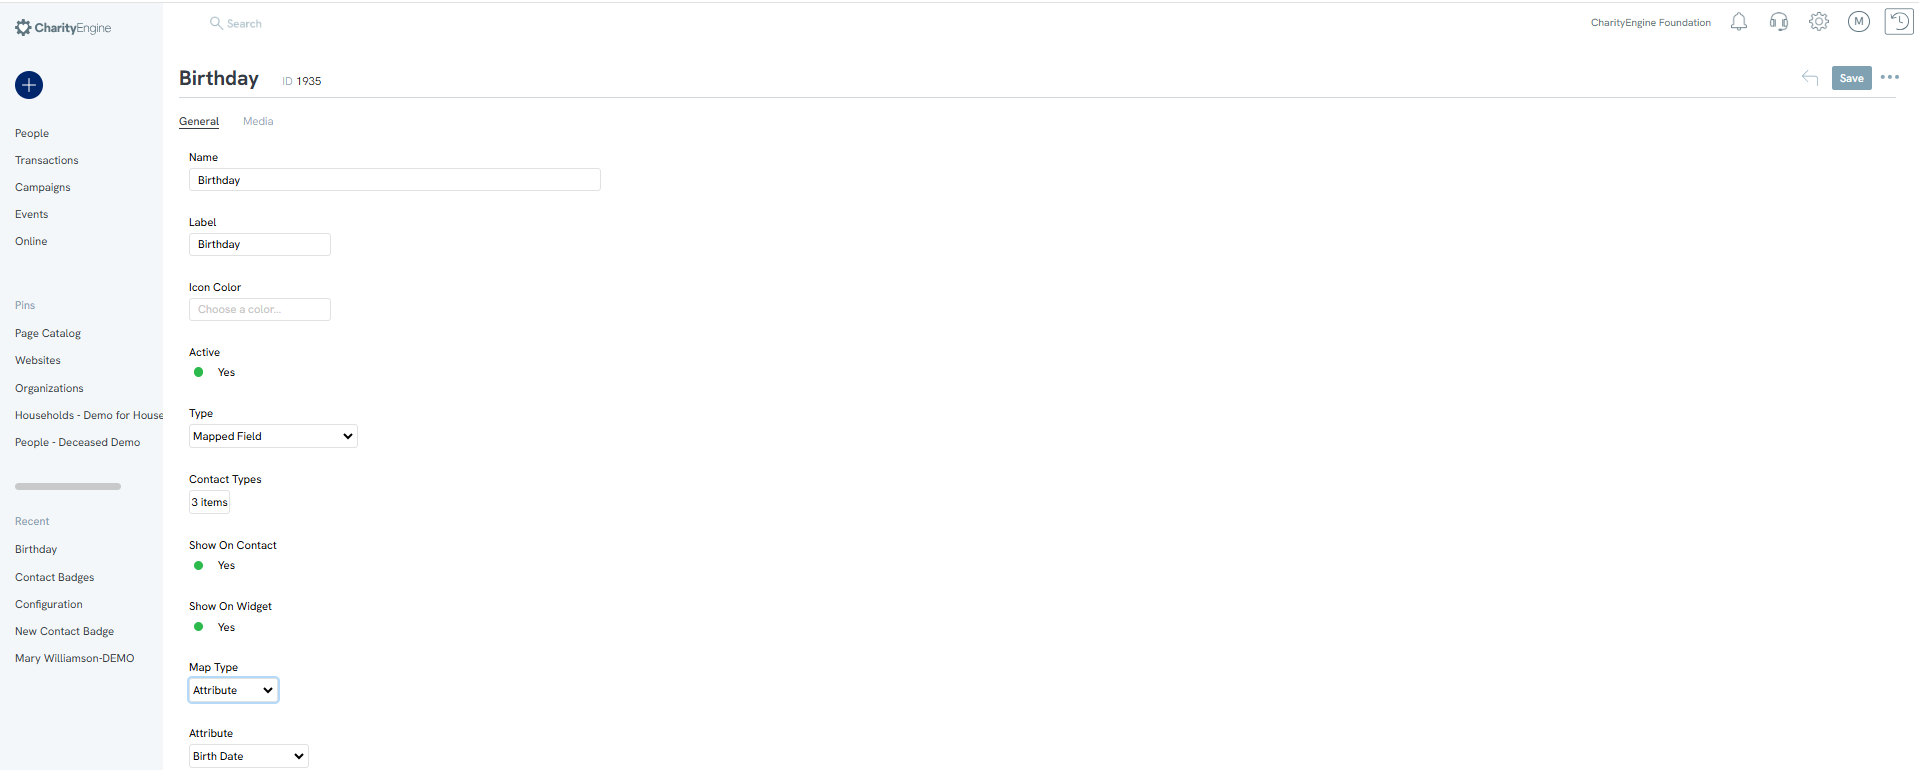
The new badge will present based upon data within the field (system or custom). Please note, it may take update to 24 hours for the badge to populate. 
Instructions - Custom Badges: Computed Fields
CharityEngine's badge feature allows users to create a calculated badge based upon qualifying data, great for instances where the users wishes to expose a badge to highlight a specific field or custom created field.
Please note, as a prerequisite to this option, the user must create a query or report that includes the user of "Contact ID" in the query field. The presence of the "Contact ID" will be used to apply the badge image/language.
Navigate to the Configuration App > Contacts > Badges.
Click Create New to create a new badge.
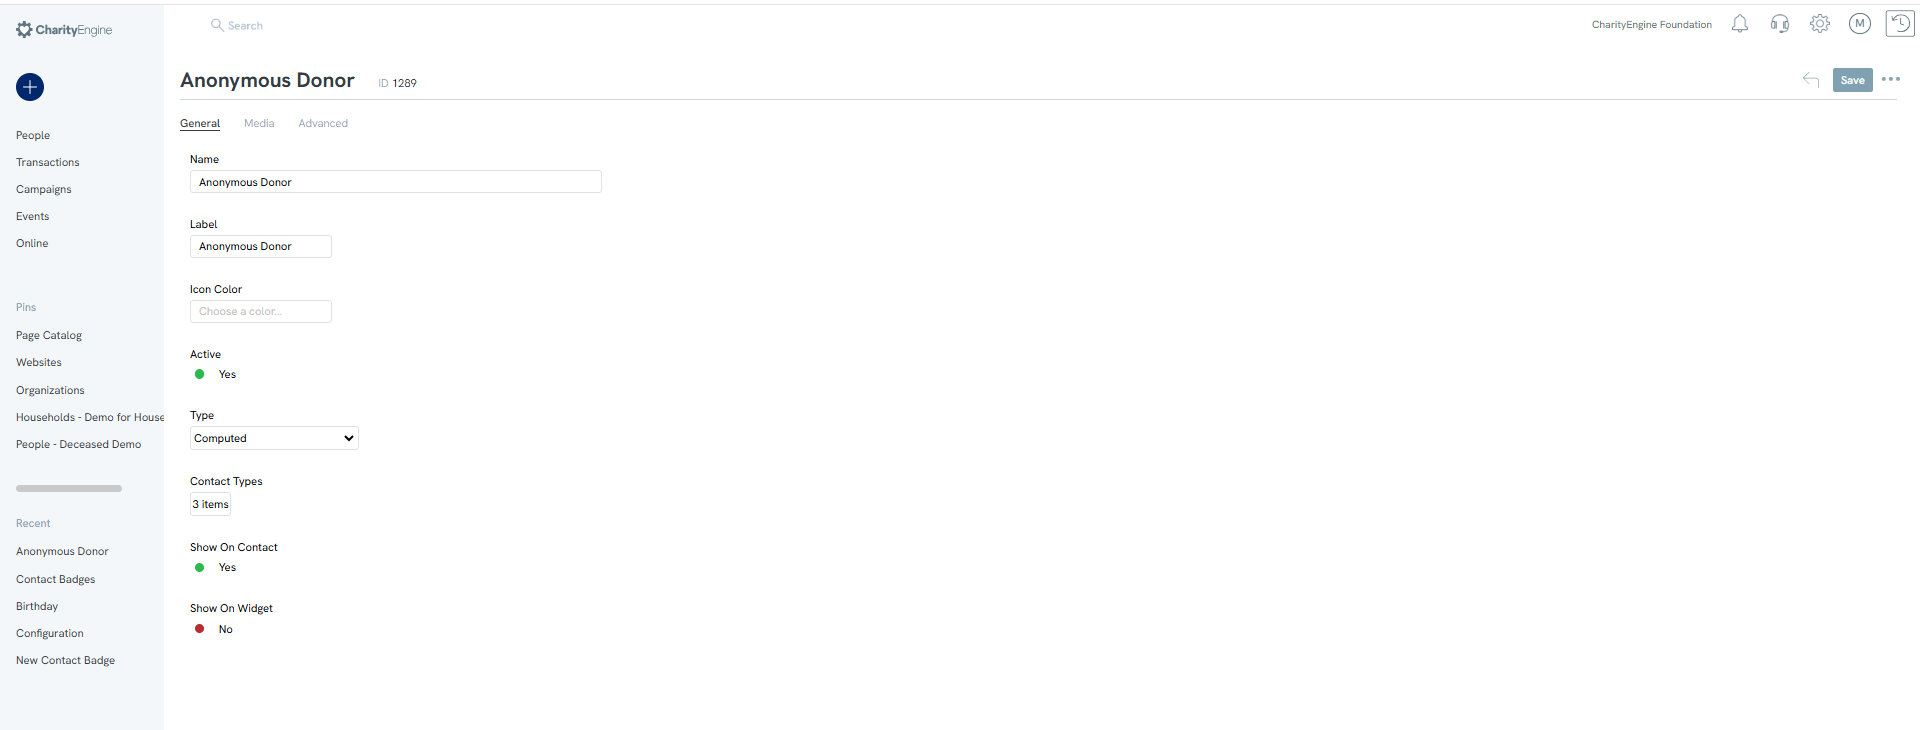
The user will enter:
Name: internal naming reference
Label: user facing label on contact record and UI
Icon Color: optional
Active: Yes
Type: Select Computed from drop down on type of badge being created
Contact Types: Select types in which the badge should be applied from the drop down
Show on Contact: Yes to present at top of contact record
Show on Widget: Yes to present on the Search/Listing Screen when in Card View
Map Type: Select type of either existing CE system attribute or a custom field
Attribute: Select an existing CE system attribute or a custom field
Navigate to the Media tab to apply a custom image.
With this option, select Advanced tab and search for the query or report created as part of the prerequisite. Critical, on the Contact Id Column select the field which represents the CharityEngine Contact ID.
Click Save to secure.

Note: This type of badge is associated with a daily job run. The badge will appear the next day and contact badges will be added/deleted daily based upon the query results.
