Introduction
Tokens allow you to add elements to your email or content that are personalized based on the information you already know about constituents. Tokens can be used to insert data points such as first name, organization address, donation amount, initiative name, event name, etc. In addition, CharityEngine also leverages conditional blocks to further customize your message.
For example, you may want to email constituents who recently donated at a recent event. In that email you would like to leverage the constituent’s first and last name as well as place the total donation value received during your event. Tokens are a great way to insert critical data elements in an email and further personal your donor’s experience with your organization. Tokens can also be leveraged within Web Forms for customization.
Within CharityEngine, users will be able to leverage both System Tokens (most frequently used and pre-defined) as well as have the ability to create Custom Tokens (those that may be unique to your organization or not currently available through the token list).
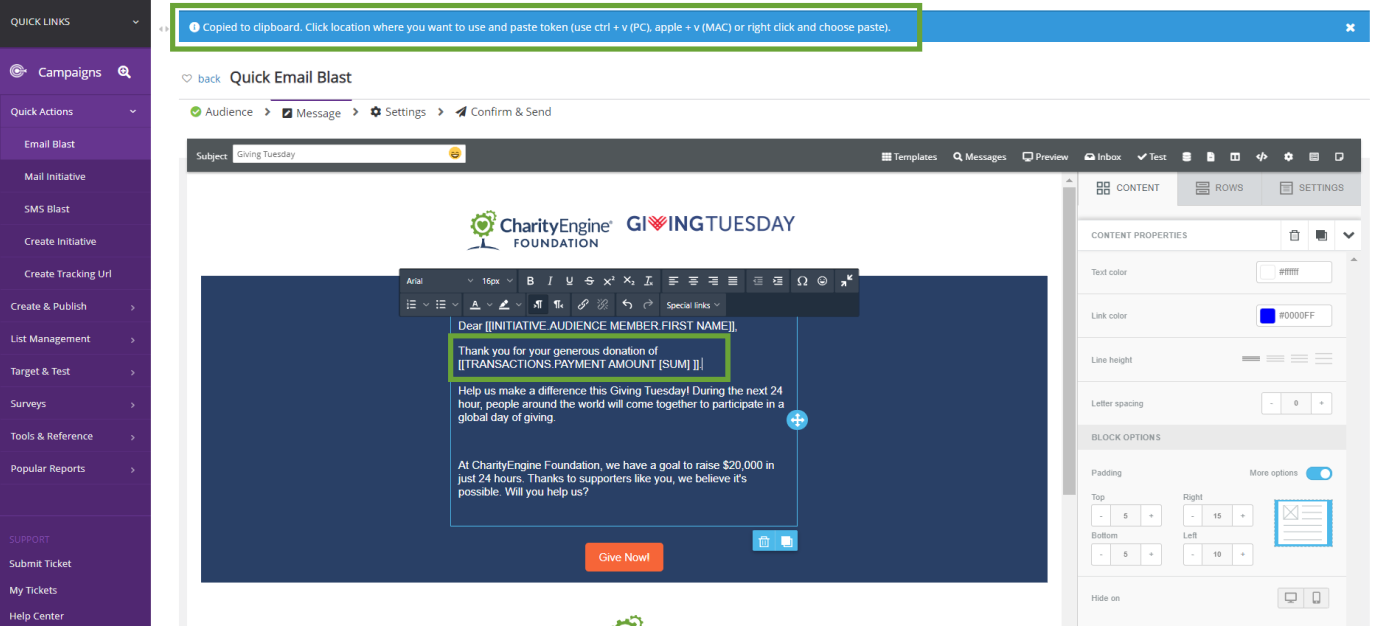
Table of Contents
- Introduction
- Prerequisites
- Instructions: How to add system tokens to your email campaign
- Instructions: How to create Custom Tokens for Emails
- Instructions: How to Use Global Tokens for Web Forms
- Instructions: How to Use Customer Tokens for Web Forms
- Instructions: How to Configure Organizational Global Tokens
- FAQs & Further Materials
Prerequisites
-
-If you are adding customs tokens for emails, the usage of Query will be required. The custom tokens that are available for your email content will need to be included within the Source file.
Instructions: How to add system tokens to your email campaign
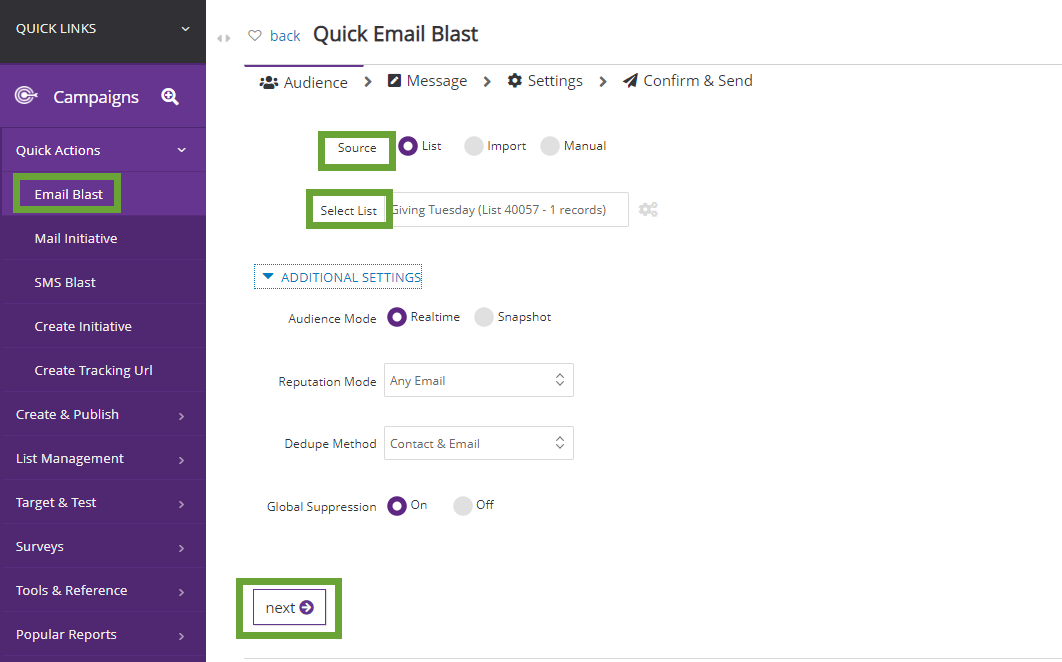
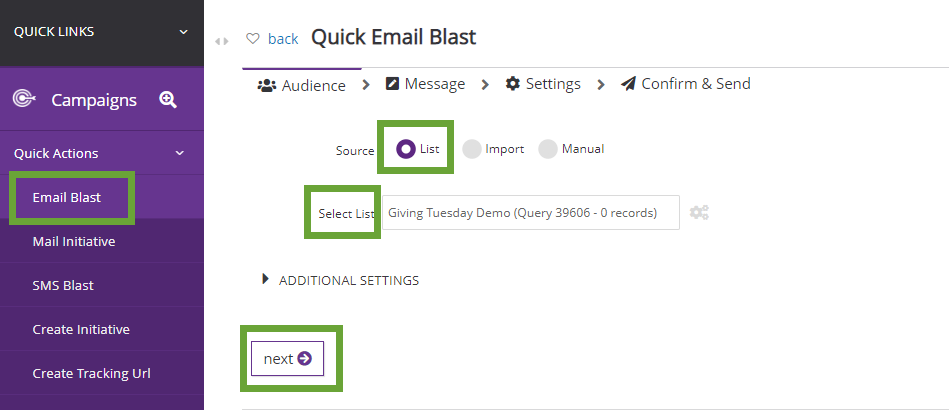
Step 2. Select your recipients for your email. Navigate to Source to select your audience list and then click next
-
- -List: Refers to an existing Opt-In List or other Query (as created from Automation & Workflow)
- -Import: Refers to the ability to create an email list from an external source (CharityEngine ID minimum requirement)
- -Manual: Refers to the ability to physically type email address(es) directly into the entry field
-
- Note: If you are adding customs tokens, the usage of List = Query will be required. The custom tokens that are available for your email content will need to be included within the Source file.
- Note: If you are adding customs tokens, the usage of List = Query will be required. The custom tokens that are available for your email content will need to be included within the Source file.
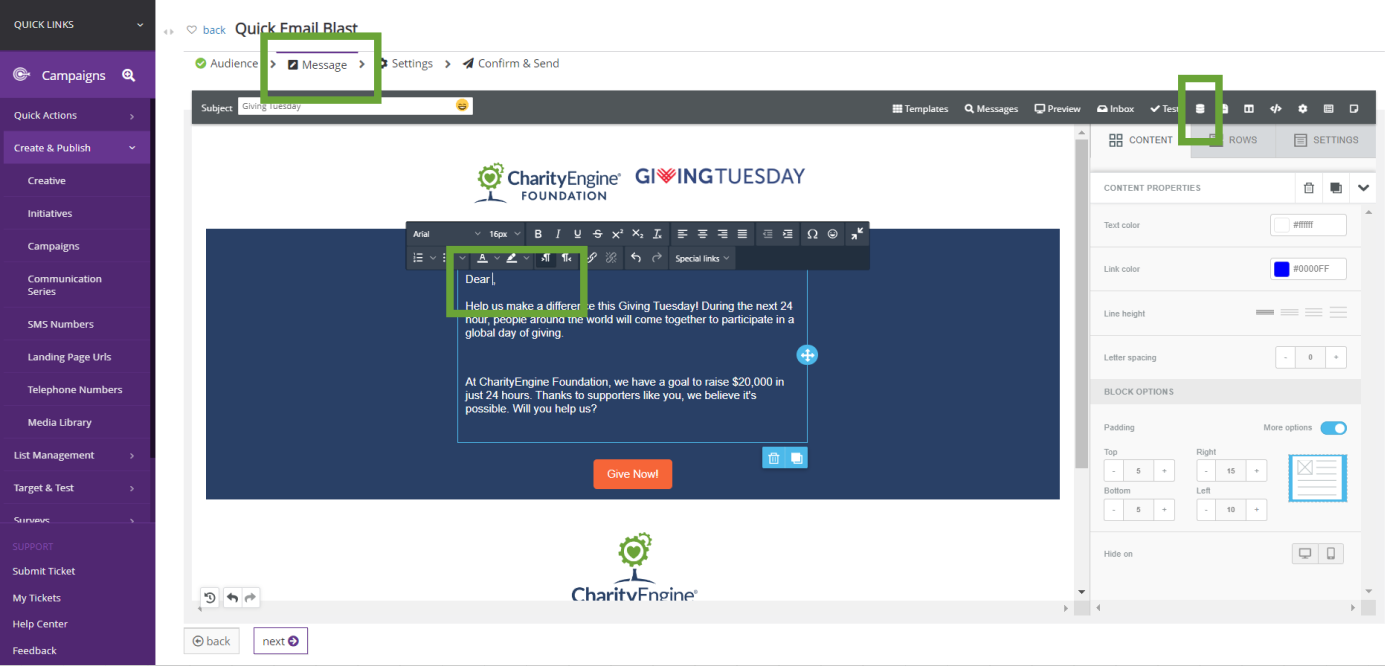
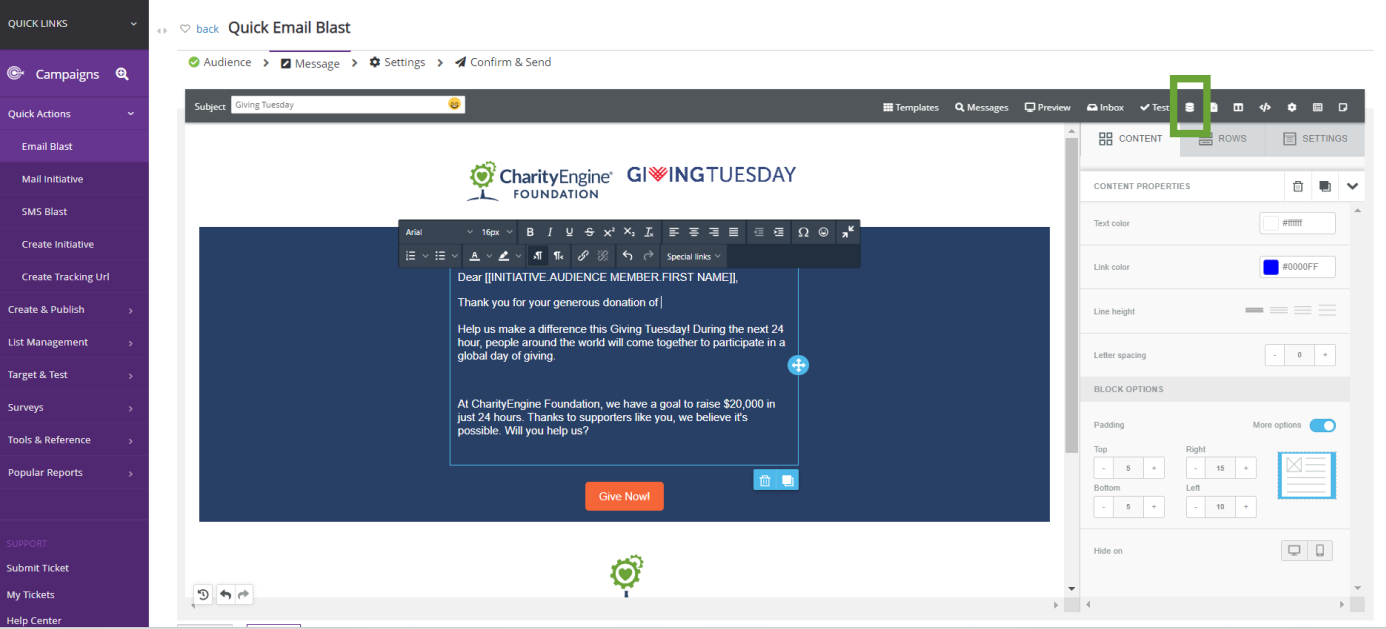
Step 3: Once you have selected the list, proceed with creation of the email content to be sent. This can include text, images, buttons, video, etc. Position your cursor for the placement of your token.
Step 4: Add a token by clicking on the Select Content Merge Tokens icon (see top right).
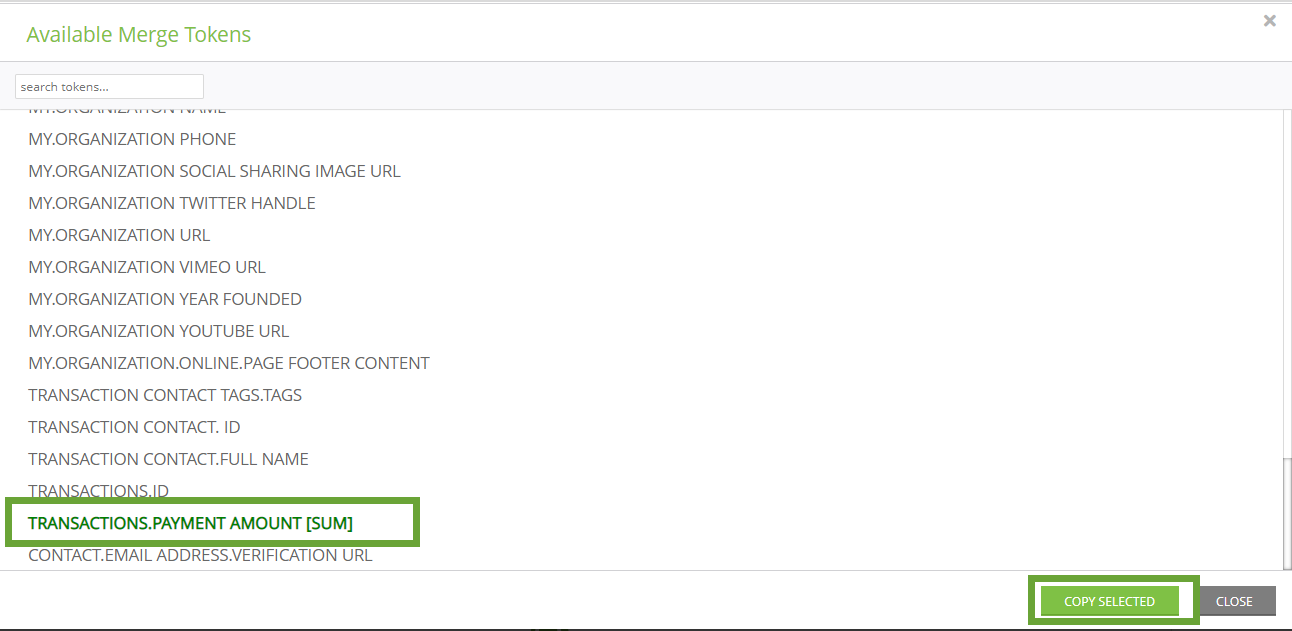
Step 5: A pop-up box will be presented with all available systemic merge tokens.
-
- Note, custom tokens creating using a query will also be presented when appropriate – see next section for details on custom token development
- Note, custom tokens creating using a query will also be presented when appropriate – see next section for details on custom token development
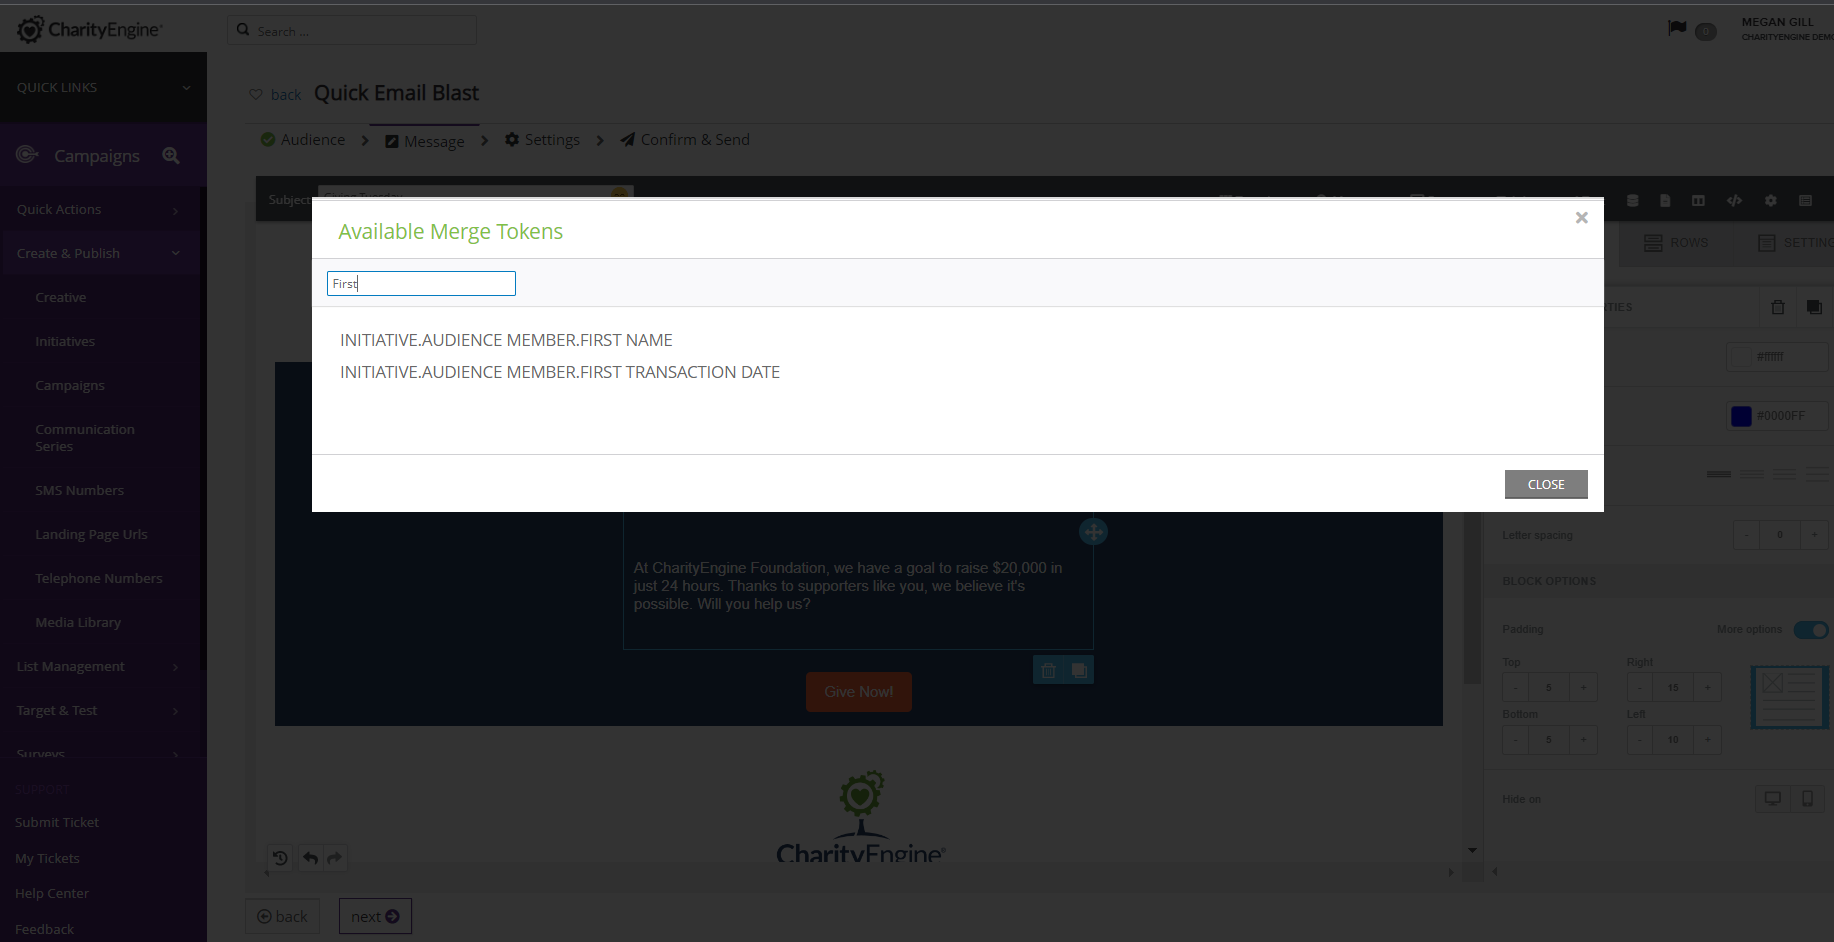
Step 6: Click on the identified token and click COPY SELECTED.
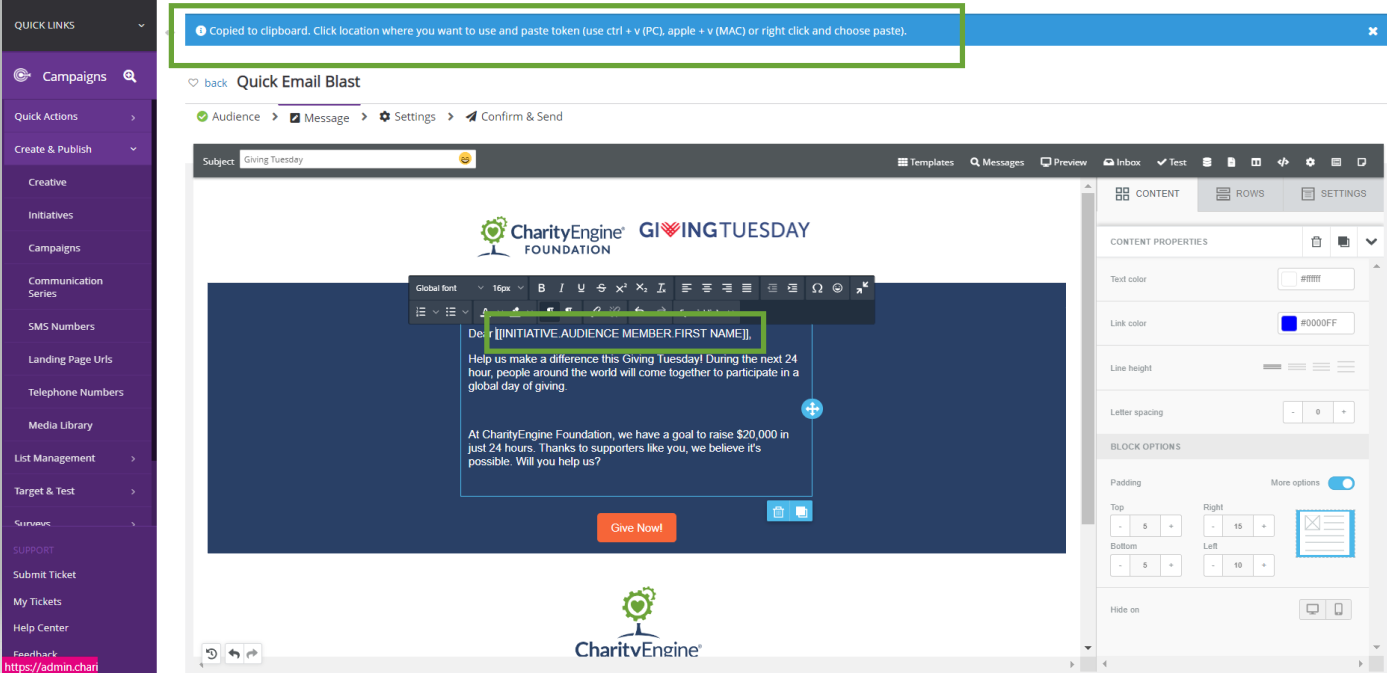
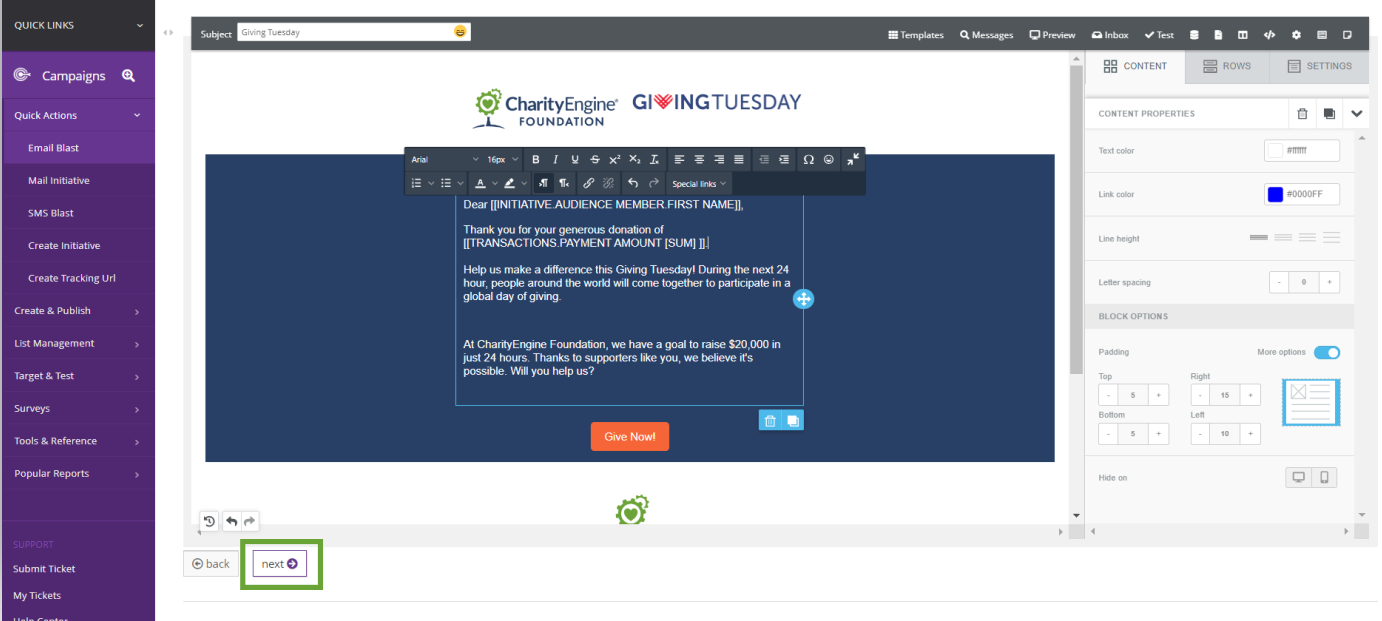
Step 7: Click the location where you want to use the token and paste the token by leveraging ctrl+v (PC), v(MAC), or right click and select paste
Step 8: Continue with send activities by selecting NEXT

Instructions: How to create Custom Tokens for Emails
Note: If you are adding customs tokens, the usage of List = Query will be required. The custom tokens that are available for your email content will need to be included within the Source file.
In this example, we will create a custom token leveraging a custom field which identifies T-Shirt Size
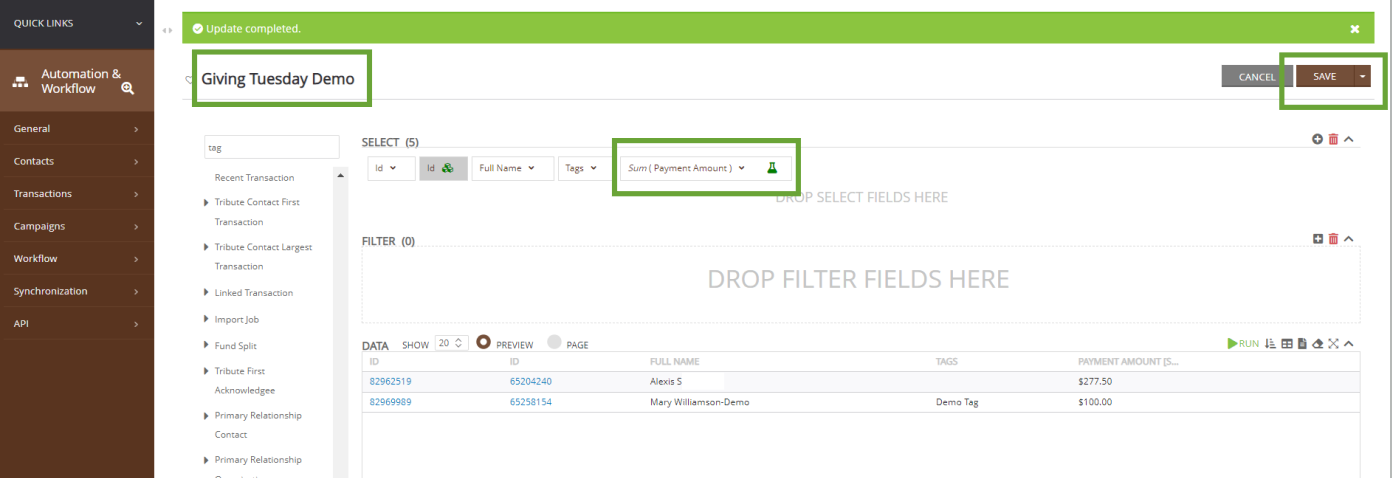
In this example, we are locating the Transactions.Payment Amount [Sum] value from the Giving Tuesday Demo query created in Step 2.
All of the global tokens will appear for you to select from, but you will also see the custom tokens that were populated from the query selected.
Instructions: How to Use Global Tokens for Web Forms
Step 1: To use a global token on a WYSIWYG navigate to the Online App > Web Forms > Search & Manage > locate the web form > ACTIONS > Manage
Step 2: Navigate to the Content tab > Success sub tab
Step 3: Once in the content block, click on Tokens in the WYSIWYG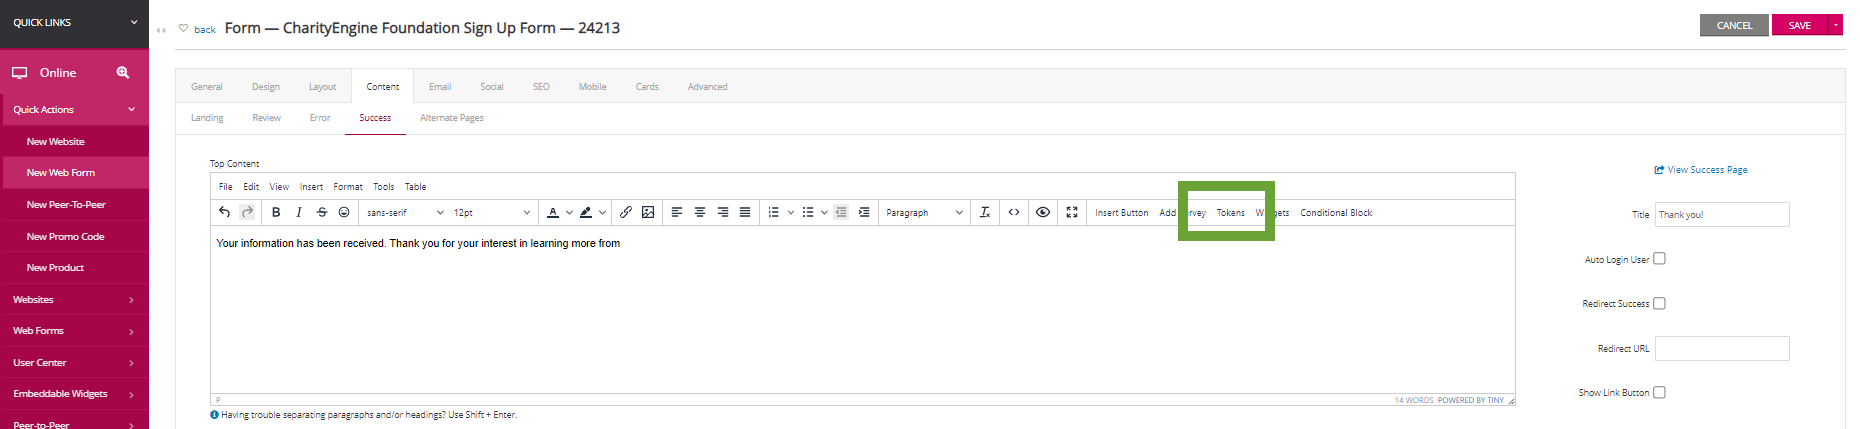
Step 4: A popup will appear with all of the global tokens CharityEngine provides. Use the search box to find specific tokens, click the token and the INSERT SELECTED.
Note: Select multiple tokens from this wizard prior to clicking INSERT SELECTED.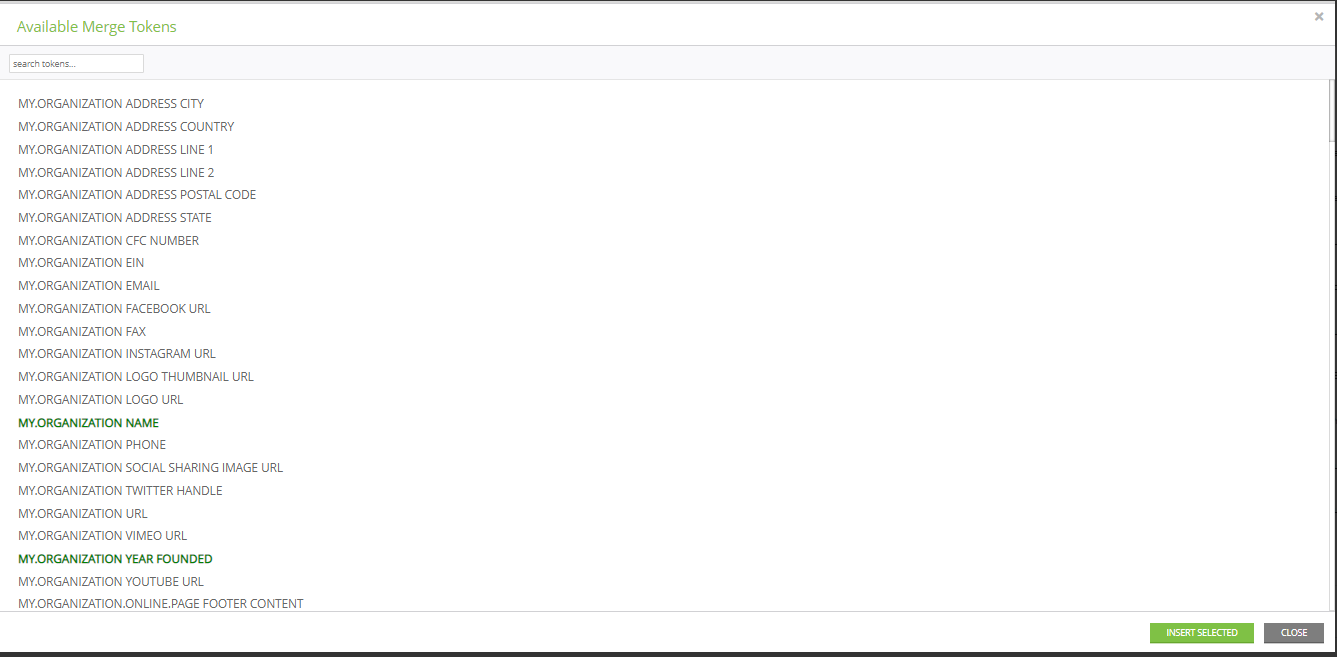
Step 5: Insert your content and system tokens to customize your content.
Step 6: Click SAVE to secure your changes.
Instructions: How to Use Customer Tokens for Web Forms
Step 1: To use a global token on a WYSIWYG navigate to the Online App > Web Forms > Search & Manage > locate the web form > ACTIONS > Manage
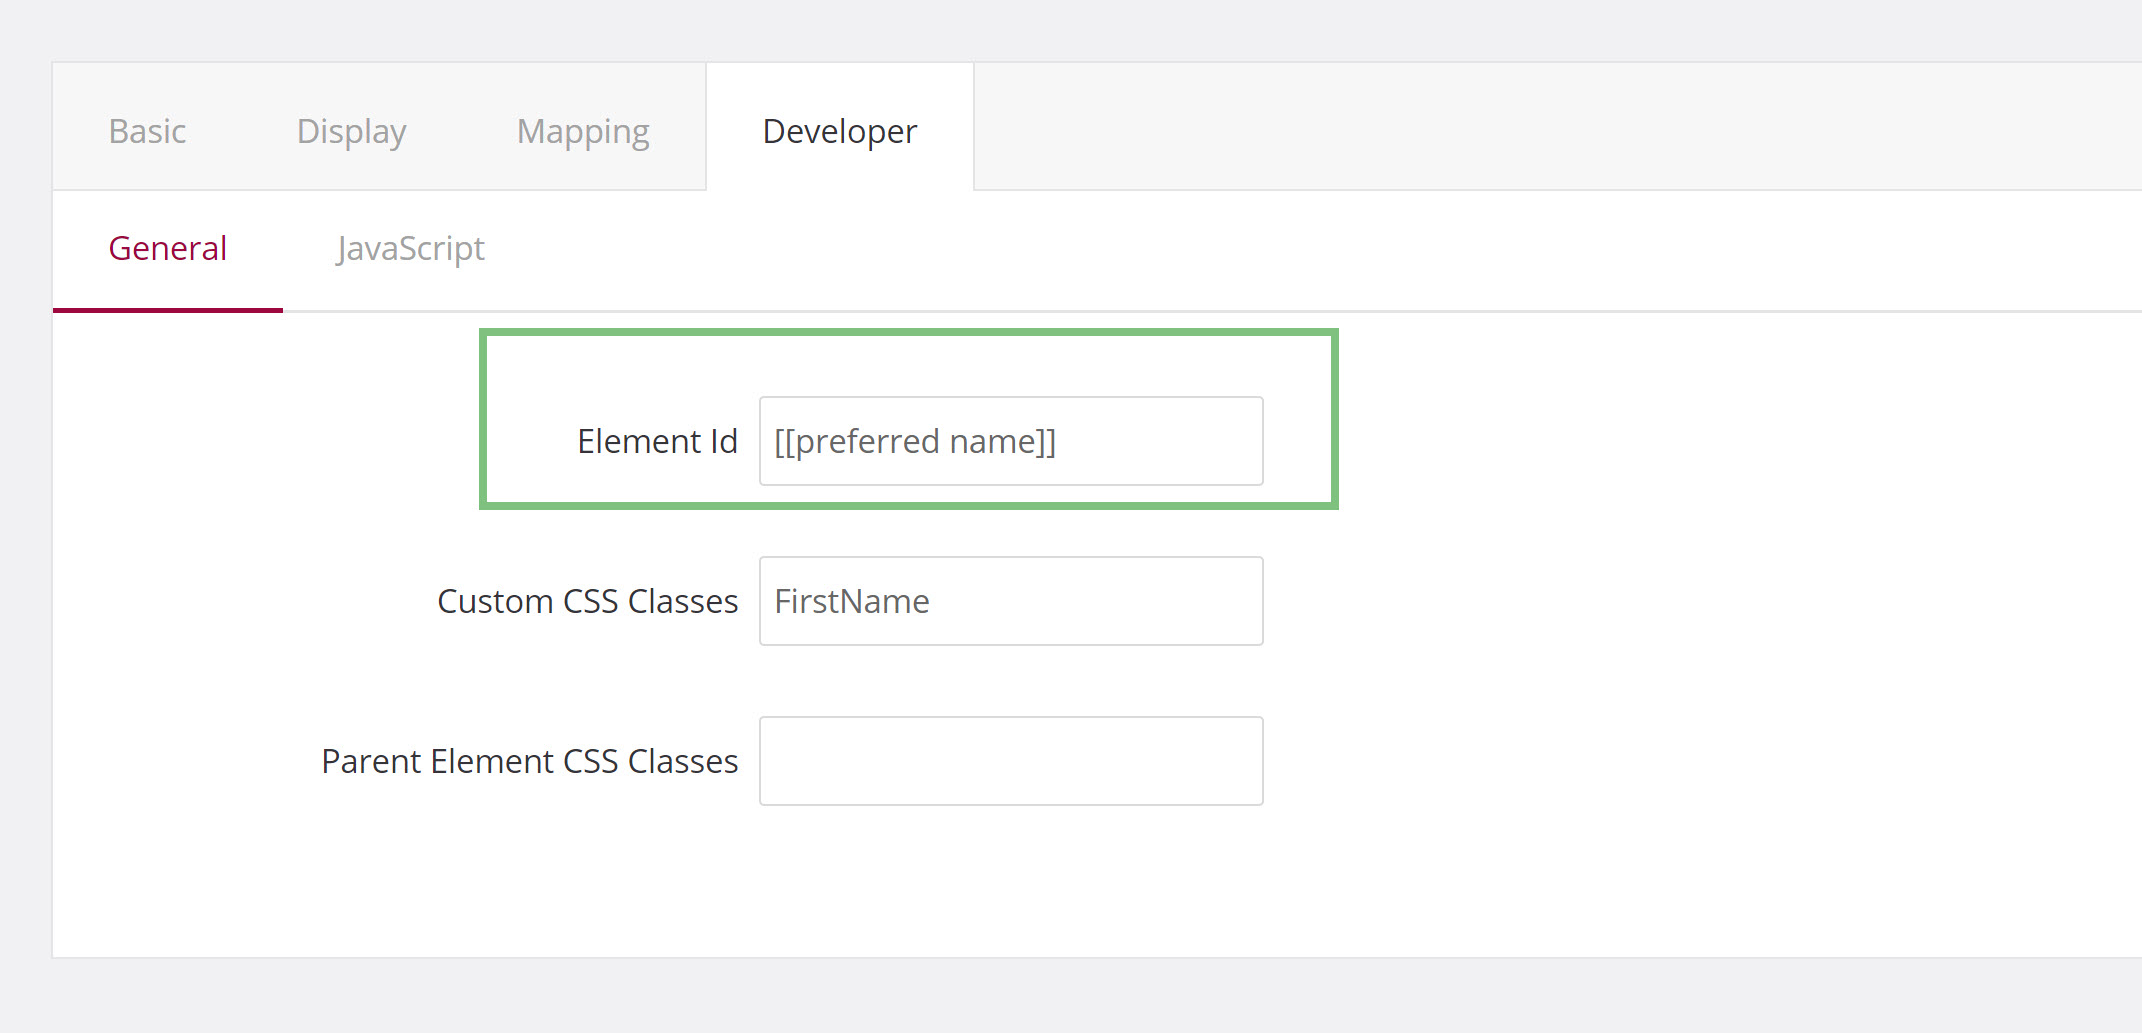
Step 2: Navigate to the Layout tab > Expand a section to expose the data fields > click on the Pencil icon

Step 3: On the Developer tab, enter the custom token into the Element Id text box and click SAVE.
Step 4: Return to your form.
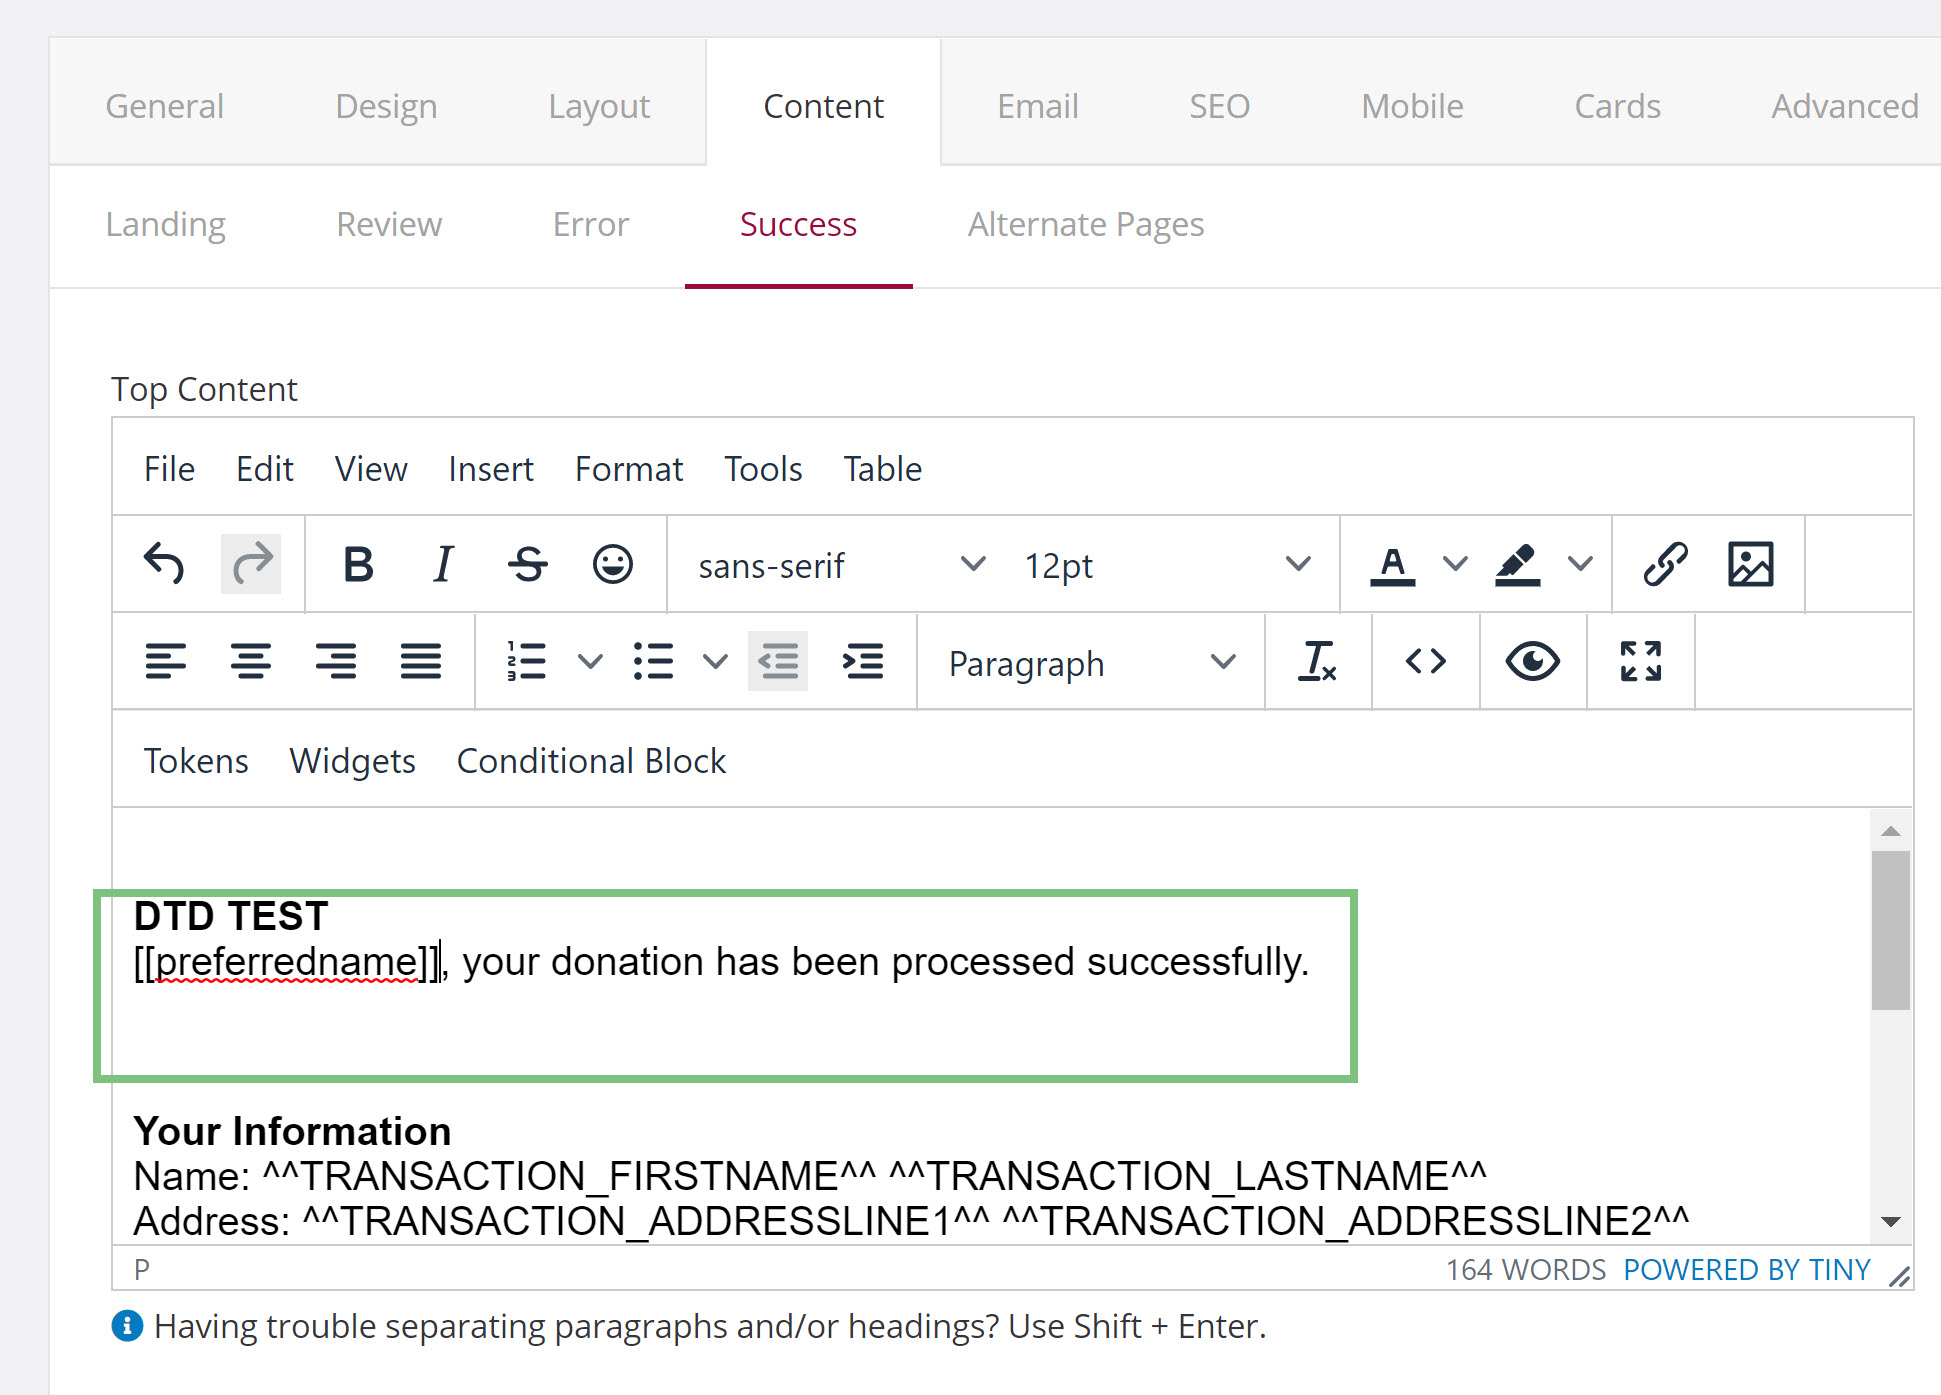
Step 5: Navigate to the Content tab > Success > in the content box > manually enter the field as created in step 3
Instructions: How to Use the Conditional Block
Conditional statements can be used across CharityEngine donor facing applications to customize content and donor experience based on real time data. By adding a conditional blocks to page content or email receipts, you can create different messages that will be displayed to your donors and contacts depending upon the data and tokens available.
Read our article here for more details.
Instructions: How to Configure Organizational Global Tokens
Global Organization Tokens are available throughout CharityEngine and reflect information configured about your organization. These tokens include data points like Organization Name and Website URL, as well as a default logo, which appears in the default User Center template and the easy form wizard templates.
Step 1: Navigate to the Configuration App > General > Account Settings to update or review the data configured for Global Organization Tokens.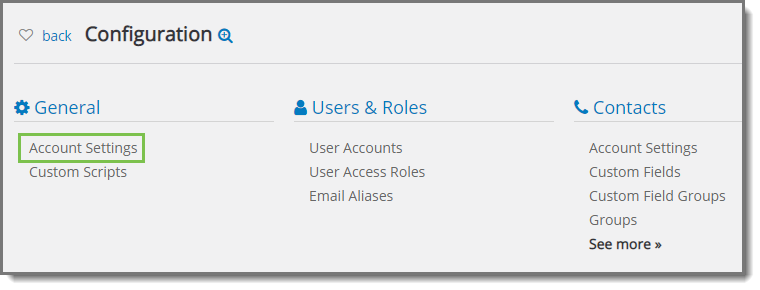
Step 2: The required and highly suggested fields are available at the top of the Account Settings page from the General tab.
Note: The Default Logo appears in the easy form wizard templates and autoresponders, as well as the default User Center template, while the other two logos are available to provide additional flexibility. Find the other logo fields click on Other Information (Optional) to expose additional organizational information elements.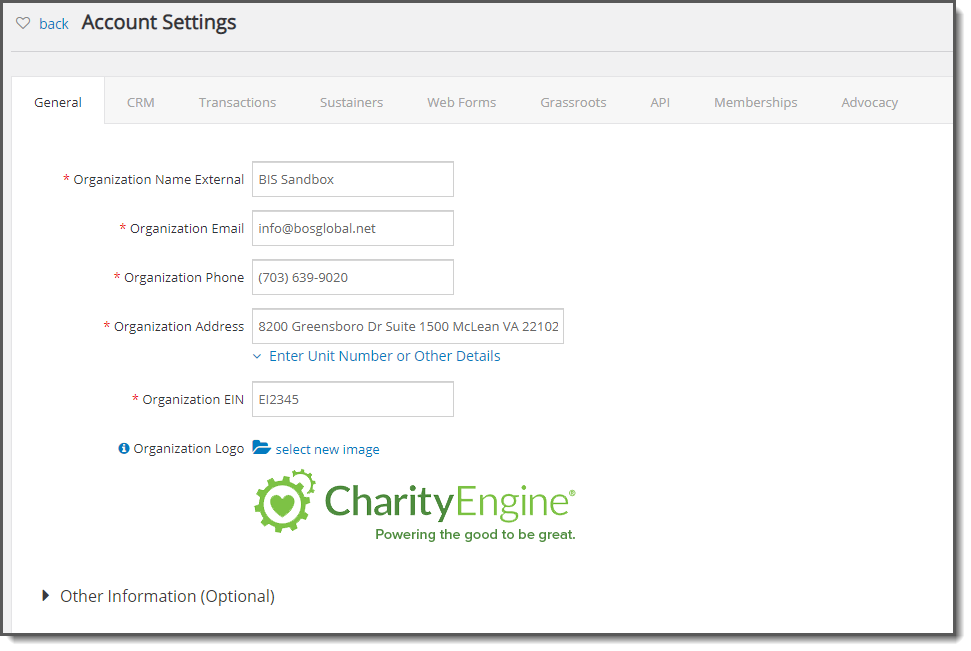
Step 3: The Global Organization Tokens appear in all of the token modals throughout the system. The example below is the email receipt/acknowledgment modal.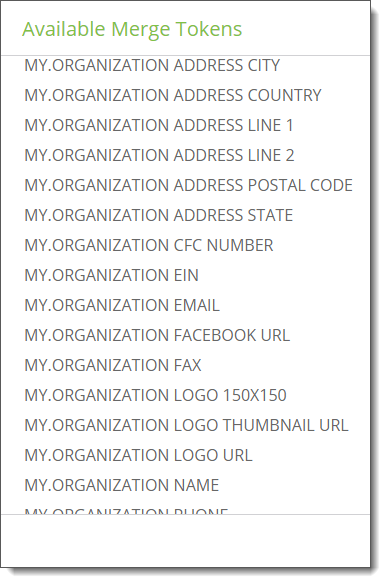
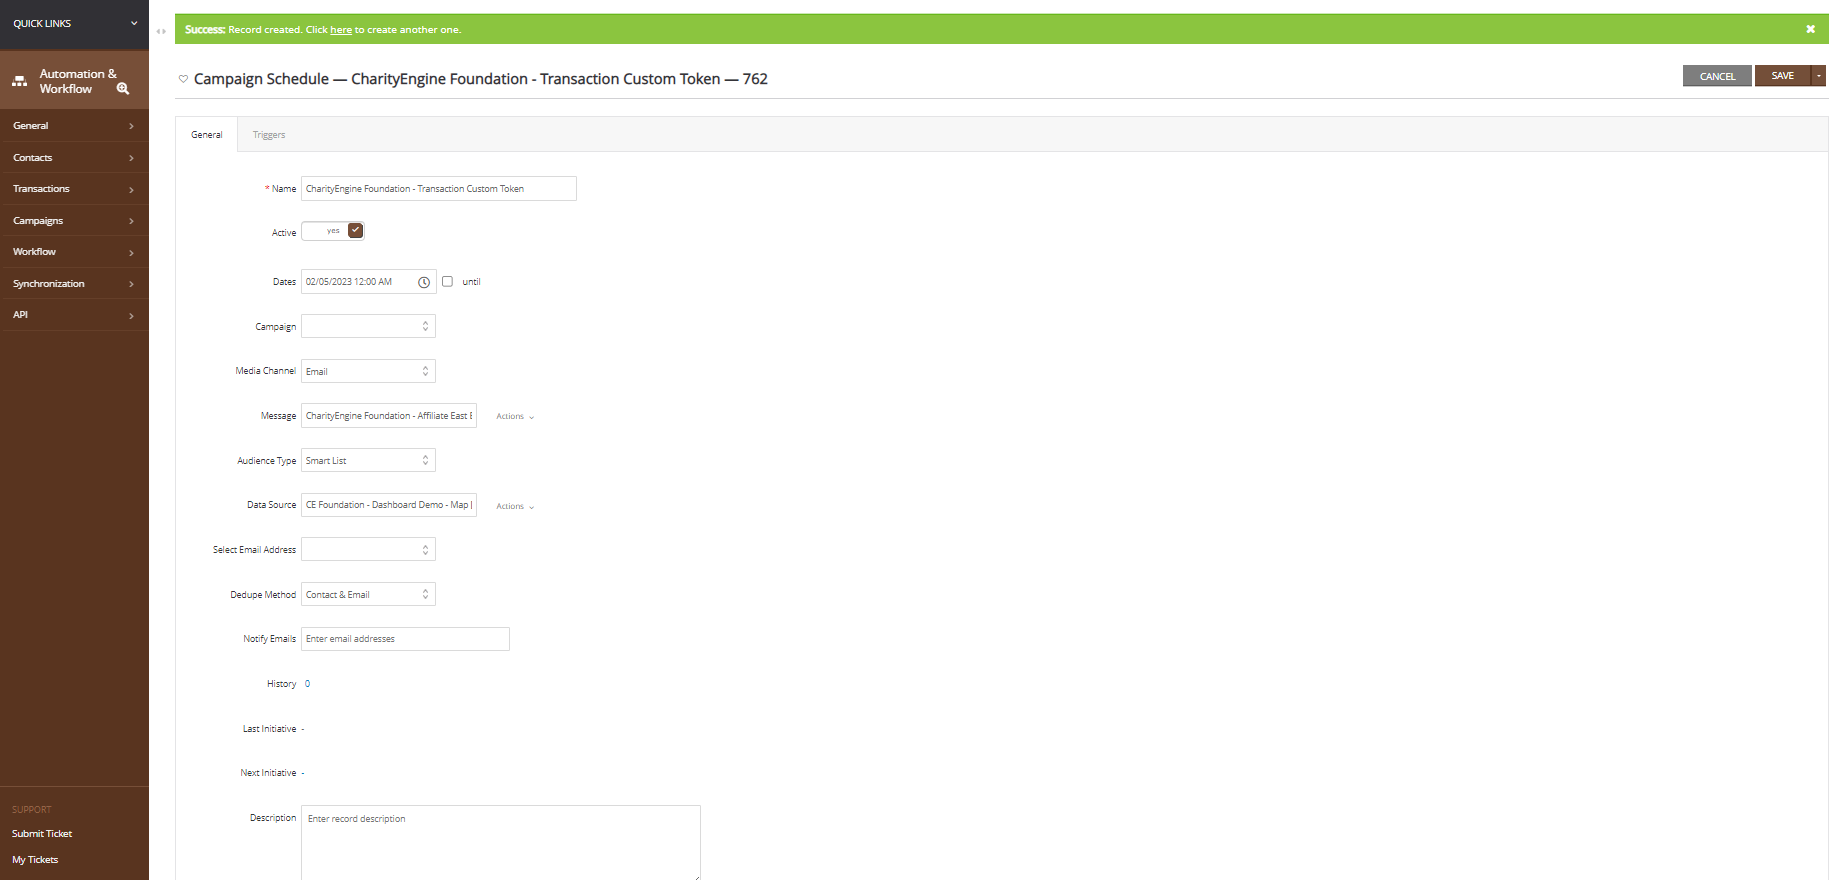
FAQs & Further Materials
Q. I'm using custom tokens in my communications series and they continues to fail. What should be done?
A. The Communication Series email workflow is designed for static email sends such as drip campaigns. As a result, custom tokens cannot be used within this feature and will result in failures for creation of the initiative. If you have a recurring email series and require the usage of custom tokens, this can be achieved by scheduling a recurring initiative. To do so, navigate to the Automation & Workflow > General > Queries > locate the query for use with your custom tokens and email audience > ACTIONS > Automated Email. Complete Name of your email job (required), start date, end date if appropriate, campaign assignment (optional), Message - locate your email creative, Select Email Address (to select primary email), Notify emails optional. Click SAVE and you will be exposed with a Trigger tab to schedule your frequency requirements.