Introduction
Capturing donor information during events like a telethon, radiothons or conferences, can be a great and easy way to build your donor base. In order to support your organization creating this type of form is much like creating any other type of form, however there are a few configurations that will need to be made when creating your form. These adjustments are needed to ensure 'auto populating' or 'auto filling' does not impact donor contact entry and avoids transactions being identified as fraud for payment transactions.
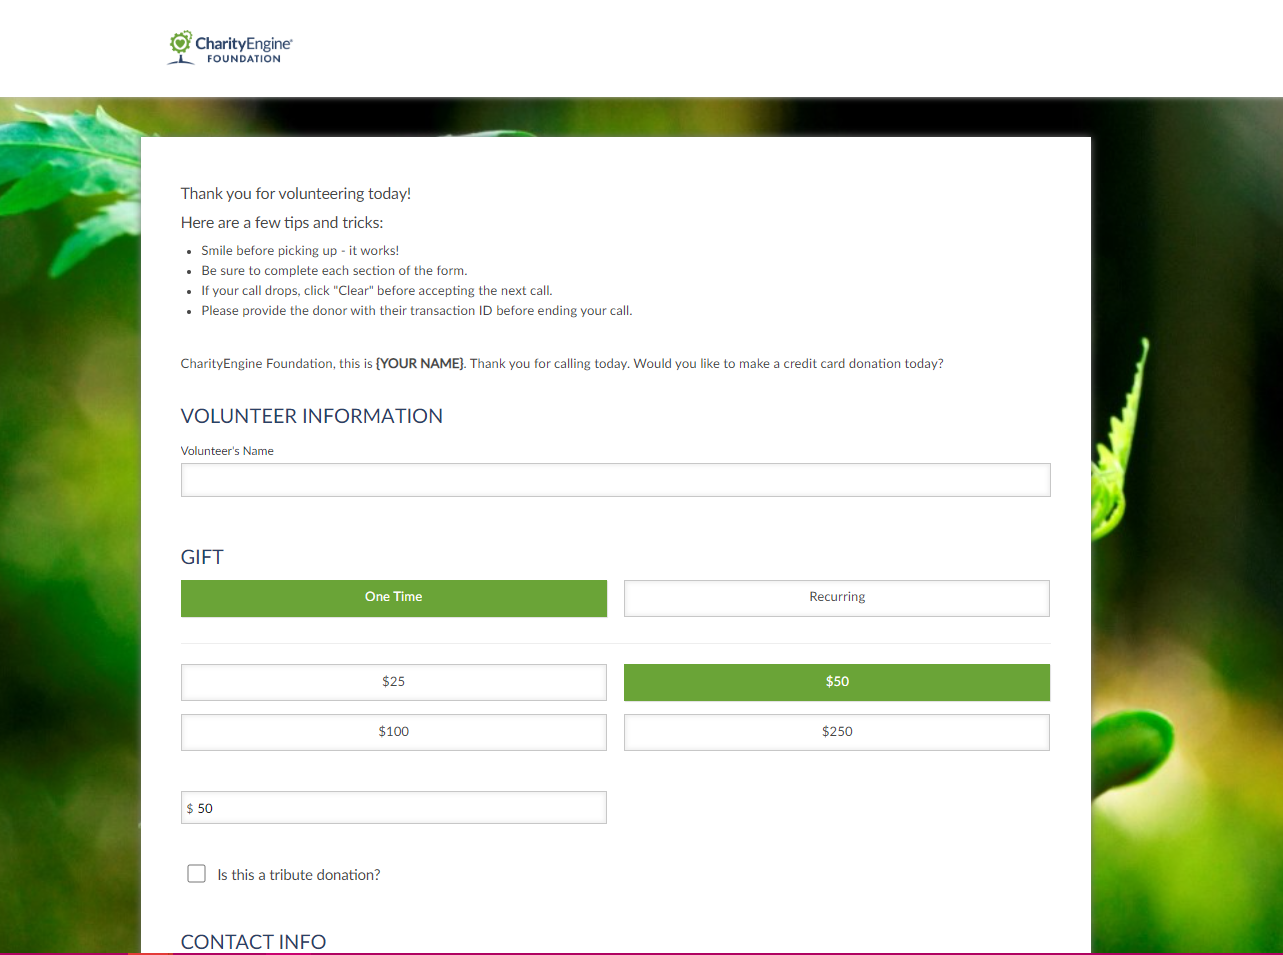
Table of Contents
- Introduction
- Prerequisites
- Instructions: Creating an Internal Form - Collecting your Volunteer's Name for Tracking
- Instructions: Creating an Internal Form - Leveraging Headers and Footers for Volunteer Scripting
- Instructions: Creating an Internal Form - Creating a Clear Button for Easier Usage by Volunteers
- Instructions: Creating an Internal Form - Clearing Cookies
- Instructions: Creating an Internal Form - Easy Form Reset
- Instructions: Creating an Internal Form - Setting Trusted IPs
- Frequently Asked Questions & Further Reading
Prerequisites
- For assistance on creating a donation form, read this article.
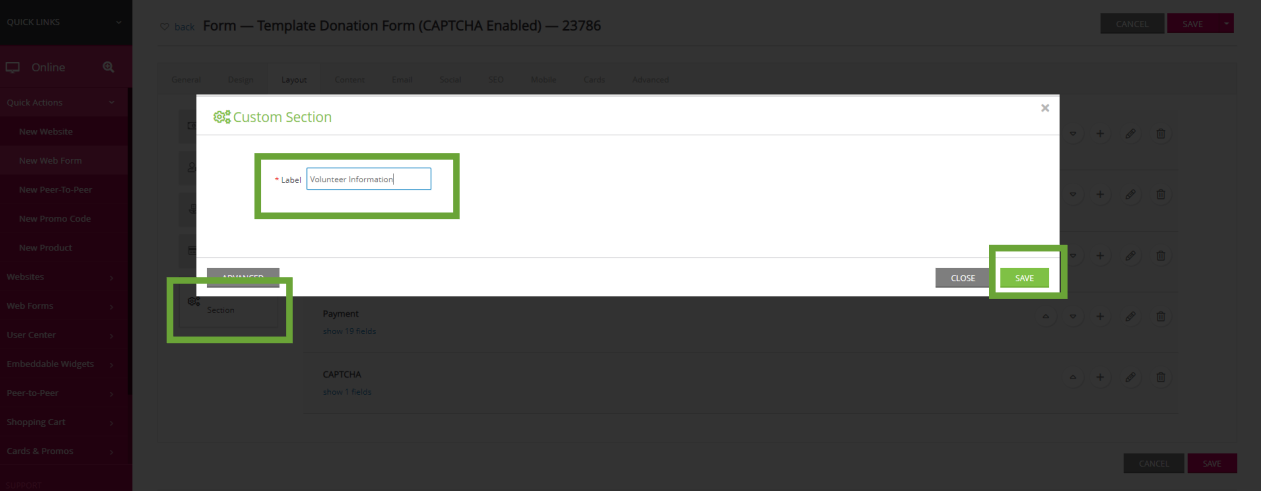
Instructions: Creating an Internal Form - Collecting your Volunteer's Name for Tracking
Best Practice: CharityEngine also suggest adding a text field for the volunteer to enter the volunteer's name. This will allow your organization to track who took the donor phone call and processed the transaction.
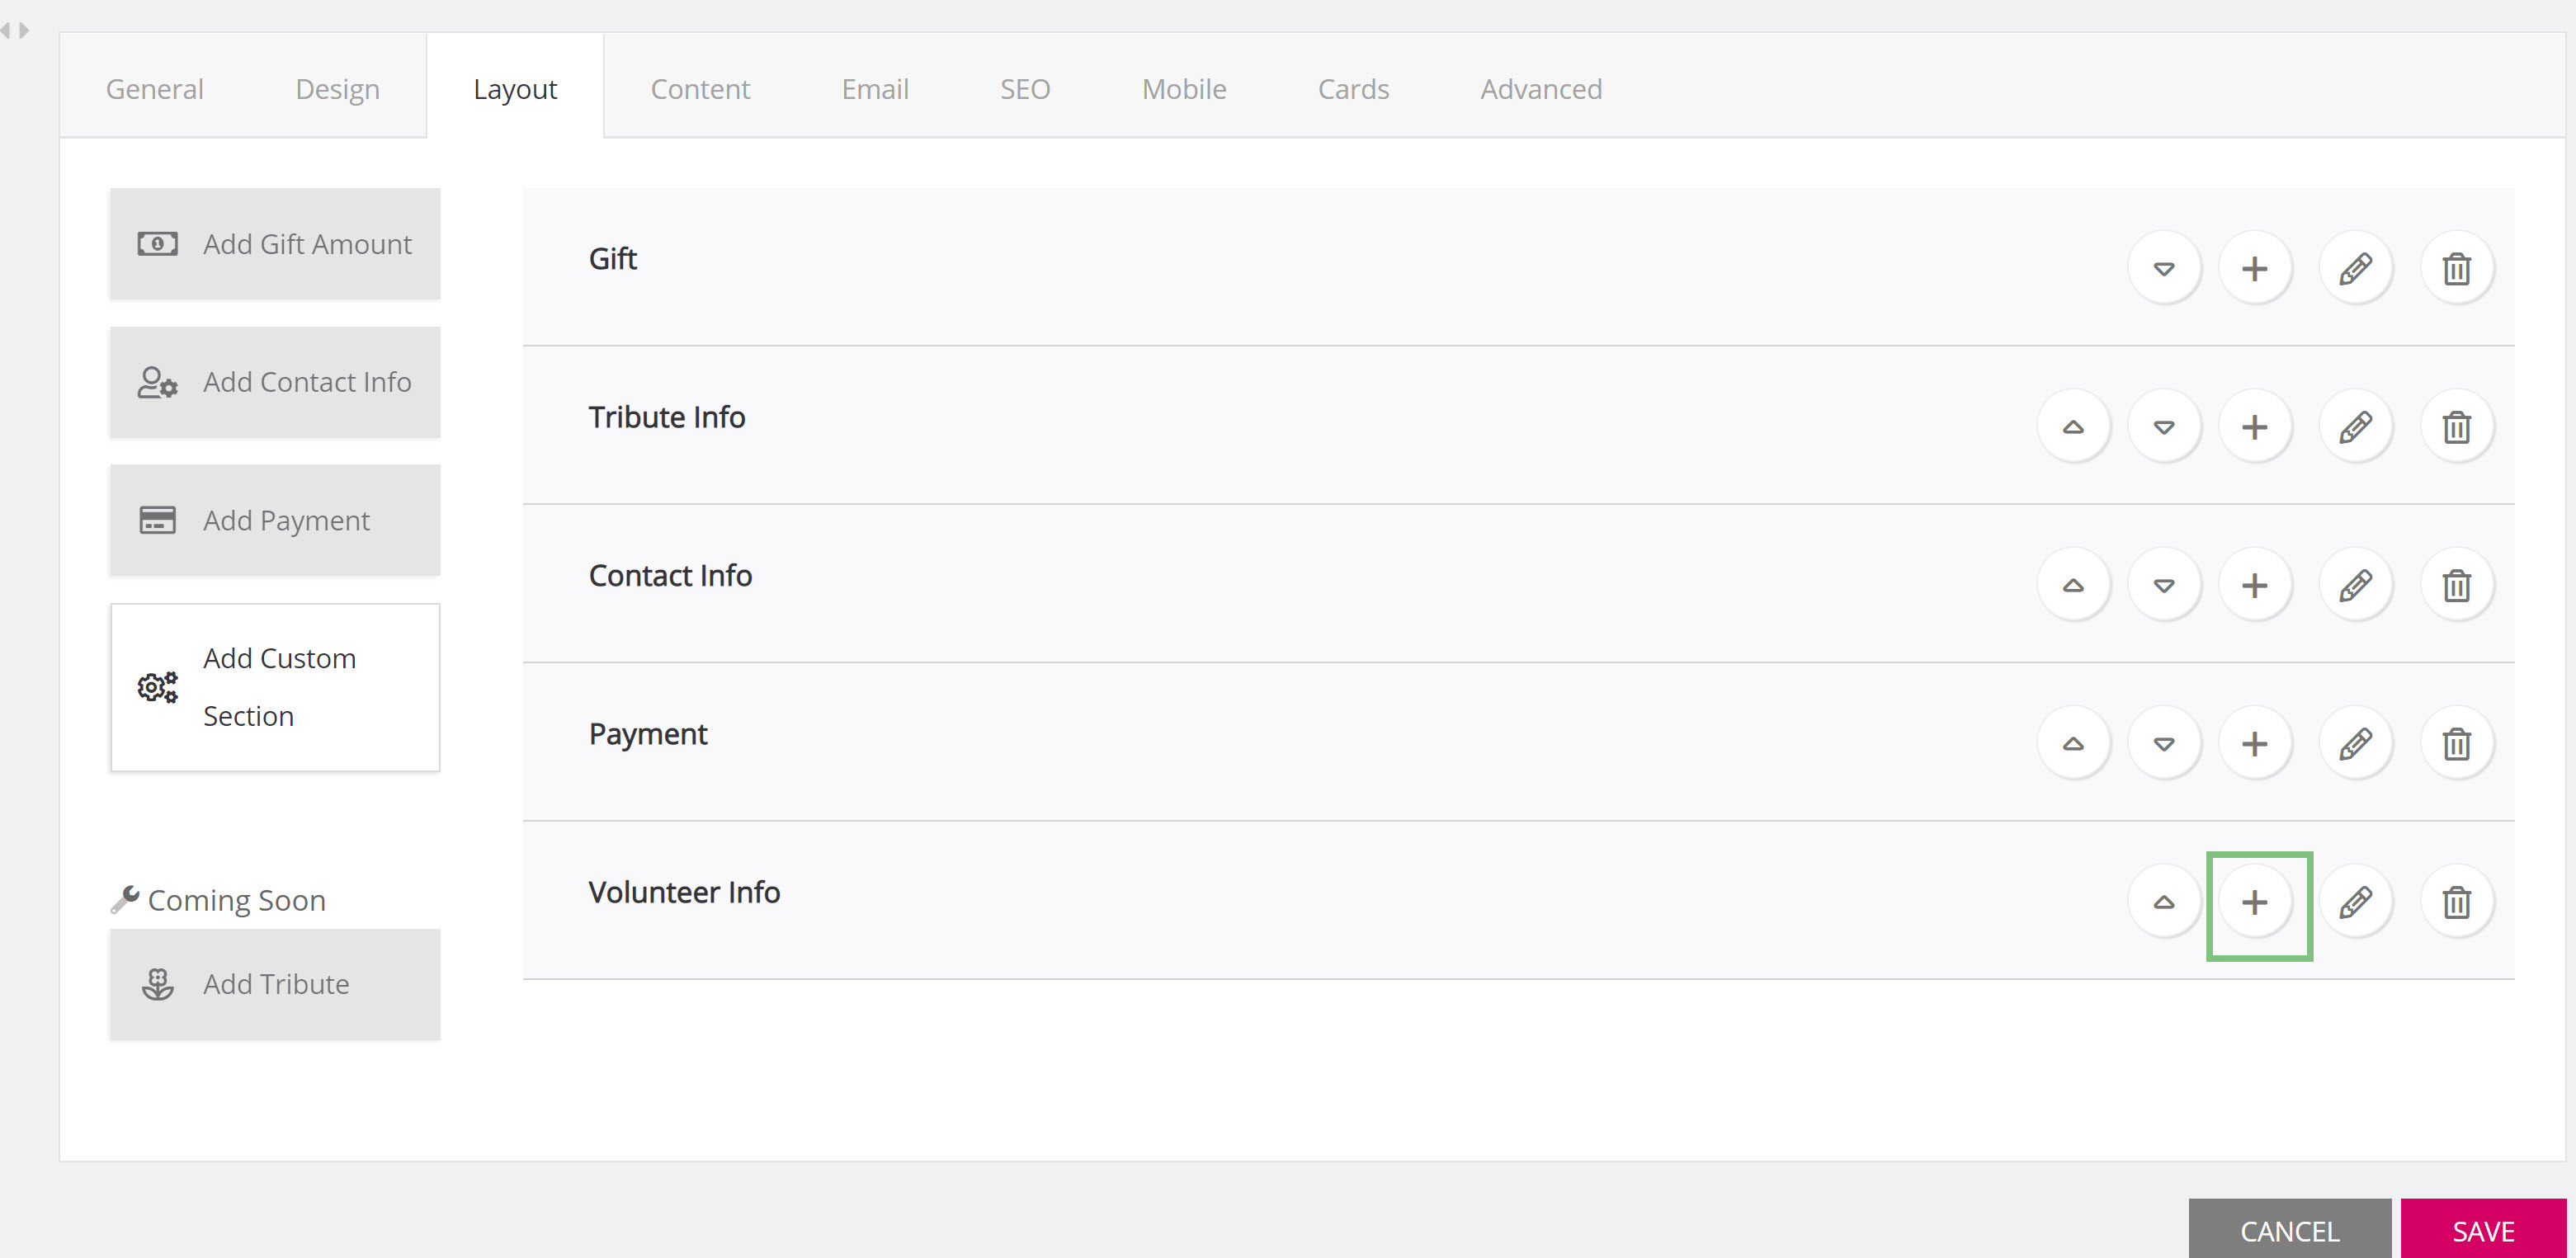
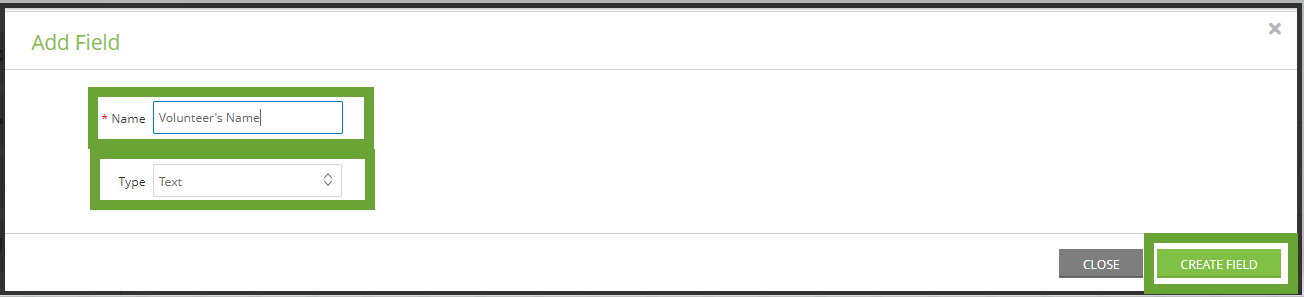
- Click the "+" button to add a field to the section
-
-
Click CREATE FIELD
-
Instructions: Creating an Internal Form - Leveraging Headers and Footers for Volunteer Scripting
Leveraging the header and footer section is a great way to add reminders, scripts or other important information for your volunteers.
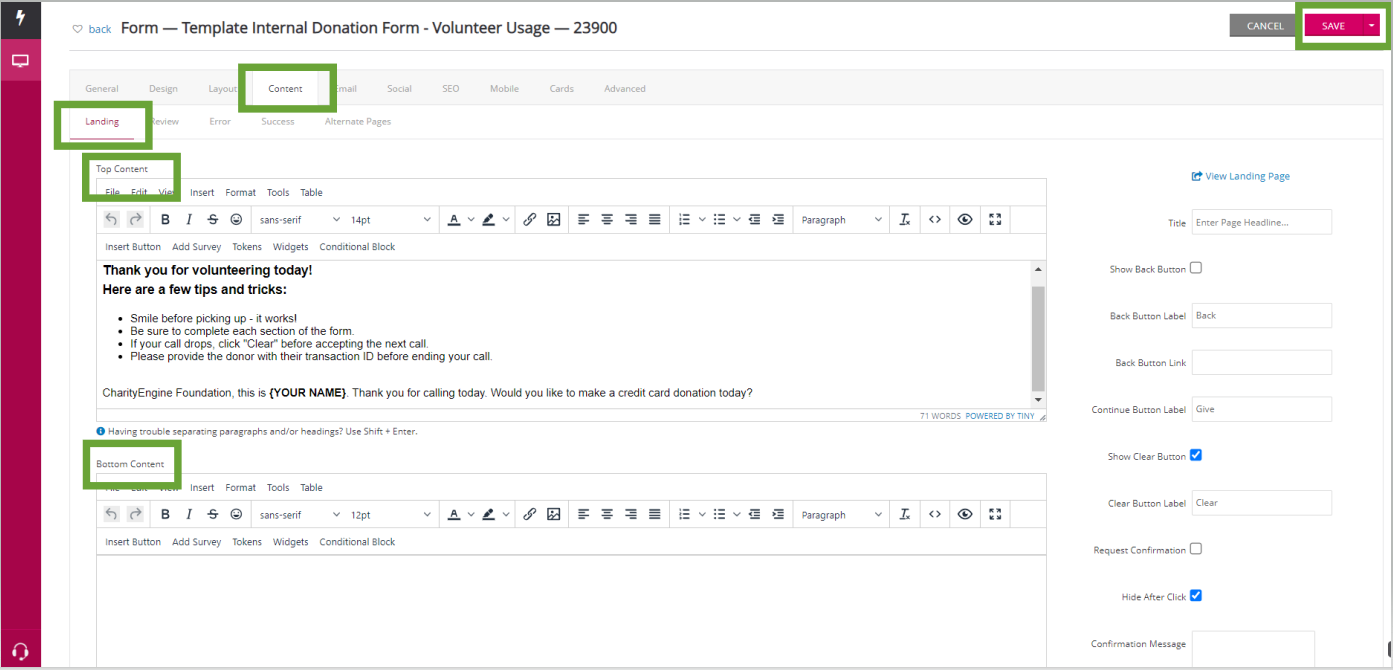
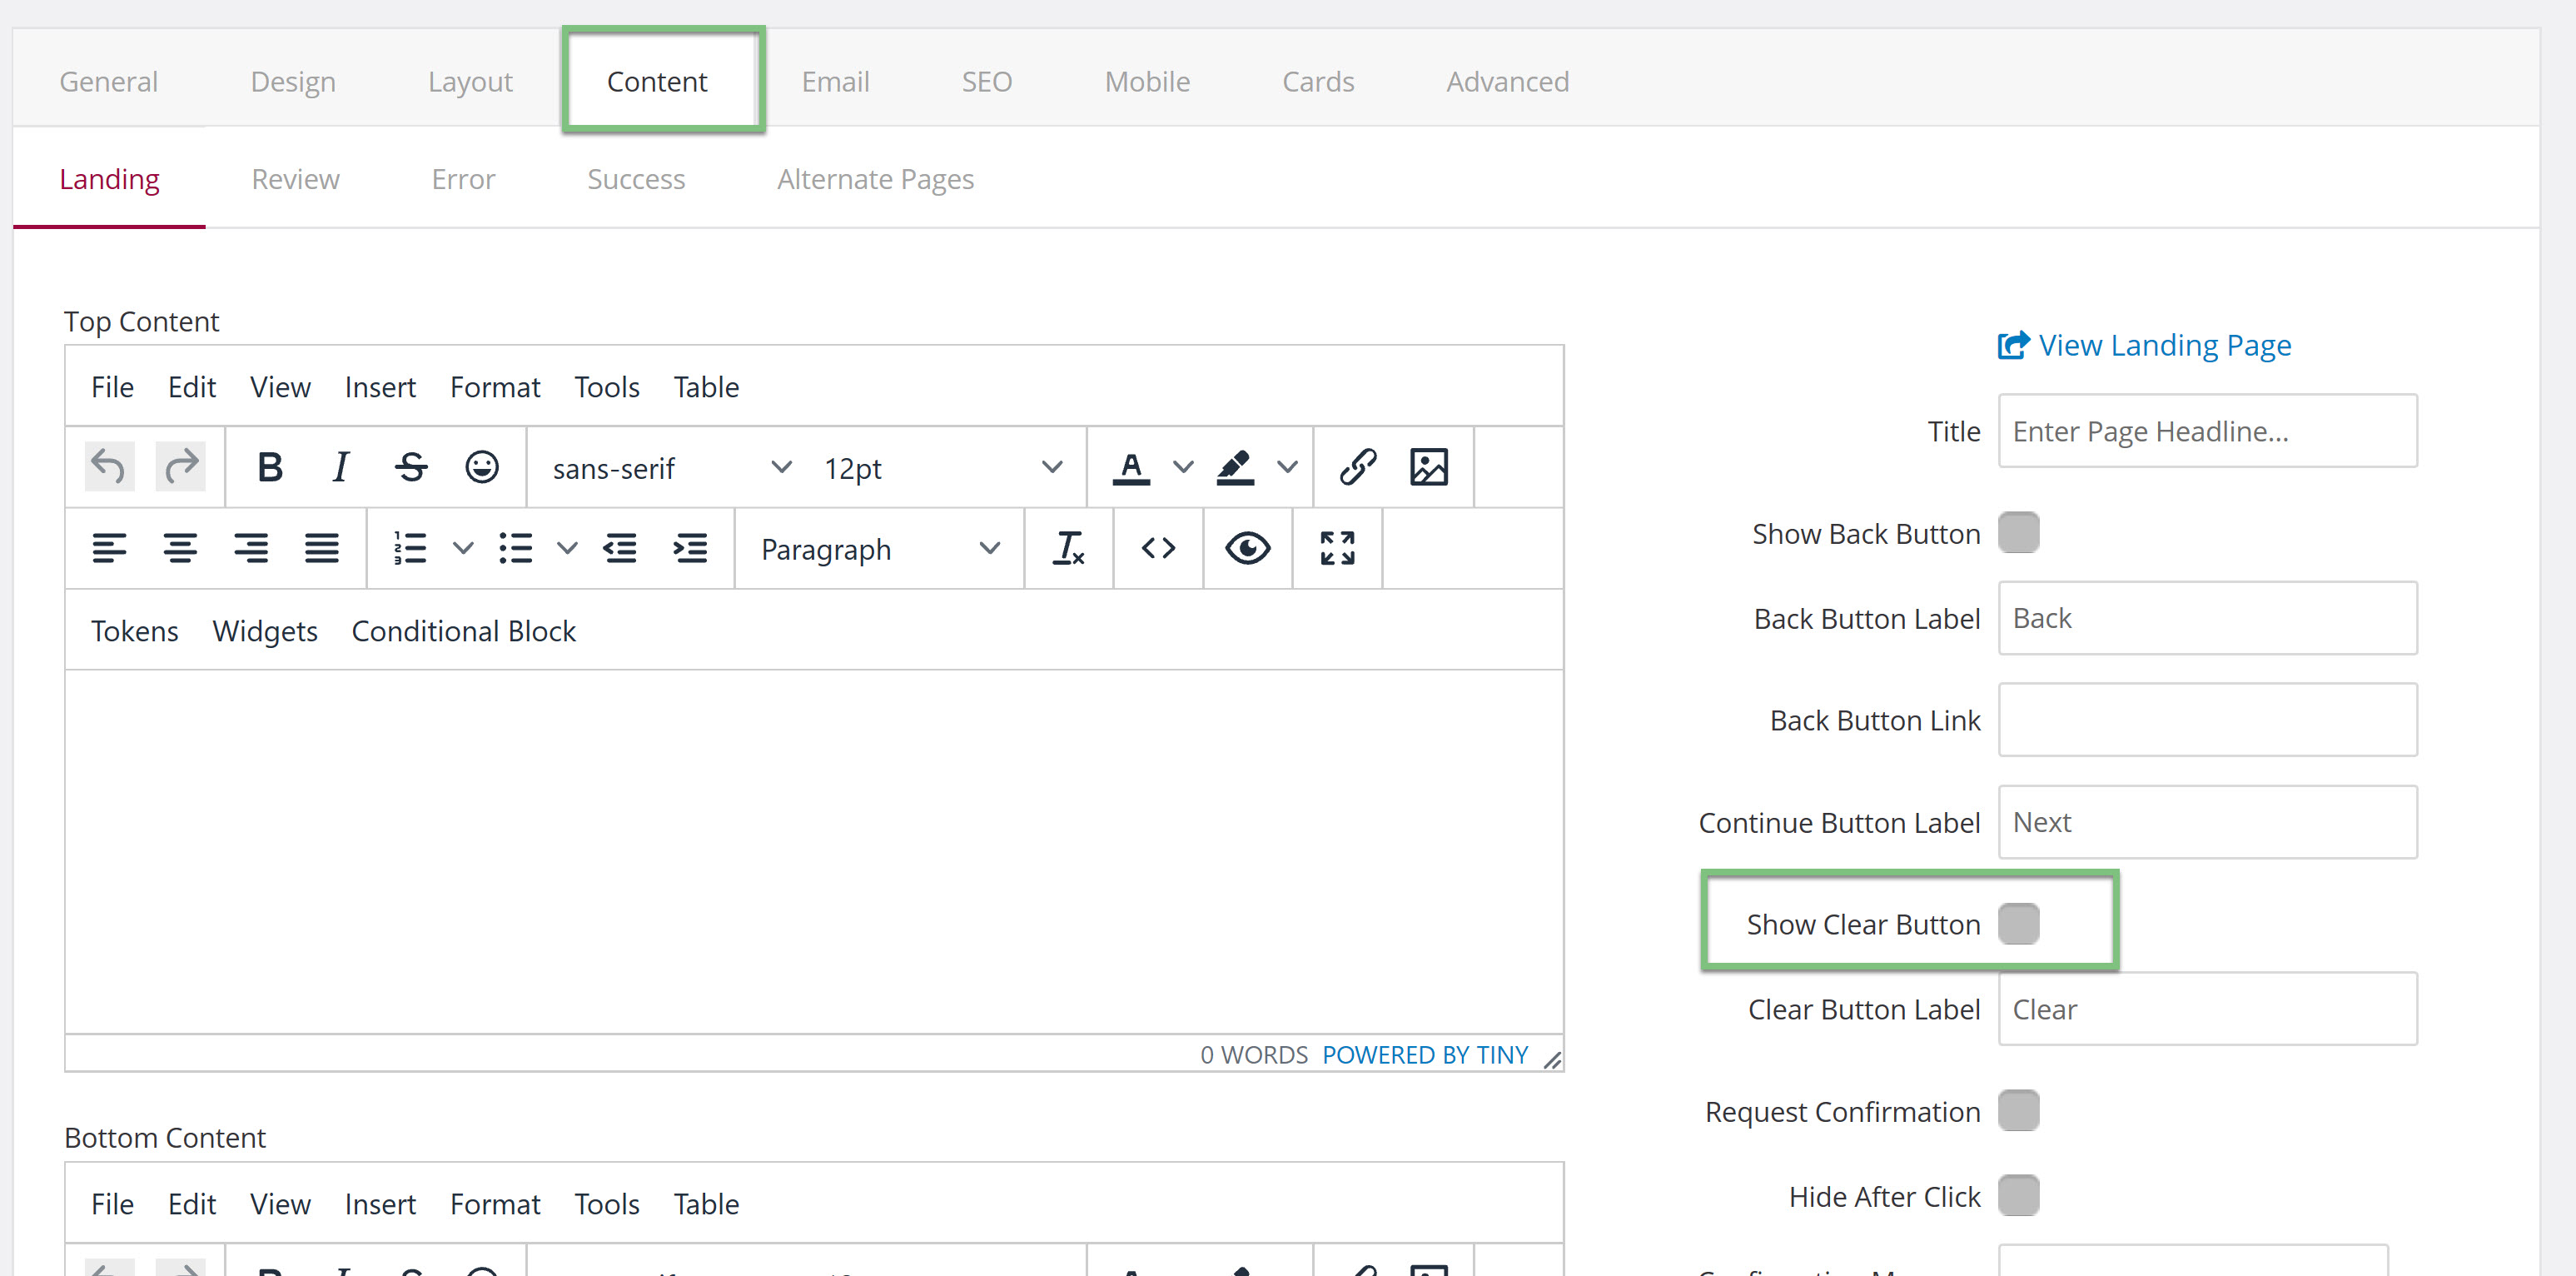
Instructions: Creating an Internal Form - Creating a Clear Button for Easier Usage by Volunteers
The first configuration that will need to be made when creating a form for a telethon, or other internal form, is to enable a clear button to ensure the donor information is cleared once the call has ended with the volunteer. This will prevent the volunteer from mistakenly inserting the wrong donor information into the form.
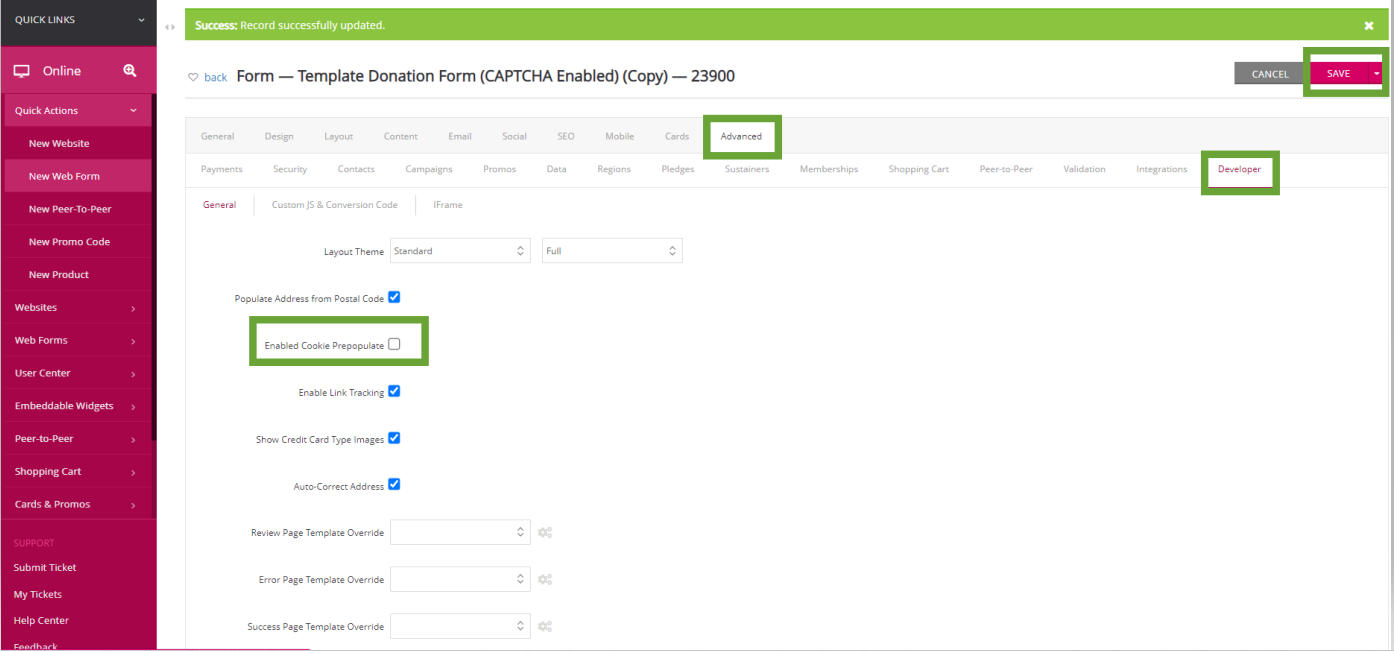
Instructions: Creating an Internal Form - Clearing Cookies
Next you will need to make a configuration that will clear the cookies to ensure that donor information is not saved and will not populate when the volunteers begins to take the next new donor's information.
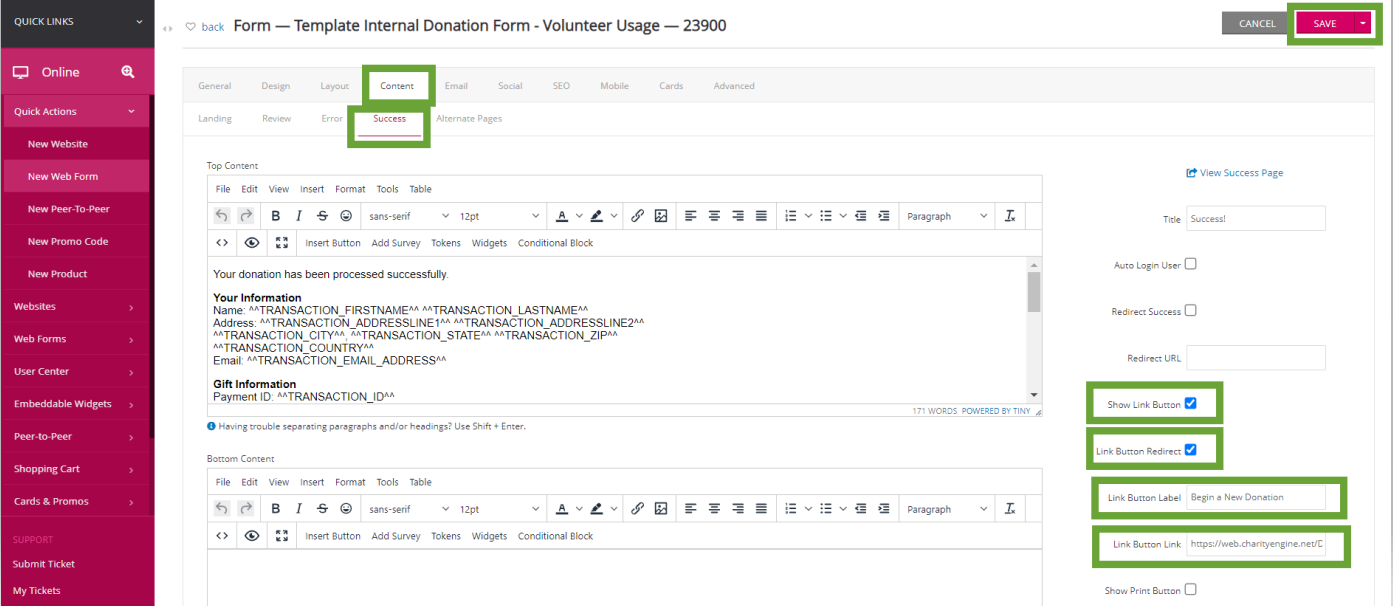
Instructions: Creating an Internal Form - Easy Form Reset
The next configuration that you will want to make is adding a link to the success page that will send the volunteer back to the beginning of the form. This will save time when taking calls and provide an easy way for the volunteers to navigate back simply and quickly.
-
- You can also view your Success Page by clicking View Success Page
- You can also view your Success Page by clicking View Success Page
Instructions: Creating an Internal Form - Setting Trusted IPs
The next configuration that you will need to have is use to restrict who can use your internal form. This includes the ability for you to limit the form accessibility to only those IPs you have approved.
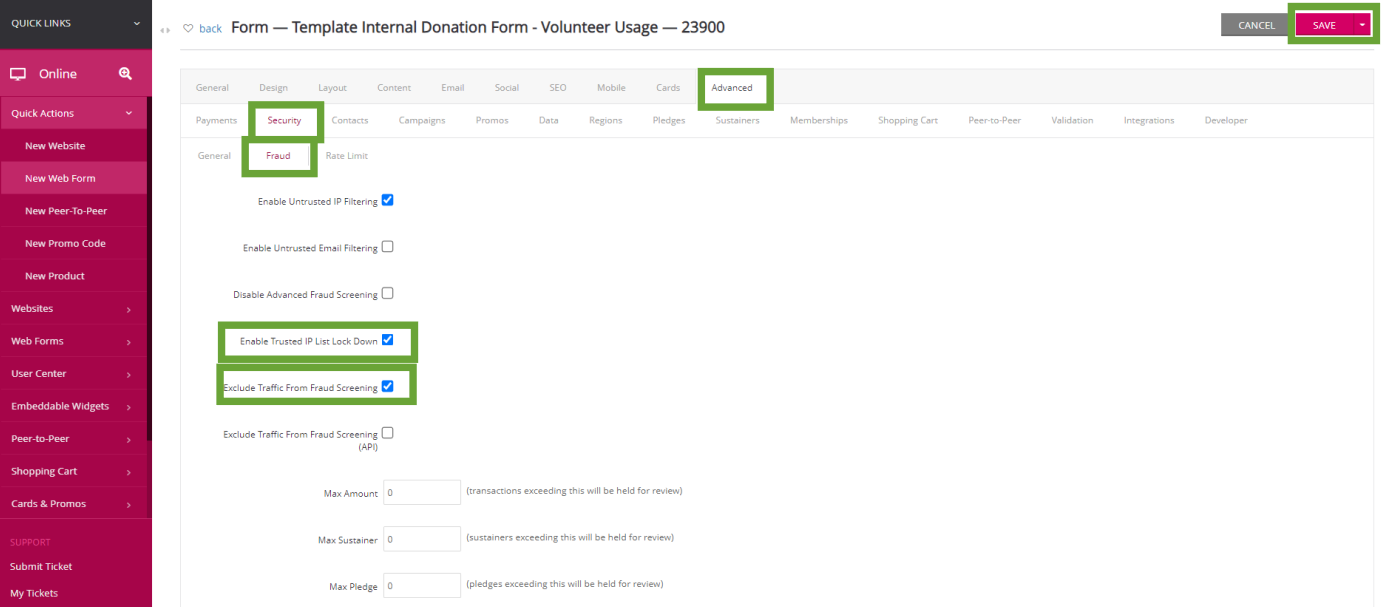
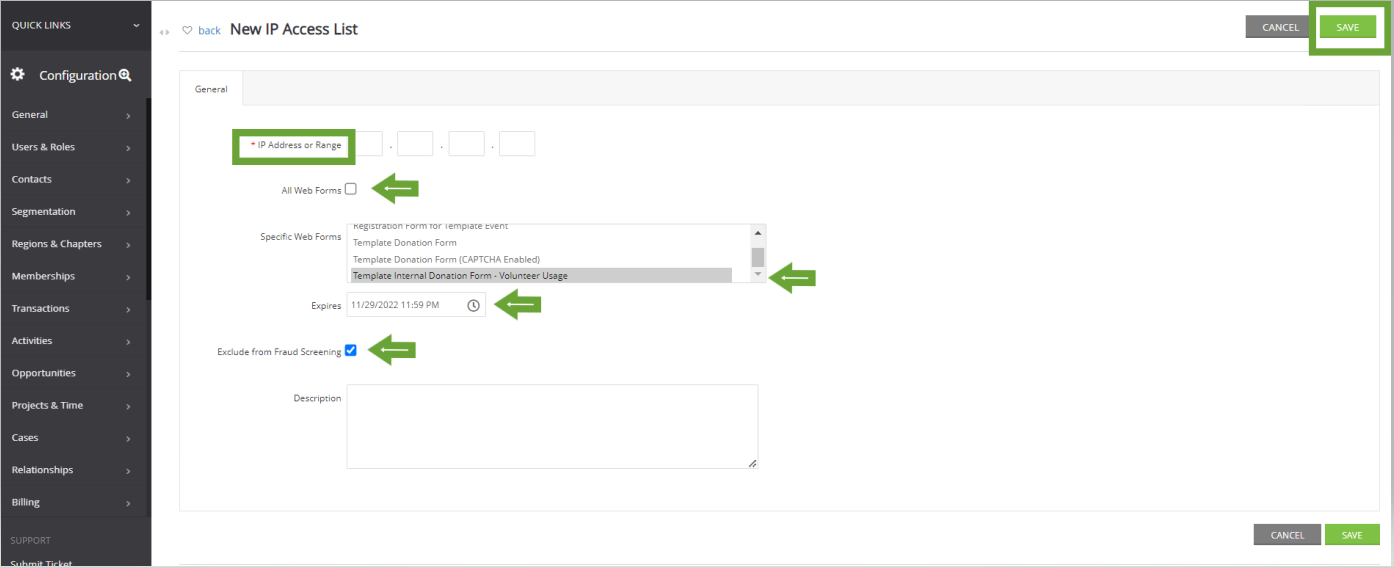
Next, add your Whitelisted IPs by navigating to:
Frequently Asked Questions & Further Reading
Q. How do get started building a new donation form?
A. For assistance on creating a donation form, read this article.
