Introduction
Users can create and send an individual invoice to collect a one-off payment. This is useful in several situations: sending someone on a recurring payment a new invoice so they can pay using a different payment method, billing someone who has promised to pay, invoicing someone for purchased merchandise, or simply sending a one-off bill payment request to anyone who owes a payment.Table of Contents
Instruction - Create a New Invoice
Step 1: Navigate to Accounting > Collections > Billing.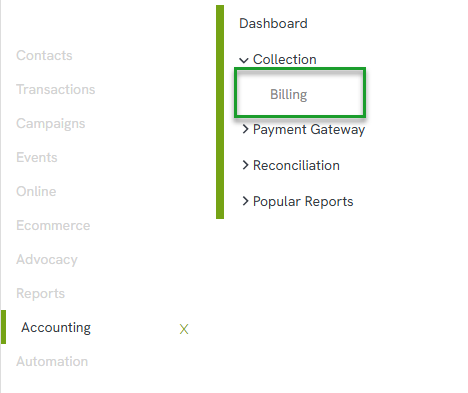
Step 2: Click the plus button (Add New) to create a new invoice.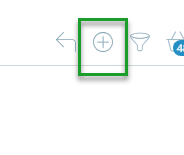
Step 3: Fill out the invoice details, including the amount and any tax-deductible portion, and indicate whether it is a one-time invoice.
Step 4: Confirm the Invoice Date, which defaults to the date the invoice is created. Then set the Due Date. The due date must be on or before the date the invoice will be sent – if the due date is still in the future when the invoice is delivered, the payer will see a message that no payment is due yet.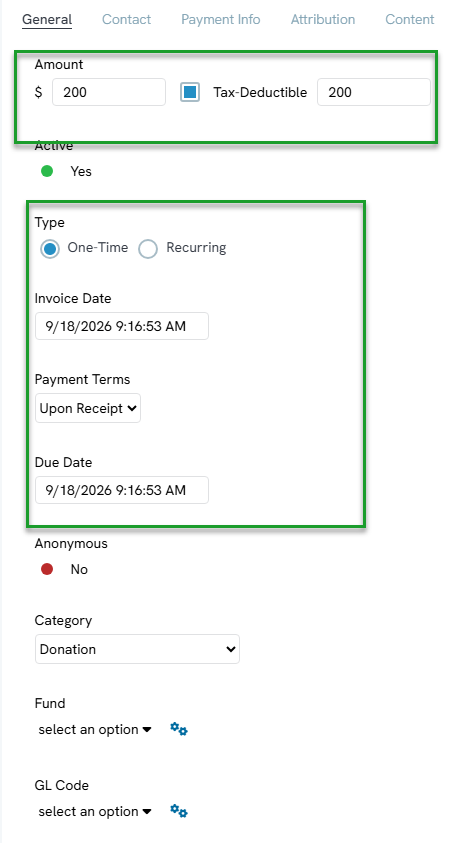
Step 5: Fill in the Category, Fund, and GL fields as needed.
Step 6: Click the Contact tab and search for and select the person this invoice is for.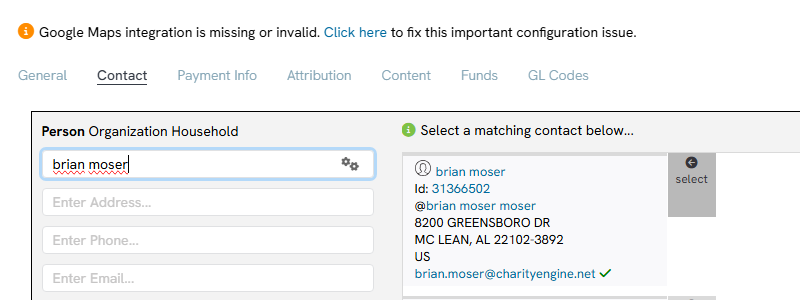
Step 7: Click the Payment Info tab and set the expected payment method (for example, Credit Card), based on how the payer is expected to pay. This can be left as any method, and does not restrict how the payer ultimately pays.
Step 8: Click the Attribution tab and apply any attributions relevant to internal reporting or workflow needs.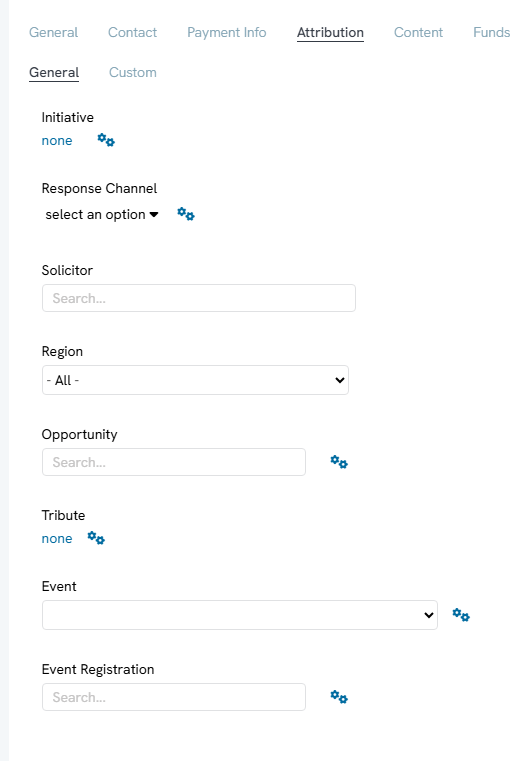
Step 9: Click the Content tab and use the WYSIWYG editor to describe what the invoice is for (for example, "T-shirts," "Event Registration," or "Promise to Pay"), so the payer clearly understands the charge.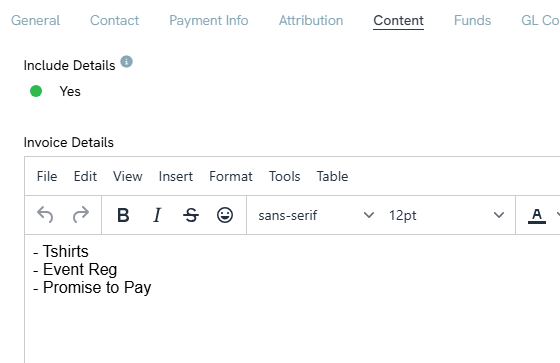
Step 10: Review the Funds tab and GL Codes tab as needed.
Step 11: Click Save to create the invoice.
Instructions - Send the Invoice for Payment
Step 1: Navigate back to Accounting > Collections > Billing.
Step 2: Use the quick filter (for example, filtering to invoices created today) and click Search to locate the new invoice.
Step 3: Hover over the invoice and click the ellipsis (three dots) menu, then select Pay Online Now to view the full payment experience the payer will see.
Step 4: Click Details within this view to see the content entered on the invoice describing what the payment is for.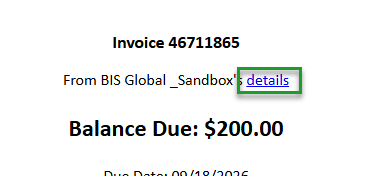
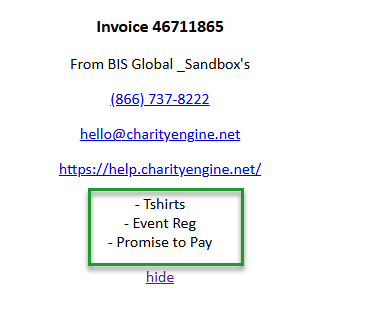
Note: From this screen, the payer is able to edit the payment amount (increase or decrease it) and choose their own payment method before submitting payment.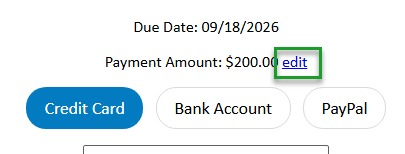
Step 5: Copy the URL shown in the address bar – this is the payment link for this invoice.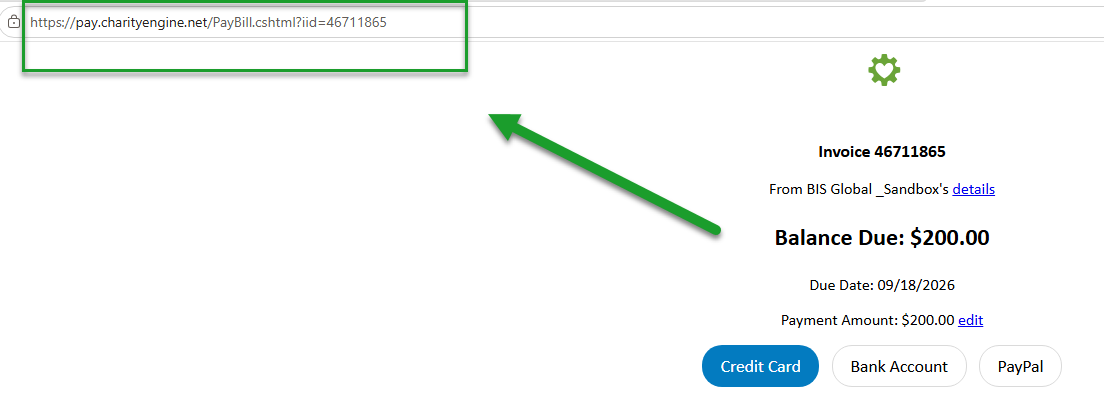
Step 6: Deliver this URL to the donor or registrant however is most convenient – for example, by emailing it through CharityEngine, sending it from a personal email account (Outlook, Gmail, etc.), or texting it directly or through a CharityEngine SMS blast. Once they open the link, they'll see the amount due and be able to complete payment.
FAQs & Additional Reading
Q. What happens if the invoice's due date is in the future when I send it?
A. The payer will see a message that no payment is due at this time. Set the due date to today (or earlier) if the invoice needs to be payable as soon as it's sent.
Q. Can the payer change the amount they pay?
A. Yes. The payment page lets the payer edit the amount, as well as choose their payment method, before completing payment.
Q. How do I actually get the invoice to the payer?
A. Copy the payment URL from the address bar on the Pay Online Now screen and send it however you'd like – through CharityEngine email or SMS, a personal email, or a text message.
