Assigning Groups, Tags, and Opt-In Lists Through Importer
When importing contacts, users can also assign the contact to groups, tags, and opt-in lists. This will help when sending emails and segment data based on the organization’s workflow, as the contacts will already be grouped together by the group, tag, or opt-in list.
Prerequisites
Before importing contacts and assigning them to a group, tag, or opt-in list, make sure the group/tag/opt-in list has been created. Creating these attributions ahead of time will make it easier when selecting the attribution.
- If you need assistance creating an opt-in list, read this article.
- If you need assistance creating a group or a tag, read this article.
Note: A Group, a Tag, and an Opt-In List each serve a different purpose – Groups and Tags are used to organize and segment contacts within the CRM, while Opt-In Lists specifically control which contacts have consented to receive a particular type of communication. If you're not sure which attribution type fits your workflow, see the linked articles above for more detail.
Instructions
To assign these attributes while importing contacts:
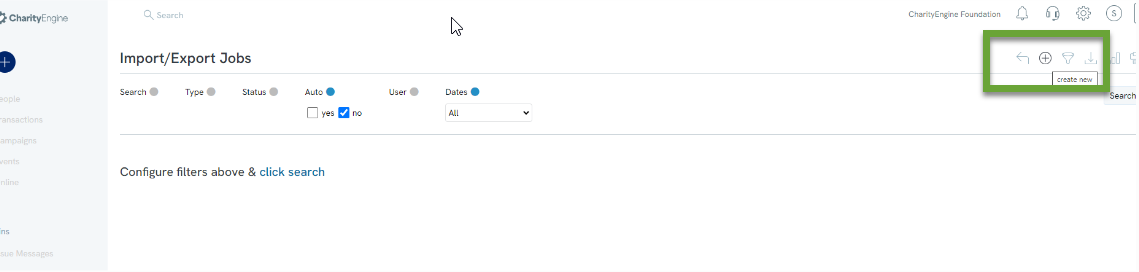
Step 1: Navigate to Automation App > General > Import and Export
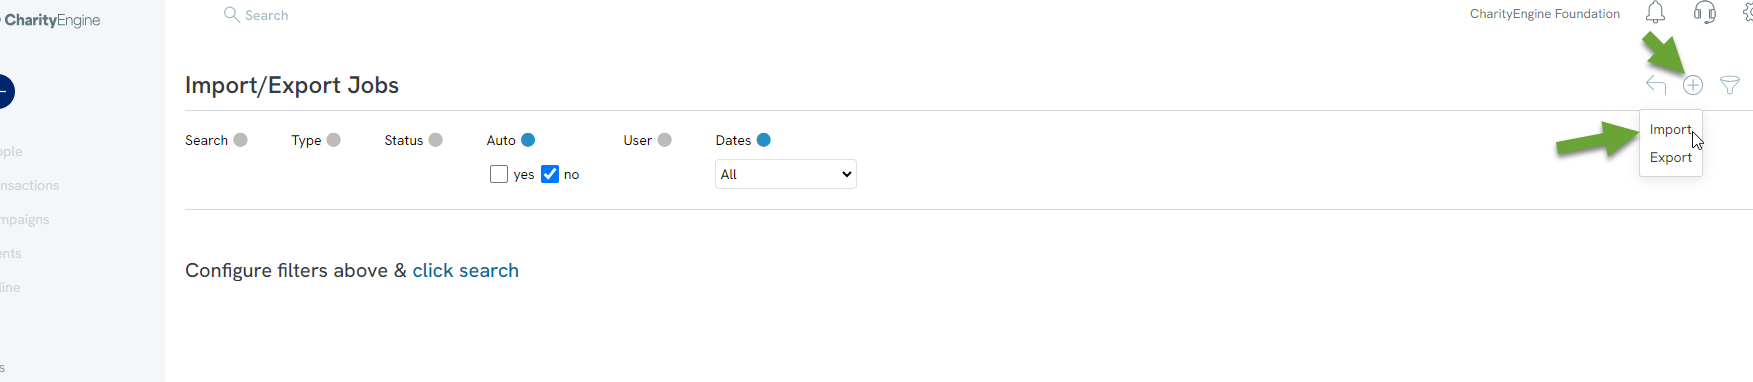
Step 2: Click the PLUS icon to Create New
Step 3: Select Import, just as when completed upon initial importing
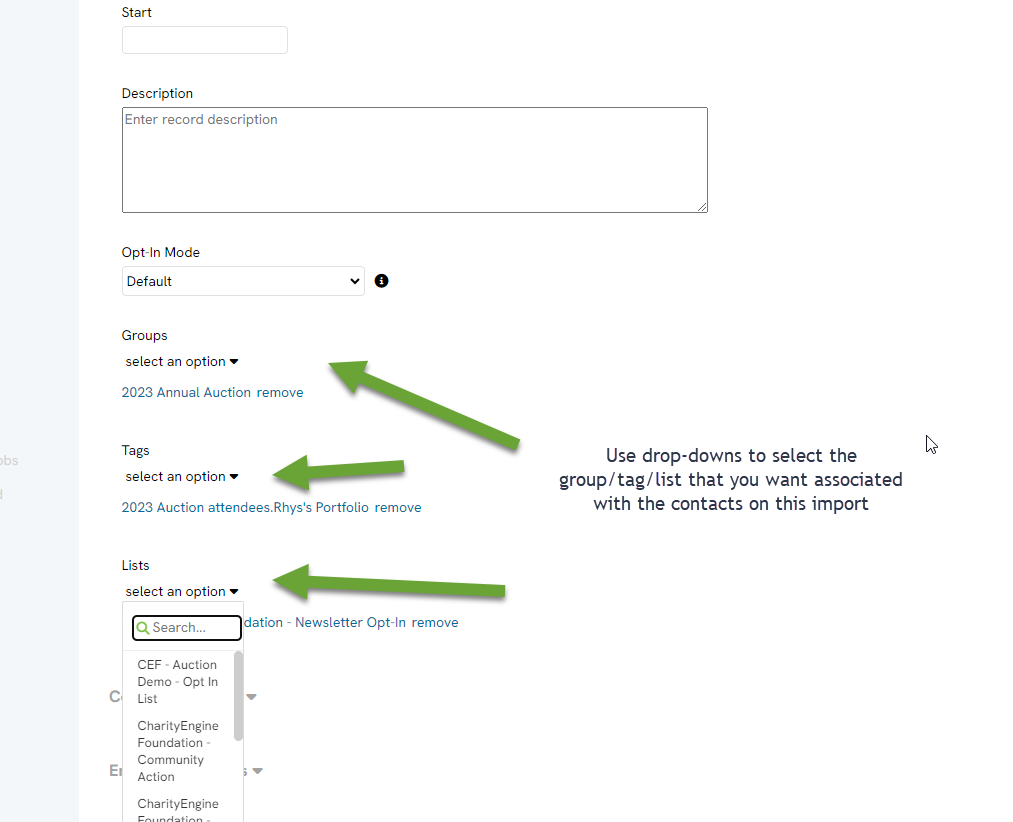
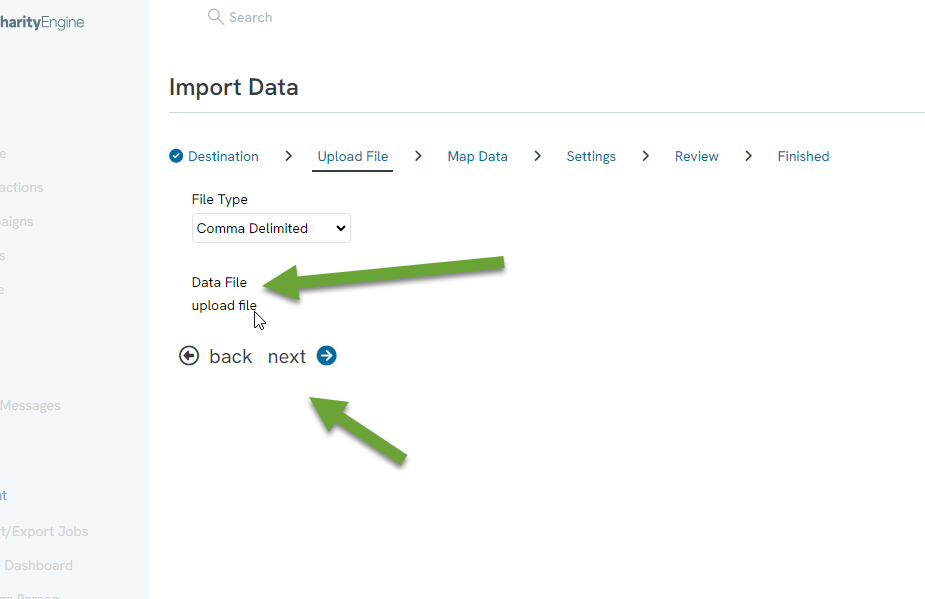
Step 4: The user will see three expandable sections under the Import To drop-down named CRM Group Assignment, CRM Tag Assignment, and List Assignment. Expand the sections using the arrow beside the name of the section.
CRM Group Assignment: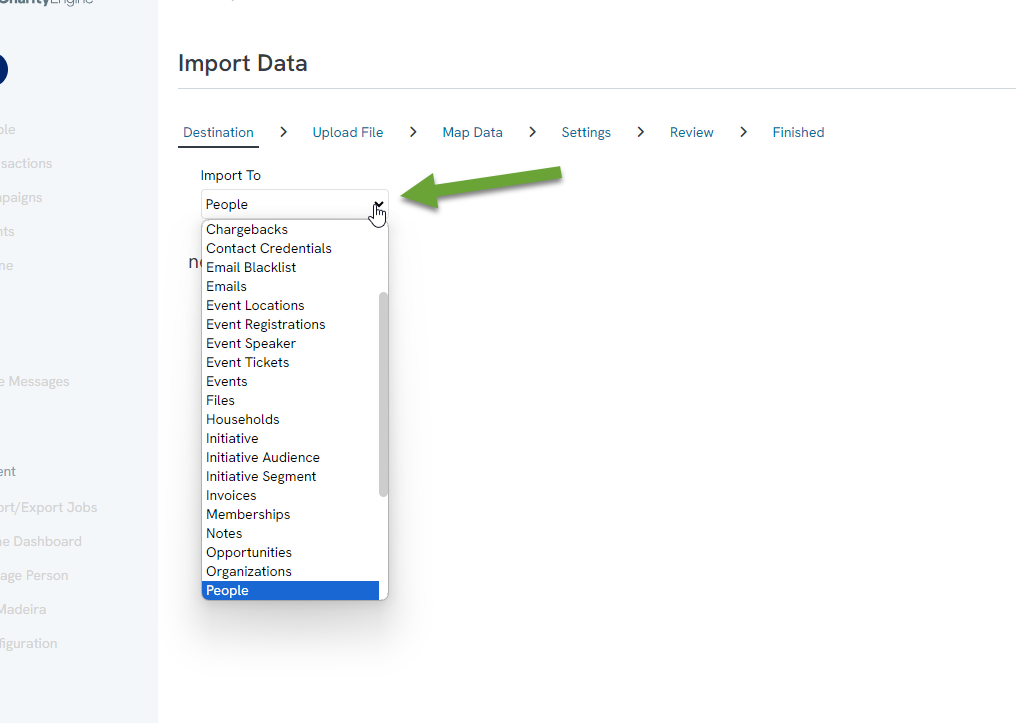 CRM Tag Assignment:
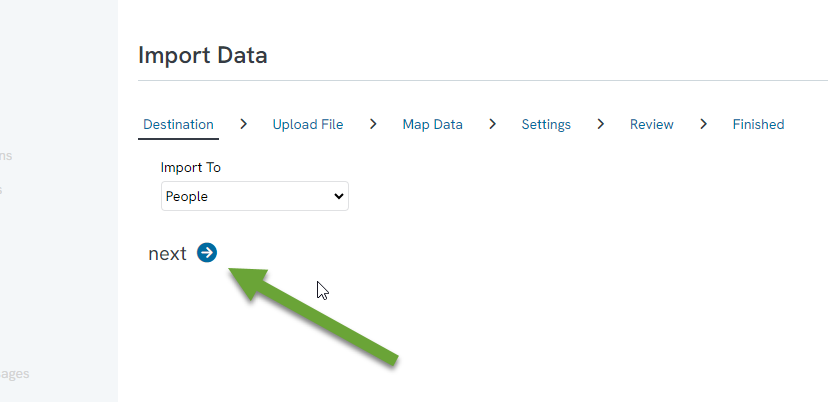 List Assignment (Opt-In List):
 Expanded section example: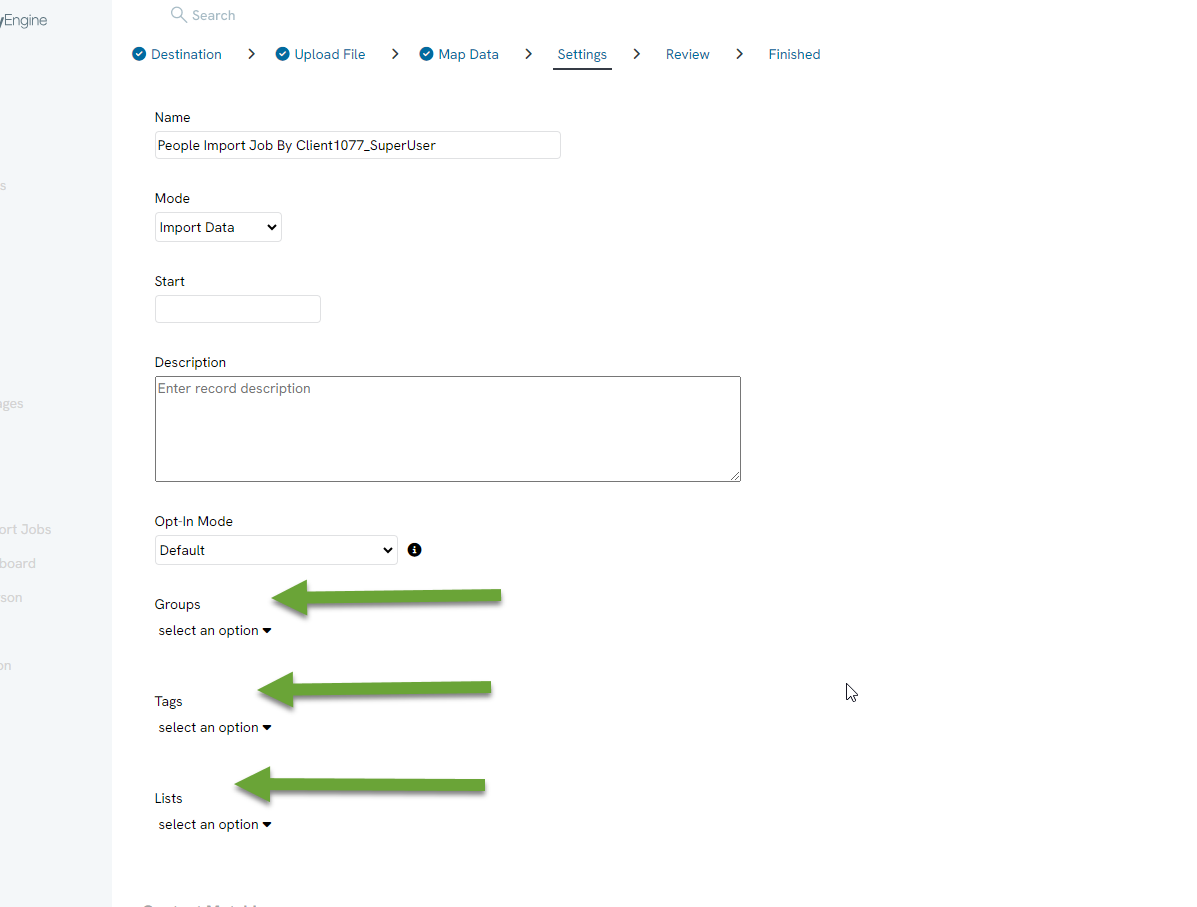
Step 5: Assigning and creating a Group, a Tag, and an Opt-In List are done the same way. If the user has already created these attributions, use the drop-down to select the group.
Note: If the user assigns the group, tag, or opt-in list to the contact record using the above method, all contacts within the import will be appended with the selected attribution. This is an additive action – existing group, tag, and opt-in list assignments on a contact are not removed or overwritten by this process.
Note: Group, Tag, and List Assignment sections can all be used within the same import – you are not limited to assigning a single attribution type per import.
FAQs & Additional Reading
Q. What is the process to bulk remove contacts from an Opt-In List?
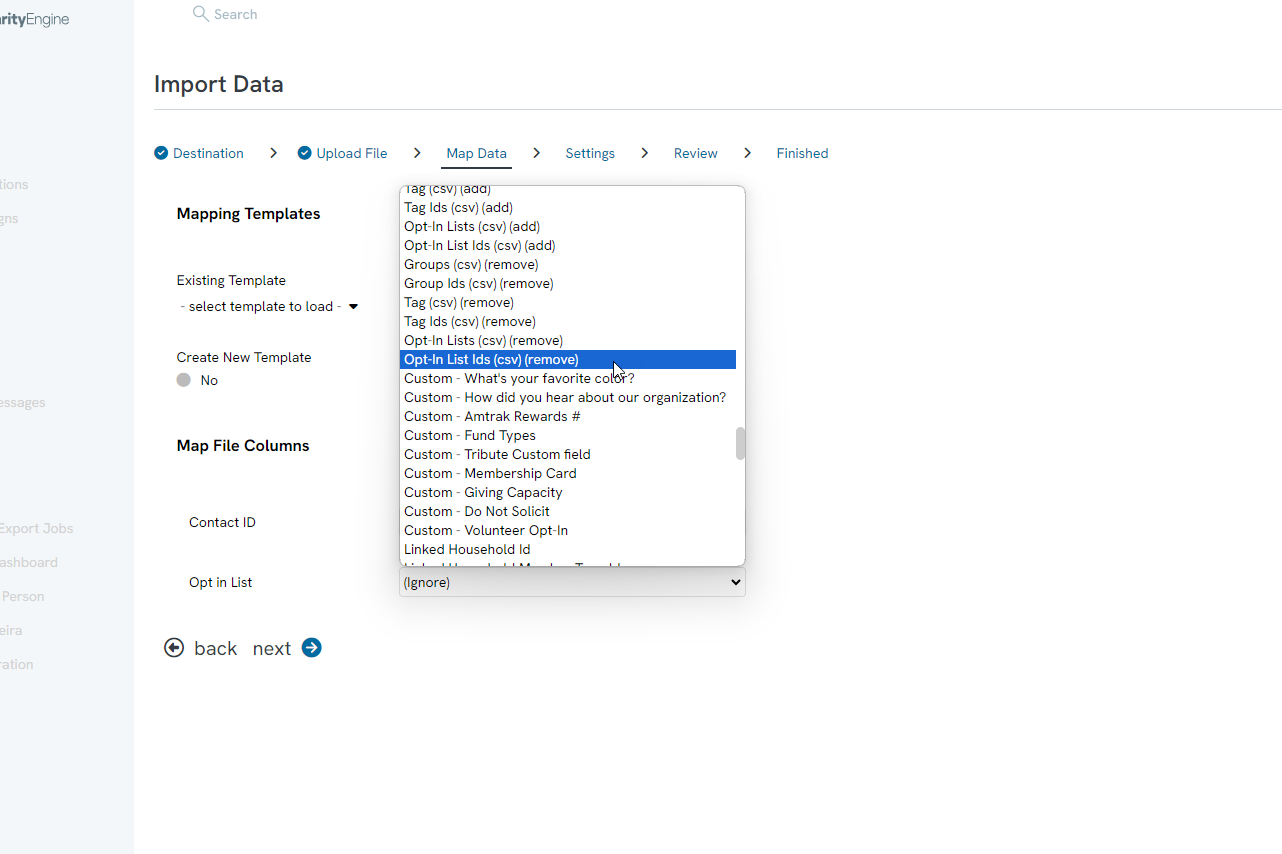
A. Similar to importing, the Import/Export feature will allow users to bulk remove from one or more opt-in lists. To begin, collect all contact IDs and types (person, organization, or household) which should be removed from the Opt-In List (name or ID). Navigate to the Automation App > General > Import/Export > Create New > Import. In this use case, the steps will remove Opt-In List XXX from all People records. From the Import To: select People > NEXT. Upload the file and then you will be able to map the fields. Click on the appropriate drop-down menus to map the fields for Contact ID and Opt-In List (csv) (remove) (for use with the name of the opt-in list – alternatively use Opt-In List IDs (csv) (remove)).
Next, click download import template. Enter each contact ID and opt-in list name (or opt-in list ID if selected). Each line should contain one Contact ID and one Opt-In List.
Save the import template to the local drive as a CSV file. Click NEXT and upload the file as a CSV. Continue with workflow steps.
Q. Can Groups or Tags be bulk removed through import the same way as Opt-In Lists?
A. Yes – the field mapping screen also offers remove variants for Group and Tag assignment (e.g., a "Group (csv) (remove)" or "Tag (csv) (remove)" field), following the same pattern described above for Opt-In Lists: map the appropriate remove field, upload a CSV with one Contact ID and one Group/Tag name per line, and continue the import.
Q. The group, tag, or opt-in list I created isn't showing up in the drop-down – why not?
A. This is most often caused by one of the following:
- The attribution was created very recently and the drop-down list hasn't refreshed – try refreshing the import screen or logging out and back in.
- The attribution may have been created as inactive or archived. Check the Group/Tag/Opt-In List management screen to confirm its status.
- Your user role may not have permission to view or assign that particular attribution. Confirm with your CharityEngine administrator that your role has the appropriate access level.
Q. Some contacts in my import didn't receive the group, tag, or opt-in list assignment – what happened?
A. Check the import job's results/error log after it completes. Rows that failed to match an existing contact, or that had a malformed value in a mapped field, will typically be skipped for that field while the rest of the record still imports. Reviewing the job log will show which rows were affected and why.
Q. What permissions are needed to create or assign Groups, Tags, and Opt-In Lists during import?
A. Your user role must have permission to manage Contacts and to access the Import/Export feature under the Automation App. Creating new Groups, Tags, or Opt-In Lists (rather than assigning existing ones) may require an elevated permission level – contact your CharityEngine administrator if the create option is unavailable to you.